Introduction
Creating the perfect sesame chicken recipe at home can transform your typical weeknight dinner into a restaurant-quality experience without the takeout price tag. This Chinese-American favorite combines crispy chicken pieces with a sweet and savory sauce, finished with a sprinkle of toasted sesame seeds. Unlike some heavy restaurant versions, making it at home allows you to control the ingredients, resulting in a healthier yet equally delicious meal. Whether you’re a novice in the kitchen or an experienced home chef, this recipe offers a straightforward approach to creating this beloved dish. The sweet-savory balance, combined with the nutty aroma of sesame, creates a flavor profile that appeals to most palates, making it a reliable crowd-pleaser for family dinners or entertaining guests. Let’s dive into this classic chicken stir fry that brings the essence of Asian cuisine right to your dining table.
Ingredients List
For the Chicken:
– 1.5 pounds boneless, skinless chicken thighs or breasts, cut into 1-inch pieces
– 2 large eggs, beaten
– 1 cup cornstarch
– 1/2 teaspoon salt
– 1/4 teaspoon black pepper
– Vegetable oil for frying
For the Sauce:
– 1/3 cup honey
– 1/4 cup soy sauce (low-sodium preferred)
– 3 tablespoons rice vinegar
– 2 tablespoons brown sugar
– 2 tablespoons sesame oil
– 1 tablespoon cornstarch
– 2 tablespoons water
– 1 tablespoon minced fresh ginger
– 3 cloves garlic, minced
– 1/4 teaspoon red pepper flakes (optional, for heat)
For Garnish:
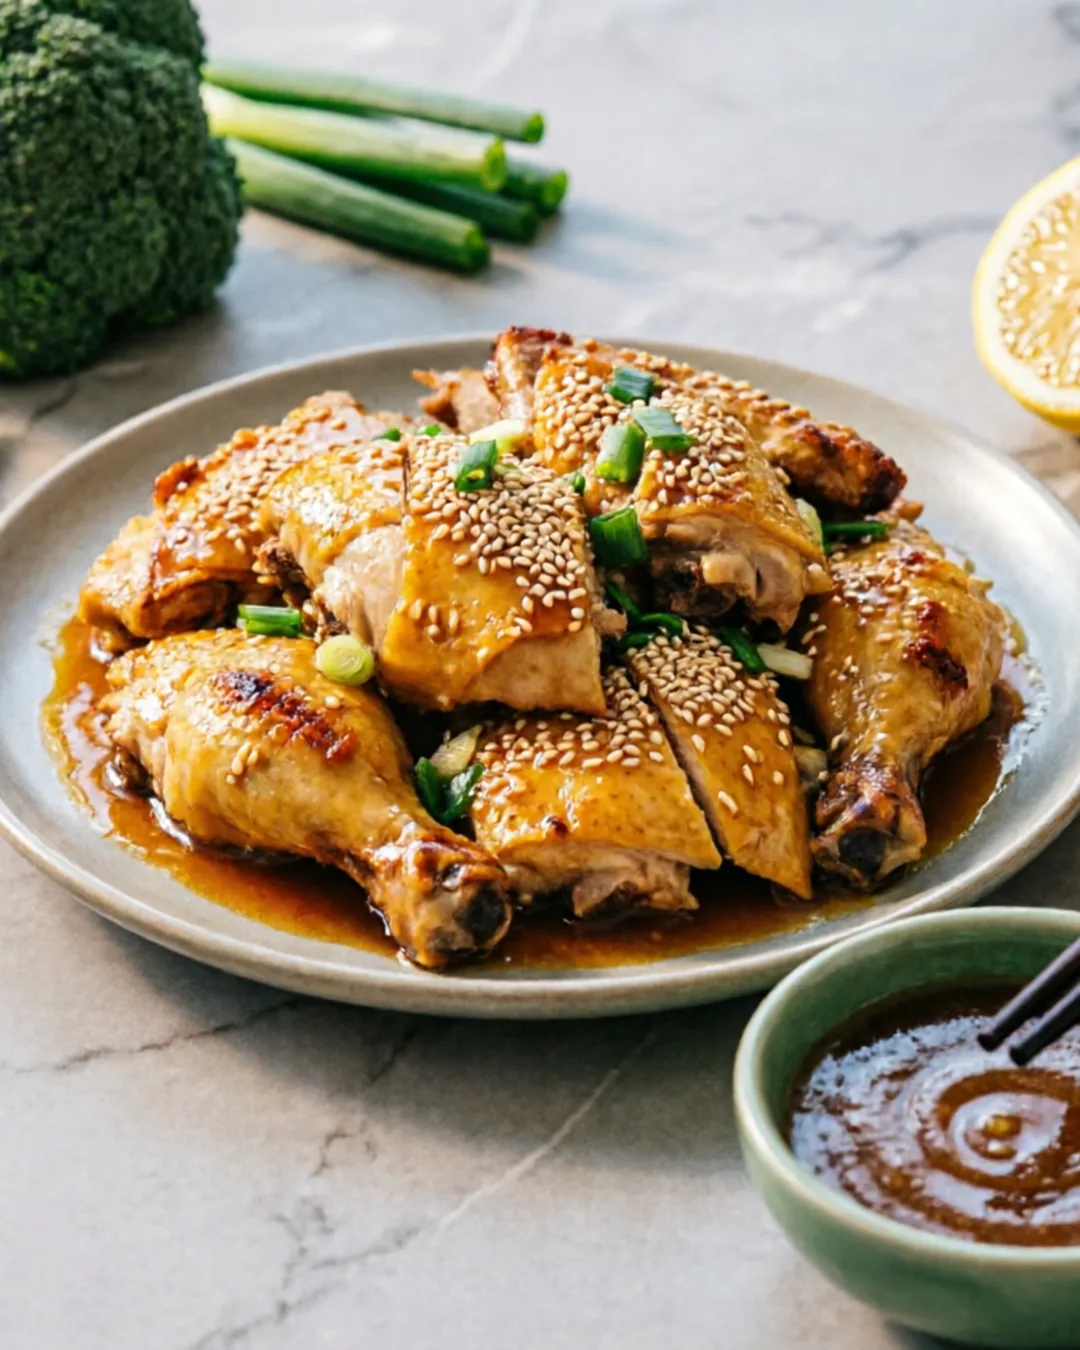
– 2 tablespoons toasted sesame seeds
– 3 green onions, thinly sliced
– Steamed rice, for serving
– Steamed broccoli or other vegetables (optional)
Timing
– Preparation Time: 20 minutes
– Cooking Time: 25 minutes
– Total Time: 45 minutes
– Servings: 4
Step-by-Step Instructions
Preparing the Chicken:
1. Cut and Season: Begin by cutting your chicken into even 1-inch cubes. In a large bowl, season the chicken pieces with salt and pepper.
2. Create Coating Station: In one bowl, beat the eggs. In another bowl, place the cornstarch.
3. Coat Chicken: Dip each piece of chicken first into the beaten eggs, then thoroughly coat with cornstarch, shaking off any excess. Place the coated chicken on a plate without overcrowding.
4. Prepare for Frying: Heat about 1/2 inch of vegetable oil in a large, deep skillet or wok over medium-high heat until it reaches approximately 350°F (175°C).
Cooking Process:
5. Fry Chicken: Working in batches to avoid overcrowding, fry the coated chicken pieces until golden brown and crispy, about 4-5 minutes per batch. Use a slotted spoon to transfer the fried chicken to a paper towel-lined plate.
6. Prepare Sauce: While the chicken is frying, combine all sauce ingredients except the cornstarch slurry in a medium bowl. For the slurry, mix cornstarch and water in a separate small bowl until smooth, then add to the sauce mixture.
7. Cook Sauce: In a clean wok or large skillet, heat 1 tablespoon of oil over medium heat. Add garlic and ginger, sautéing for about 30 seconds until fragrant. Pour in the sauce mixture and bring to a simmer, stirring occasionally.
8. Thicken Sauce: Allow the sauce to simmer until it begins to thicken, about 2-3 minutes. If it becomes too thick, add a tablespoon of water at a time until reaching desired consistency.
9. Combine: Add the fried chicken to the sauce, tossing gently to coat each piece thoroughly. Continue cooking for 1-2 minutes to ensure the chicken is hot and fully coated.
10. Finish and Serve: Sprinkle with toasted sesame seeds and sliced green onions. Serve immediately over steamed rice with your choice of vegetables.
Nutritional Information
Per serving (excluding rice and additional vegetables):
– Calories: 420
– Protein: 28g
– Carbohydrates: 35g
– Fat: 18g
– Fiber: 1g
– Sugar: 18g
– Sodium: 890mg
Note: Nutritional values are approximate and may vary based on specific ingredients and portion sizes.
Healthier Alternatives
This classic sesame chicken recipe can be modified to suit various dietary needs:
1. Air Fryer Method: Instead of deep-frying, use an air fryer at 375°F for about 12-15 minutes, turning halfway through. This reduces oil usage significantly while maintaining crispiness.
2. Baked Version: Coat chicken pieces as directed, then bake on a parchment-lined baking sheet at 400°F for 20-25 minutes, turning once.
3. Reduce Sugar: Cut the brown sugar and honey amounts in half for a less sweet version that still maintains flavor balance.
4. Gluten-Free Option: Use tamari or certified gluten-free soy sauce and ensure your cornstarch is free from cross-contamination.
5. Lower Carb: Skip the cornstarch coating and simply sauté the chicken pieces before adding to the sauce. You can thicken the sauce with xanthan gum instead of cornstarch.
6. More Vegetables: Transform this into a more complete chicken stir fry by adding bell peppers, snow peas, carrots, or broccoli during the final cooking stage.
Serving Suggestions
Elevate your sesame chicken with these complementary sides and presentation ideas:
– Serve over steamed jasmine or brown rice for a traditional approach
– For a lower-carb option, use cauliflower rice or spiralized zucchini
– Pair with steamed or stir-fried broccoli, which beautifully absorbs the sauce
– Add color and nutrition with a side of stir-fried bell peppers and snap peas
– Include vegetable spring rolls or a light cucumber salad for a complete meal
– For an elegant presentation, serve in a bowl lined with large lettuce leaves
– Garnish with additional toasted sesame seeds, thinly sliced red chilies, or microgreens
– Offer condiments like chili oil, sriracha, or extra soy sauce on the side
Common Mistakes
Avoid these pitfalls to perfect your sesame chicken recipe:
1. Overcrowding the Pan: Frying too many chicken pieces at once lowers the oil temperature, resulting in soggy rather than crispy chicken. Work in batches instead.
2. Inconsistent Chicken Sizes: Uneven pieces cook at different rates, leading to some overcooked and others undercooked. Aim for uniform 1-inch cubes.
3. Sauce Too Thick/Thin: The sauce should coat the back of a spoon but still flow. If too thick, add water; if too thin, simmer longer or add a touch more cornstarch slurry.
4. Burning the Garlic and Ginger: These aromatics burn quickly, leading to bitter flavors. Sauté just until fragrant, about 30 seconds.
5. Adding Sauce to Cold Pan: This prevents proper caramelization. Ensure your pan is hot before adding sauce ingredients.
6. Skipping the Cornstarch Coating: This crucial step creates the signature crispy exterior that holds up against the sauce.
7. Not Toasting Sesame Seeds: Raw sesame seeds lack the nutty flavor that defines the dish. Toast them in a dry pan until golden for maximum impact.
Storing Tips
Make the most of your sesame chicken with these storage guidelines:
– Refrigeration: Store leftovers in an airtight container for up to 3 days. The sauce will absorb into the chicken, softening the coating somewhat.
– Freezing: While possible to freeze for up to 2 months, the texture of the chicken will change, becoming less crispy when thawed. Store sauce and chicken separately when possible.
– Reheating: For best results, reheat in a skillet over medium heat with a splash of water to rejuvenate the sauce. Avoid microwave reheating which can make the chicken rubbery.
– Meal Prep: Prepare the sauce up to 3 days ahead and store refrigerated. The chicken is best cooked fresh, but can be marinated a day ahead if desired.
– Separate Components: For meal planning, store cooked rice, vegetables, and chicken separately to maintain optimal textures, combining only when ready to eat.
Conclusion
Mastering this sesame chicken recipe opens the door to creating restaurant-quality Chinese-American cuisine in your own kitchen. The balance of sweet, savory, and nutty flavors creates a dish that satisfies cravings while allowing you complete control over ingredients and nutritional content. Whether you follow the traditional preparation or opt for healthier alternatives, the distinctive flavor profile remains intact. As you become comfortable with the technique, consider experimenting with heat levels, additional vegetables, or serving styles to make this recipe uniquely yours. This versatile chicken stir fry can easily become a weeknight staple, special occasion centerpiece, or meal prep solution. With practice, you’ll find the perfect balance that suits your taste preferences while impressing family and friends with your culinary prowess.
FAQs
Can I use chicken breast instead of thighs?
Yes, chicken breast works well but tends to dry out more quickly than thighs. Reduce cooking time slightly and watch carefully to prevent overcooking.
Is there a non-fried version of this recipe?
Absolutely! See the Healthier Alternatives section for air fryer and baking methods that significantly reduce oil while maintaining flavor.
How can I make this sesame chicken spicier?
Increase the red pepper flakes to 1/2 teaspoon, add 1-2 tablespoons of sriracha to the sauce, or include thinly sliced fresh chilies in the final garnish.
Can I prepare components of this dish ahead of time?
Yes, the sauce can be made up to 3 days ahead and stored refrigerated. The chicken is best coated and fried just before serving for optimal texture.
What’s the best oil for frying the chicken?
Vegetable, canola, or peanut oil all work well due to their high smoke points. Avoid olive oil which has a lower smoke point and distinctive flavor.
Is this sesame chicken recipe gluten-free?
Not inherently, but it can be made gluten-free by substituting regular soy sauce with tamari or certified gluten-free soy sauce.
How can I prevent the chicken from becoming soggy when mixed with sauce?
Ensure your chicken is well-drained after frying, and toss it with the sauce just before serving. The thicker your sauce, the better it will coat without making the chicken soggy.
What vegetables pair well with this dish?
Broccoli, bell peppers, snap peas, carrots, water chestnuts, and baby corn all complement the flavors in this sesame chicken recipe and turn it into a complete chicken stir fry meal.