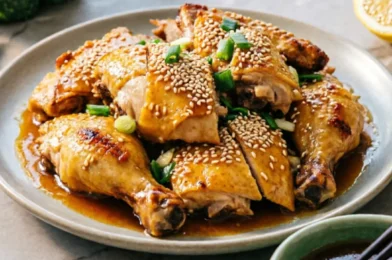
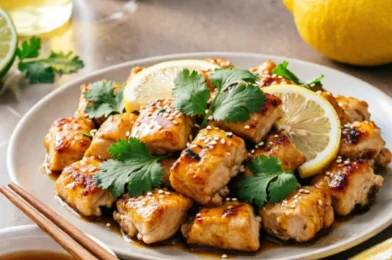
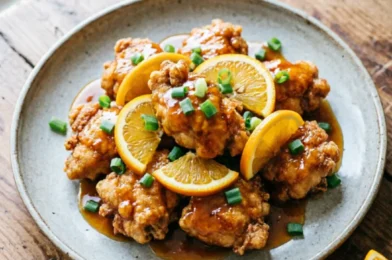
Delicious Chicken Curry Recipe for a Flavorful Meal

Introduction

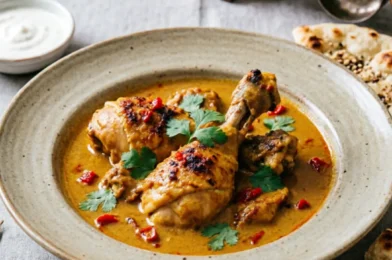
Indulge in the rich, aromatic flavors of a perfectly prepared chicken curry that transports your taste buds straight to the heart of South Asian cuisine. This classic dish, beloved worldwide, combines tender chicken pieces with a fragrant blend of spices and a velvety sauce that’s both comforting and exciting. Whether you’re a curry aficionado or trying your hand at this dish for the first time, this authentic chicken curry recipe strikes the perfect balance between traditional techniques and accessible ingredients. The beauty of this spicy chicken curry lies in its versatility – easily adjustable to your preferred heat level while maintaining the depth of flavor that makes curry so irresistible. As the gentle simmer fills your kitchen with intoxicating aromas, you’ll understand why this dish has become a staple in homes across continents, bringing people together around tables to share something truly special.

Ingredients List

For the Curry Base:
– 1.5 lbs (700g) boneless, skinless chicken thighs, cut into bite-sized pieces
– 2 medium onions, finely diced
– 4 garlic cloves, minced
– 1 inch (2.5 cm) fresh ginger, grated
– 2 tablespoons vegetable oil or ghee
– 1 can (14 oz/400g) diced tomatoes
– 1 cup (240ml) chicken stock
– 1/2 cup (120ml) coconut milk or plain yogurt

Spice Blend:
– 2 tablespoons curry powder
– 1 teaspoon ground cumin
– 1 teaspoon ground coriander
– 1 teaspoon turmeric
– 1/2 teaspoon red chili powder (adjust to taste for spiciness)
– 1/4 teaspoon cinnamon
– 2 whole cardamom pods (optional)
– 2 bay leaves
– Salt and pepper to taste

For Garnish:
– Fresh cilantro leaves, chopped
– 1 lime, cut into wedges
– Sliced green chilies (optional for extra heat)

Timing

Preparation Time: 15-20 minutes
Marination Time: 30 minutes (optional but recommended)
Cooking Time: 35-40 minutes
Total Time: 1 hour 25 minutes (including optional marination)
Serves: 4 people

Step-by-Step Instructions

Step 1: Prepare the Chicken
1. Pat the chicken pieces dry with paper towels
2. Season with salt, pepper, and 1 teaspoon of curry powder
3. If time permits, let the chicken marinate for 30 minutes in the refrigerator
4. This allows the flavors to penetrate the meat more deeply

Step 2: Prepare the Base
1. Heat oil or ghee in a large, deep pan over medium heat
2. Add the diced onions and sauté for 5-7 minutes until they turn golden brown
3. Add the minced garlic and grated ginger, stirring for another minute until fragrant
4. This aromatic foundation is crucial for an authentic chicken curry recipe

Step 3: Create the Spice Base
1. Add all the spices (curry powder, cumin, coriander, turmeric, chili powder, cinnamon) to the onion mixture
2. Toast the spices for 1-2 minutes, stirring constantly to prevent burning
3. This process releases the essential oils in the spices, intensifying the flavor
4. Add the cardamom pods and bay leaves

Step 4: Cook the Chicken
1. Increase heat to medium-high and add the chicken pieces
2. Sear for 4-5 minutes, turning occasionally, until the chicken is lightly browned on all sides
3. The searing process locks in the juices and adds another layer of flavor

Step 5: Create the Sauce
1. Add the diced tomatoes and stir well to combine with the spices and chicken
2. Pour in the chicken stock
3. Bring the mixture to a boil, then reduce heat to low
4. Cover and simmer for 15-20 minutes, allowing the sauce to thicken and the chicken to cook through

Step 6: Finishing Touches
1. Stir in the coconut milk or yogurt
2. Simmer uncovered for an additional 5-7 minutes until the sauce reaches your desired consistency
3. Taste and adjust seasoning as needed – add more salt or spices to achieve your perfect balance
4. Remove bay leaves and cardamom pods before serving

Step 7: Serve
1. Transfer to a serving dish
2. Garnish with fresh cilantro leaves
3. Serve with lime wedges on the side
4. Add sliced green chilies for those who enjoy extra heat in their spicy chicken curry

Nutritional Information

Per serving (approximately 1/4 of recipe):

Calories: 320
Protein: 28g
Carbohydrates: 12g
Fat: 18g (6g saturated)
Fiber: 3g
Sugar: 5g
Sodium: 580mg

This nutritional profile may vary depending on exact ingredients and portion sizes. The chicken curry recipe offers a good balance of protein and moderate carbohydrates, making it a satisfying main dish.

Healthier Alternatives

Make this chicken curry recipe even more nutritious with these simple swaps and additions:

Use skinless chicken breast instead of thighs to reduce the fat content
Increase the vegetable content by adding bell peppers, spinach, cauliflower, or peas
Substitute light coconut milk or low-fat yogurt to reduce calories and saturated fat
Use less oil by opting for a non-stick pan and using cooking spray
Reduce sodium by using low-sodium chicken stock and adjusting salt to taste
Add more fiber by serving with brown rice or quinoa instead of white rice

These modifications maintain the authentic flavor profile while boosting nutritional value. Remember that traditional spices like turmeric, ginger, and garlic used in spicy chicken curry offer natural anti-inflammatory benefits.

Serving Suggestions

Elevate your chicken curry experience with these perfect accompaniments:

Rice options: Basmati rice, jeera (cumin) rice, or coconut rice
Bread companions: Fresh naan, roti, paratha, or chapati for scooping up the sauce
Cooling sides: Cucumber raita or a simple yogurt with mint to balance the heat
Additional vegetables: Serve with a side of sautéed spinach or roasted cauliflower
Chutneys and pickles: Mango chutney, lime pickle, or onion relish add contrasting flavors
Refreshing drinks: Lassi, iced tea with mint, or a light beer complement the spices beautifully

For a complete dinner experience, start with a light appetizer like papadums with chutney before serving your main chicken curry dish.

Common Mistakes

Avoid these pitfalls to ensure your chicken curry recipe turns out perfectly every time:

1. Rushing the onions: Not cooking onions long enough results in a less developed flavor base
2. Burning the spices: Toasting spices enhances flavor, but burning them creates bitterness
3. Overcooking the chicken: This leads to dry, tough meat instead of tender, juicy pieces
4. Underseasoning: Curries need adequate salt to bring out the complex spice flavors
5. Adding yogurt or coconut milk too early: This can cause curdling; add towards the end of cooking
6. Cooking at too high heat: A gentle simmer develops flavors better than a rapid boil
7. Not tasting as you go: Adjust seasonings throughout the cooking process for balanced flavor

Taking the time to properly execute each step ensures your spicy chicken curry will have the authentic depth of flavor that makes this dish special.

Storing Tips

Make the most of your chicken curry with these storage recommendations:

Refrigeration: Store cooled leftovers in an airtight container for up to 3-4 days
Freezing: This curry freezes exceptionally well for up to 3 months in freezer-safe containers
Portioning: Consider freezing in individual portions for convenient future meals
Reheating: Warm gently on the stovetop with a splash of water to restore consistency
Flavor development: Many curry enthusiasts believe the flavor improves after a day in the refrigerator as the spices continue to meld
Food safety: Ensure the curry is properly cooled before refrigerating and always reheat until steaming hot

These storage practices help you enjoy your chicken curry recipe beyond the initial meal, making it an excellent option for meal prep and planned leftovers.

Conclusion

Mastering this chicken curry recipe opens the door to endless culinary possibilities, allowing you to create restaurant-quality meals in your own kitchen. What makes this dish truly special is how it combines simple ingredients with thoughtful technique to create something greater than the sum of its parts. As you become more comfortable with the process, don’t hesitate to experiment with different spice combinations, protein options, or additional vegetables to make this recipe your own. The beauty of curry lies in its adaptability—whether you prefer a mild, comforting dish or a fiery spicy chicken curry that challenges the taste buds. Beyond just a delicious meal, cooking curry connects you to centuries of culinary tradition and the shared human experience of creating food that brings joy. Each time you prepare this dish, you’ll discover new nuances in flavor and likely find your technique improving, resulting in an ever more delightful curry experience.

FAQs

1. Can I use chicken breast instead of thighs in this chicken curry recipe?
Yes, chicken breasts work well but require careful cooking to prevent drying out. Reduce the simmering time to about 10-15 minutes and check for doneness.

2. How can I make my curry spicier?
To increase heat, add more red chili powder, fresh chopped chilies, or a teaspoon of cayenne pepper. Alternatively, serve with fresh chili slices on the side so each person can adjust their heat level.

3. Can I make this chicken curry in a slow cooker?
Absolutely! Sauté the onions, garlic, ginger, and spices first, then transfer everything to a slow cooker. Cook on low for 4-5 hours or high for 2-3 hours, adding the coconut milk or yogurt in the last 30 minutes.

4. Is this curry gluten-free?
The basic recipe is gluten-free, but always check your curry powder and stock ingredients as some commercial versions may contain gluten additives.

5. Can I make this curry vegetarian?
Yes! Substitute the chicken with chickpeas, paneer cheese, tofu, or a variety of vegetables like cauliflower, potato, and peas. Use vegetable stock instead of chicken stock.

6. What if I don’t have all the spices listed?
A good quality curry powder alone can work in a pinch. The additional spices add complexity, but you’ll still get a delicious result with just curry powder, salt, and pepper.

7. Why is my curry watery?
Allow the curry to simmer uncovered for longer to reduce the sauce. Alternatively, mix 1 teaspoon of cornstarch with 1 tablespoon of cold water and stir into the simmering curry to thicken it.

8. Can I prepare this curry in advance for a party?
Yes, this curry actually improves in flavor when made a day ahead. Reheat gently before serving, adding a splash of cream or coconut milk to refresh the sauce.

Easy Sesame Chicken Recipe for a Delicious Dinner

Introduction

Creating the perfect sesame chicken recipe at home can transform your typical weeknight dinner into a restaurant-quality experience without the takeout price tag. This Chinese-American favorite combines crispy chicken pieces with a sweet and savory sauce, finished with a sprinkle of toasted sesame seeds. Unlike some heavy restaurant versions, making it at home allows you to control the ingredients, resulting in a healthier yet equally delicious meal. Whether you’re a novice in the kitchen or an experienced home chef, this recipe offers a straightforward approach to creating this beloved dish. The sweet-savory balance, combined with the nutty aroma of sesame, creates a flavor profile that appeals to most palates, making it a reliable crowd-pleaser for family dinners or entertaining guests. Let’s dive into this classic chicken stir fry that brings the essence of Asian cuisine right to your dining table.

Ingredients List

For the Chicken:
– 1.5 pounds boneless, skinless chicken thighs or breasts, cut into 1-inch pieces
– 2 large eggs, beaten
– 1 cup cornstarch
– 1/2 teaspoon salt
– 1/4 teaspoon black pepper
– Vegetable oil for frying

For the Sauce:
– 1/3 cup honey
– 1/4 cup soy sauce (low-sodium preferred)
– 3 tablespoons rice vinegar
– 2 tablespoons brown sugar
– 2 tablespoons sesame oil
– 1 tablespoon cornstarch
– 2 tablespoons water
– 1 tablespoon minced fresh ginger
– 3 cloves garlic, minced
– 1/4 teaspoon red pepper flakes (optional, for heat)

For Garnish:
– 2 tablespoons toasted sesame seeds
– 3 green onions, thinly sliced
– Steamed rice, for serving
– Steamed broccoli or other vegetables (optional)

Timing

Preparation Time: 20 minutes
Cooking Time: 25 minutes
Total Time: 45 minutes
Servings: 4

Step-by-Step Instructions

Preparing the Chicken:

1. Cut and Season: Begin by cutting your chicken into even 1-inch cubes. In a large bowl, season the chicken pieces with salt and pepper.

2. Create Coating Station: In one bowl, beat the eggs. In another bowl, place the cornstarch.

3. Coat Chicken: Dip each piece of chicken first into the beaten eggs, then thoroughly coat with cornstarch, shaking off any excess. Place the coated chicken on a plate without overcrowding.

4. Prepare for Frying: Heat about 1/2 inch of vegetable oil in a large, deep skillet or wok over medium-high heat until it reaches approximately 350°F (175°C).

Cooking Process:

5. Fry Chicken: Working in batches to avoid overcrowding, fry the coated chicken pieces until golden brown and crispy, about 4-5 minutes per batch. Use a slotted spoon to transfer the fried chicken to a paper towel-lined plate.

6. Prepare Sauce: While the chicken is frying, combine all sauce ingredients except the cornstarch slurry in a medium bowl. For the slurry, mix cornstarch and water in a separate small bowl until smooth, then add to the sauce mixture.

7. Cook Sauce: In a clean wok or large skillet, heat 1 tablespoon of oil over medium heat. Add garlic and ginger, sautéing for about 30 seconds until fragrant. Pour in the sauce mixture and bring to a simmer, stirring occasionally.

8. Thicken Sauce: Allow the sauce to simmer until it begins to thicken, about 2-3 minutes. If it becomes too thick, add a tablespoon of water at a time until reaching desired consistency.

9. Combine: Add the fried chicken to the sauce, tossing gently to coat each piece thoroughly. Continue cooking for 1-2 minutes to ensure the chicken is hot and fully coated.

10. Finish and Serve: Sprinkle with toasted sesame seeds and sliced green onions. Serve immediately over steamed rice with your choice of vegetables.

Nutritional Information

Per serving (excluding rice and additional vegetables):
Calories: 420
Protein: 28g
Carbohydrates: 35g
Fat: 18g
Fiber: 1g
Sugar: 18g
Sodium: 890mg

Note: Nutritional values are approximate and may vary based on specific ingredients and portion sizes.

Healthier Alternatives

This classic sesame chicken recipe can be modified to suit various dietary needs:

1. Air Fryer Method: Instead of deep-frying, use an air fryer at 375°F for about 12-15 minutes, turning halfway through. This reduces oil usage significantly while maintaining crispiness.

2. Baked Version: Coat chicken pieces as directed, then bake on a parchment-lined baking sheet at 400°F for 20-25 minutes, turning once.

3. Reduce Sugar: Cut the brown sugar and honey amounts in half for a less sweet version that still maintains flavor balance.

4. Gluten-Free Option: Use tamari or certified gluten-free soy sauce and ensure your cornstarch is free from cross-contamination.

5. Lower Carb: Skip the cornstarch coating and simply sauté the chicken pieces before adding to the sauce. You can thicken the sauce with xanthan gum instead of cornstarch.

6. More Vegetables: Transform this into a more complete chicken stir fry by adding bell peppers, snow peas, carrots, or broccoli during the final cooking stage.

Serving Suggestions

Elevate your sesame chicken with these complementary sides and presentation ideas:

– Serve over steamed jasmine or brown rice for a traditional approach
– For a lower-carb option, use cauliflower rice or spiralized zucchini
– Pair with steamed or stir-fried broccoli, which beautifully absorbs the sauce
– Add color and nutrition with a side of stir-fried bell peppers and snap peas
– Include vegetable spring rolls or a light cucumber salad for a complete meal
– For an elegant presentation, serve in a bowl lined with large lettuce leaves
– Garnish with additional toasted sesame seeds, thinly sliced red chilies, or microgreens
– Offer condiments like chili oil, sriracha, or extra soy sauce on the side

Common Mistakes

Avoid these pitfalls to perfect your sesame chicken recipe:

1. Overcrowding the Pan: Frying too many chicken pieces at once lowers the oil temperature, resulting in soggy rather than crispy chicken. Work in batches instead.

2. Inconsistent Chicken Sizes: Uneven pieces cook at different rates, leading to some overcooked and others undercooked. Aim for uniform 1-inch cubes.

3. Sauce Too Thick/Thin: The sauce should coat the back of a spoon but still flow. If too thick, add water; if too thin, simmer longer or add a touch more cornstarch slurry.

4. Burning the Garlic and Ginger: These aromatics burn quickly, leading to bitter flavors. Sauté just until fragrant, about 30 seconds.

5. Adding Sauce to Cold Pan: This prevents proper caramelization. Ensure your pan is hot before adding sauce ingredients.

6. Skipping the Cornstarch Coating: This crucial step creates the signature crispy exterior that holds up against the sauce.

7. Not Toasting Sesame Seeds: Raw sesame seeds lack the nutty flavor that defines the dish. Toast them in a dry pan until golden for maximum impact.

Storing Tips

Make the most of your sesame chicken with these storage guidelines:

Refrigeration: Store leftovers in an airtight container for up to 3 days. The sauce will absorb into the chicken, softening the coating somewhat.

Freezing: While possible to freeze for up to 2 months, the texture of the chicken will change, becoming less crispy when thawed. Store sauce and chicken separately when possible.

Reheating: For best results, reheat in a skillet over medium heat with a splash of water to rejuvenate the sauce. Avoid microwave reheating which can make the chicken rubbery.

Meal Prep: Prepare the sauce up to 3 days ahead and store refrigerated. The chicken is best cooked fresh, but can be marinated a day ahead if desired.

Separate Components: For meal planning, store cooked rice, vegetables, and chicken separately to maintain optimal textures, combining only when ready to eat.

Conclusion

Mastering this sesame chicken recipe opens the door to creating restaurant-quality Chinese-American cuisine in your own kitchen. The balance of sweet, savory, and nutty flavors creates a dish that satisfies cravings while allowing you complete control over ingredients and nutritional content. Whether you follow the traditional preparation or opt for healthier alternatives, the distinctive flavor profile remains intact. As you become comfortable with the technique, consider experimenting with heat levels, additional vegetables, or serving styles to make this recipe uniquely yours. This versatile chicken stir fry can easily become a weeknight staple, special occasion centerpiece, or meal prep solution. With practice, you’ll find the perfect balance that suits your taste preferences while impressing family and friends with your culinary prowess.

FAQs

Can I use chicken breast instead of thighs?
Yes, chicken breast works well but tends to dry out more quickly than thighs. Reduce cooking time slightly and watch carefully to prevent overcooking.

Is there a non-fried version of this recipe?
Absolutely! See the Healthier Alternatives section for air fryer and baking methods that significantly reduce oil while maintaining flavor.

How can I make this sesame chicken spicier?
Increase the red pepper flakes to 1/2 teaspoon, add 1-2 tablespoons of sriracha to the sauce, or include thinly sliced fresh chilies in the final garnish.

Can I prepare components of this dish ahead of time?
Yes, the sauce can be made up to 3 days ahead and stored refrigerated. The chicken is best coated and fried just before serving for optimal texture.

What’s the best oil for frying the chicken?
Vegetable, canola, or peanut oil all work well due to their high smoke points. Avoid olive oil which has a lower smoke point and distinctive flavor.

Is this sesame chicken recipe gluten-free?
Not inherently, but it can be made gluten-free by substituting regular soy sauce with tamari or certified gluten-free soy sauce.

How can I prevent the chicken from becoming soggy when mixed with sauce?
Ensure your chicken is well-drained after frying, and toss it with the sauce just before serving. The thicker your sauce, the better it will coat without making the chicken soggy.

What vegetables pair well with this dish?
Broccoli, bell peppers, snap peas, carrots, water chestnuts, and baby corn all complement the flavors in this sesame chicken recipe and turn it into a complete chicken stir fry meal.

Easy Chicken Parmesan Recipe: Quick & Delicious!

Introduction

Nothing quite matches the appeal of a perfectly prepared Italian-inspired dish that brings restaurant-quality flavors to your home kitchen. This chicken parmesan recipe easy enough for beginners yet delicious enough to impress dinner guests has become a staple in American households for good reason. The combination of crispy breaded chicken, tangy tomato sauce, and melted cheese creates a comfort food masterpiece that satisfies even the pickiest eaters.

If you’ve been intimidated by making easy chicken parmesan before, rest assured this version simplifies the process without compromising on flavor. Perfect for busy weeknights when you need a hearty meal but don’t have hours to spend in the kitchen, this recipe strikes the ideal balance between convenience and taste. The techniques used here have been refined to ensure even novice cooks can achieve that perfect golden crust and juicy interior that defines an excellent chicken parmesan.

Ingredients List

For the chicken:
– 4 boneless, skinless chicken breasts (about 2 pounds total)
– 1 cup all-purpose flour
– 1 teaspoon salt
– ½ teaspoon black pepper
– 2 large eggs
– 1 tablespoon water
– 2 cups Italian seasoned breadcrumbs
– ½ cup grated Parmesan cheese
– 2 teaspoons Italian seasoning
– ½ cup vegetable oil for frying

For the topping:
– 2 cups marinara sauce (homemade or good-quality jarred)
– 2 cups shredded mozzarella cheese
– ¼ cup freshly grated Parmesan cheese
– 2 tablespoons fresh basil, chopped (for garnish)

Timing

– Prep time: 20 minutes
– Cook time: 30 minutes
– Total time: 50 minutes
– Servings: 4

Step-by-Step Instructions

1. Prepare the chicken:
Begin by placing each chicken breast between two sheets of plastic wrap. Using a meat mallet or heavy skillet, pound the chicken to an even ½-inch thickness. This ensures even cooking and tender meat in your easy chicken parmesan.

2. Set up the breading station:
Prepare three shallow dishes. In the first, combine flour, salt, and pepper. In the second, whisk together eggs and water. In the third, mix breadcrumbs, grated Parmesan, and Italian seasoning.

3. Bread the chicken:
Working with one piece at a time, dredge the chicken in the flour mixture, shaking off excess. Dip into the egg mixture, allowing extra to drip off, then press firmly into the breadcrumb mixture, ensuring an even coating on both sides. Place the breaded chicken on a plate and repeat with remaining pieces.

4. Rest the breaded chicken:
Allow the breaded chicken to rest for 5-10 minutes. This helps the coating adhere better during cooking – a crucial step many people skip when making chicken parmesan recipes.

5. Preheat the oven:
While the chicken rests, preheat your oven to 425°F (220°C) and prepare a baking sheet lined with parchment paper or aluminum foil.

6. Cook the chicken:
Heat oil in a large skillet over medium-high heat. When the oil is shimmering, carefully add two chicken breasts and cook for 3-4 minutes per side until golden brown. Transfer to paper towels to drain excess oil, then repeat with remaining chicken.

7. Assemble for baking:
Place the fried chicken on the prepared baking sheet. Spread ½ cup marinara sauce over each piece, then top with shredded mozzarella and a sprinkle of Parmesan cheese.

8. Bake:
Bake in the preheated oven for 15-20 minutes, until the cheese is melted, bubbly, and slightly golden, and the chicken reaches an internal temperature of 165°F (74°C).

9. Garnish and serve:
Remove from the oven and let rest for 5 minutes before garnishing with fresh chopped basil.

Nutritional Information

Per serving (1 chicken breast with sauce and cheese):
– Calories: 620
– Protein: 52g
– Carbohydrates: 35g
– Fat: 30g
– Saturated Fat: 10g
– Cholesterol: 215mg
– Sodium: 1150mg
– Fiber: 2g
– Sugar: 4g

This chicken parmesan recipe easy on the palate is admittedly indulgent. However, the high protein content makes it satisfying, and when paired with lighter sides like salad or roasted vegetables, it can be part of a balanced meal.

Healthier Alternatives

For those looking to lighten up this classic dish:

1. Baked instead of fried:
Skip the pan-frying completely. After breading, spray the chicken with olive oil cooking spray and bake at 425°F for 15-20 minutes before adding sauce and cheese.

2. Lighter breading:
Use whole wheat breadcrumbs and reduce the amount by 1/3, or try a mixture of panko breadcrumbs and ground almonds for extra crunch with less carbs.

3. Reduced cheese:
Cut the mozzarella in half and use part-skim varieties.

4. Protein modification:
Try the same technique with chicken tenders (reducing cooking time) or even eggplant slices for a vegetarian version of this easy chicken parmesan approach.

5. Low-carb option:
Skip the flour and breadcrumbs entirely and instead coat the chicken with a mixture of Parmesan cheese, almond flour, and Italian herbs.

Serving Suggestions

Transform your chicken parmesan into a complete meal with these serving ideas:

Classic pairing: Serve over spaghetti or fettuccine with extra marinara sauce on the side.
Lighter option: Place on a bed of zucchini noodles or spaghetti squash for a low-carb alternative.
Sandwich style: Place between toasted garlic bread or on a sub roll for an incredible chicken parm sandwich.
Family-style presentation: Arrange all chicken pieces in a large baking dish before adding sauce and cheese, then bake and bring the entire dish to the table for serving.
Side dishes: Complement with garlic bread, a Caesar salad, steamed broccoli, or roasted vegetables to round out the meal.

Common Mistakes

Avoid these pitfalls when preparing your chicken parmesan recipe easy enough for any home cook:

1. Skipping the pounding step: Uneven chicken breasts will cook unevenly, leaving some parts dry while others remain undercooked.

2. Wet breading: Not thoroughly patting the chicken dry before breading or pressing too lightly in the breadcrumb mixture leads to coating that falls off during cooking.

3. Overcrowding the pan: Frying too many pieces at once lowers the oil temperature, resulting in soggy rather than crispy chicken.

4. Too much sauce: Drowning the chicken in sauce before baking can make the crispy coating soggy. Use a moderate amount spread evenly.

5. Adding cold sauce: Using refrigerated sauce directly on the hot fried chicken can cause uneven cooking in the oven. Bring sauce to room temperature first or warm slightly.

6. Impatience with cheese: Not allowing enough time for the cheese to fully melt and begin to brown slightly means missing out on the perfect texture contrast in your easy chicken parmesan.

Storing Tips

Make the most of leftovers with these storage recommendations:

Refrigeration: Store leftovers in an airtight container for up to 3 days. For best results, store the chicken separate from any pasta or sides.

Freezing: Freeze the breaded and fried chicken (before adding sauce and cheese) for up to 3 months. Wrap individual pieces in plastic wrap, then aluminum foil, and place in a freezer bag.

Reheating: For the crispiest results, reheat in a 375°F oven for 10-15 minutes. If reheating with sauce and cheese already applied, cover with foil for the first half of reheating to prevent burning.

Meal prep: Prepare a double batch of the breaded chicken, cook completely, then freeze. This gives you a head start on future meals – simply thaw, top with sauce and cheese, and bake for a quick weeknight dinner.

Conclusion

This chicken parmesan recipe easy enough for beginners yet impressive enough for company demonstrates why this Italian-American classic has stood the test of time. The contrast between the crispy exterior, juicy chicken, tangy sauce, and melted cheese creates a symphony of flavors and textures that satisfies on a deep level.

Whether you’re cooking for a family dinner, meal prepping for the week ahead, or hosting friends, this approachable version delivers restaurant-quality results without complicated techniques. The recipe is also versatile – once you’ve mastered the basic method, you can customize it to suit your taste preferences or dietary needs.

Next time you’re craving comfort food with Italian flair, skip the takeout and try this easy chicken parmesan instead. Your taste buds – and your budget – will thank you for the homemade touch that makes all the difference.

FAQs

Can I use chicken thighs instead of breasts?
Yes, boneless skinless chicken thighs work well. They typically have more flavor but need to be pounded to even thickness just like the breasts. The cooking time might vary slightly as thighs can take a bit longer.

How do I know when the chicken is fully cooked?
The safest method is using an instant-read thermometer, which should register 165°F (74°C) when inserted into the thickest part of the chicken. If you don’t have a thermometer, ensure the juices run clear when the chicken is pierced.

Can I prepare this dish ahead of time?
Yes! You can bread the chicken up to 24 hours in advance (store covered in the refrigerator) or even fry the chicken earlier in the day. Complete the assembly with sauce and cheese just before baking.

What’s the best type of mozzarella to use?
For the meltiest result, use whole milk mozzarella that you shred yourself. Pre-shredded cheese contains anti-caking agents that can prevent proper melting. Fresh mozzarella is delicious but contains more moisture, which can make the breading soggy.

Is there a gluten-free version of this recipe?
Absolutely! Substitute the all-purpose flour with gluten-free flour and use gluten-free breadcrumbs. Many stores now carry gluten-free Italian seasoned breadcrumbs, or you can season plain gluten-free breadcrumbs with Italian herbs.

Delicious Lemon Chicken Recipe for Quick Family Dinners

Introduction

The perfect lemon chicken recipe combines the bright, zesty flavor of fresh lemons with succulent, tender chicken to create a dish that’s both refreshing and satisfying. This classic combination has stood the test of time, appearing on dinner tables around the world for generations. Whether you’re looking for a quick weeknight meal or an impressive dish for entertaining guests, this garlic lemon chicken recipe delivers exceptional flavor with minimal effort. The tangy citrus notes cut through the richness of the chicken, creating a balanced dish that awakens the palate while providing comforting familiarity. As a bonus, this recipe uses simple ingredients you likely already have in your pantry, making it an accessible option even when you haven’t planned ahead for dinner. Let’s explore how to create this delicious meal that’s sure to become a regular in your cooking rotation.

Ingredients List

For this classic lemon chicken recipe, you’ll need:

For the chicken:

  • 4 boneless, skinless chicken breasts (about 2 pounds)
  • 2 tablespoons olive oil
  • Salt and freshly ground black pepper
  • 2 tablespoons all-purpose flour (optional, for dredging)

For the lemon garlic sauce:

  • 4 tablespoons butter
  • 6 cloves garlic, minced
  • 1 cup chicken broth
  • 2 lemons (juice and zest)
  • 1 teaspoon dried oregano
  • 1 teaspoon dried thyme
  • 2 tablespoons fresh parsley, chopped
  • 1 tablespoon honey or sugar (optional, to balance acidity)

Optional garnishes:

  • Lemon slices
  • Additional fresh parsley
  • Capers (2 tablespoons)
  • Red pepper flakes (for heat)

The beauty of this garlic lemon chicken recipe lies in its simplicity. Each ingredient plays an important role: the garlic provides depth, the lemon delivers brightness, and the herbs add complexity. For those who prefer a creamier version, consider adding 1/4 cup of heavy cream to the sauce at the final stage of cooking.

Timing

Preparation time: 15 minutes
Cooking time: 25-30 minutes
Total time: 40-45 minutes

This lemon chicken recipe is perfect for busy weeknights when time is limited but you still want something delicious. The prep work is minimal—just slicing lemons, mincing garlic, and preparing the chicken. Most of the cooking time is hands-off, allowing you to prepare side dishes or set the table while the chicken cooks to perfection.

Step-by-Step Instructions

1. Prepare the chicken
* Pat the chicken breasts dry with paper towels.
* If the breasts are very thick, pound them to even thickness (about 1/2 inch) using a meat mallet or heavy pan.
* Season both sides generously with salt and pepper.
* Optional: lightly dredge in flour for a more golden exterior.

2. Cook the chicken
* Heat olive oil in a large skillet over medium-high heat.
* Once hot, add the chicken breasts and cook for 5-6 minutes per side until golden brown and cooked through (internal temperature should reach 165°F or 74°C).
* Remove chicken to a plate and cover loosely with foil to keep warm.

3. Prepare the lemon garlic sauce
* In the same skillet, reduce heat to medium and add butter.
* Once melted, add minced garlic and sauté for 30-60 seconds until fragrant but not browned.
* Pour in chicken broth, lemon juice, and lemon zest, then add dried oregano and thyme.
* Bring the sauce to a simmer and cook for 5 minutes, allowing it to reduce slightly.
* If using, add honey or sugar to balance the acidity.

4. Combine and finish
* Return the chicken to the skillet, spooning the sauce over the top.
* Simmer gently for 2-3 minutes to reheat the chicken and allow flavors to meld.
* Sprinkle with fresh parsley before serving.

For an extra-special presentation, garnish with thin lemon slices warmed in the sauce during the final minute of cooking.

Nutritional Information

Per serving (based on 4 servings):

  • Calories: 350
  • Protein: 35g
  • Carbohydrates: 8g
  • Fat: 19g
  • Fiber: 1g
  • Sugar: 3g
  • Sodium: 480mg

This lemon chicken recipe is relatively low in carbohydrates and high in protein, making it a good option for those following higher-protein diets. The primary sources of fat come from the olive oil and butter, which contain heart-healthy monounsaturated fats along with saturated fats.

Healthier Alternatives

To make this garlic lemon chicken recipe even more nutritious:

  • Reduce butter: Cut the butter amount in half and increase the olive oil slightly for a healthier fat profile.
  • Skip the flour: Eliminate the flour dredging step to reduce carbohydrates and make the dish gluten-free.
  • Use chicken thighs: Substitute skinless, boneless chicken thighs which contain more iron and zinc than breast meat.
  • Add vegetables: Enhance nutrition by adding 2 cups of baby spinach, asparagus, or broccoli to the skillet during the final few minutes of cooking.
  • Use low-sodium broth: Reduce the sodium content by selecting a low-sodium or homemade chicken broth.

These modifications maintain the delicious lemon-garlic flavor profile while increasing the nutritional value of your meal.

Serving Suggestions

This versatile lemon chicken recipe pairs beautifully with numerous side dishes:

Starchy sides:

  • Roasted garlic mashed potatoes
  • Lemon herb rice pilaf
  • Crusty bread for soaking up the delicious sauce
  • Orzo pasta tossed with a little olive oil and parmesan

Vegetable companions:

  • Steamed asparagus or green beans
  • Roasted Mediterranean vegetables (zucchini, bell peppers, eggplant)
  • Simple green salad with a light vinaigrette
  • Sautéed spinach with garlic

For a complete Mediterranean-inspired meal, serve this garlic lemon chicken recipe with a side of Greek salad and roasted potatoes seasoned with oregano and lemon zest. The bright flavors complement each other beautifully and create a cohesive dining experience.

Common Mistakes

Even simple recipes can go awry. Here are some pitfalls to avoid when preparing this lemon chicken recipe:

1. Overcooking the chicken: This is perhaps the most common mistake. Chicken breasts quickly go from juicy to dry when overcooked. Use a meat thermometer to ensure they reach 165°F but not much higher.

2. Not reducing the sauce enough: A watery sauce lacks flavor intensity. Take the time to let it simmer and reduce properly.

3. Burning the garlic: Garlic can go from perfectly golden to bitter and burnt in seconds. Watch it carefully and keep the heat moderate.

4. Using bottled lemon juice: The flavor profile of fresh lemons is significantly better than bottled juice, which often has a more artificial taste.

5. Skipping the zest: Lemon zest contains essential oils that provide intense citrus flavor. Omitting it diminishes the lemon profile considerably.

6. Not balancing the acidity: Some lemons are particularly tart. Don’t be afraid to add a touch of honey or sugar if needed to balance the flavors.

Storing Tips

This garlic lemon chicken recipe creates leftovers that store beautifully:

Refrigeration:

  • Store cooled leftovers in an airtight container for up to 3 days.
  • Keep the chicken submerged in the sauce to maintain moisture during storage.

Freezing:

  • This dish can be frozen for up to 3 months.
  • Freeze in individual portions for easy single-serving meals.
  • Allow extra sauce in each container as some will absorb into the chicken.

Reheating:

  • Thaw overnight in the refrigerator if frozen.
  • Reheat gently in a covered skillet over medium-low heat with a splash of chicken broth.
  • Alternatively, microwave at 70% power, covered, to prevent the chicken from drying out.
  • Add a fresh squeeze of lemon juice and sprinkle of herbs after reheating to brighten the flavors.

Conclusion

This lemon chicken recipe represents the perfect balance of simplicity and flavor. With just a handful of everyday ingredients, you can create a restaurant-quality meal that satisfies both weeknight cravings and special occasions. The bright acidity of lemon perfectly complements the savory garlic and herbs, creating a sauce that transforms ordinary chicken into something truly memorable. Whether you’re a novice cook or a seasoned chef, this versatile dish deserves a place in your regular rotation. The techniques used here—searing meat properly, creating a pan sauce, and balancing flavors—are fundamental cooking skills that will serve you well beyond this single recipe. So the next time you’re wondering what to make for dinner, remember this garlic lemon chicken recipe that combines accessibility with gourmet results.

FAQs

Can I use chicken thighs instead of breasts?
Yes! Boneless, skinless chicken thighs work wonderfully in this lemon chicken recipe. They’re more forgiving and often more flavorful, though they may require a slightly longer cooking time.

How do I know when the chicken is done cooking?
The safest method is using a meat thermometer to ensure the internal temperature reaches 165°F (74°C). Alternatively, cut into the thickest part—the meat should be opaque with no pink remaining.

Can I make this garlic lemon chicken recipe without garlic?
While garlic adds significant flavor, you can omit it if necessary. Consider adding extra herbs like rosemary or tarragon to compensate for the missing depth.

Is this recipe gluten-free?
If you skip the flour dredging step, this recipe is naturally gluten-free. Just ensure your chicken broth is also gluten-free (many commercial brands are).

Can I make this ahead for a dinner party?
Yes! Prepare the dish up to the point of combining the chicken with the sauce. Refrigerate separately, then reheat the sauce, add the chicken, and finish the dish just before serving.

What’s the best type of lemon to use?
Meyer lemons offer a sweeter, less acidic profile, making them excellent for this dish. However, regular Eureka or Lisbon lemons work perfectly well and are more commonly available.

Can I add wine to the sauce?
Absolutely! Replace half the chicken broth with a dry white wine like Sauvignon Blanc or Pinot Grigio for an even more complex flavor profile in your garlic lemon chicken recipe.

Crispy Fried Chicken Recipe for the Perfect Dinner

Introduction

Achieving the perfect balance of crispy exterior and juicy interior is the holy grail when making fried chicken at home. This classic comfort food has deep roots in Southern American cuisine but has evolved into countless variations worldwide. Whether you’re a novice in the kitchen or an experienced home cook looking to refine your technique, this fried chicken recipe delivers consistently delicious results. The secret lies in the proper preparation, seasoning, and cooking method. We’ll walk through each step meticulously, ensuring your chicken turns out golden brown and irresistibly crunchy every time. From the initial brining process to the final temperature check, this guide covers all the essential elements needed to create restaurant-quality fried chicken in your own kitchen.

Ingredients List

For the Brine:

  • 4 cups buttermilk
  • 2 tablespoons kosher salt
  • 1 tablespoon black pepper
  • 2 teaspoons garlic powder
  • 1 teaspoon paprika
  • 3 pounds chicken pieces (mix of thighs, drumsticks, breasts, and wings)

For the Coating:

  • 3 cups all-purpose flour
  • 1 cup cornstarch
  • 1 tablespoon baking powder
  • 2 tablespoons kosher salt
  • 2 teaspoons black pepper
  • 2 teaspoons garlic powder
  • 2 teaspoons onion powder
  • 1 teaspoon paprika
  • 1 teaspoon cayenne pepper (adjust to taste)
  • 1 teaspoon dried herbs (thyme, oregano, or a blend)

For Frying:

  • 2 quarts vegetable oil, peanut oil, or lard for frying
  • 2 eggs, beaten
  • 1/4 cup water

Timing

Total Time: 3 hours 30 minutes

  • Prep Time: 30 minutes
  • Brining Time: 2 hours (or overnight for best results)
  • Coating Time: 15 minutes
  • Cooking Time: 25-30 minutes
  • Resting Time: 10-15 minutes

Step-by-Step Instructions

1. Prepare the Brine

Start by combining the buttermilk, salt, black pepper, garlic powder, and paprika in a large bowl. Whisk thoroughly until all seasonings are fully incorporated. The buttermilk serves two important purposes: its acidity tenderizes the chicken while the fat content helps lock in moisture during cooking.

2. Brine the Chicken

Submerge all chicken pieces in the buttermilk mixture, ensuring each piece is fully coated. Cover the bowl with plastic wrap and refrigerate for at least 2 hours. For optimal flavor and tenderness, brine overnight (up to 24 hours).

3. Prepare the Coating

In a large shallow dish, combine all the dry coating ingredients: flour, cornstarch, baking powder, salt, pepper, garlic powder, onion powder, paprika, cayenne, and dried herbs. The cornstarch is crucial for achieving that extra crispy texture, while baking powder helps create a light, airy crust.

4. Set Up Your Dredging Station

Create an efficient workflow by arranging your dredging station in this order:

  • Brined chicken (drain excess buttermilk)
  • A small bowl with beaten eggs mixed with water
  • The seasoned flour mixture
  • A wire rack placed over a baking sheet

5. Heat the Oil

Pour oil into a large, heavy-bottomed pot or deep cast-iron skillet until it reaches about 2-3 inches deep. Heat to 350°F (175°C). Use a candy or deep-fry thermometer to monitor the temperature accurately.

6. Coat the Chicken

Working with one piece at a time:

  • Remove chicken from the brine, allowing excess to drip off
  • Dip in the egg wash
  • Dredge thoroughly in the flour mixture, pressing firmly to ensure coating adheres
  • Shake off excess flour and place on the wire rack
  • Allow the coated pieces to rest for 5-10 minutes (this helps the coating adhere better)

7. Fry the Chicken

Carefully lower 3-4 pieces into the hot oil (don’t overcrowd). The oil temperature will drop slightly – aim to maintain around 325°F (165°C) during frying. Cook times vary by piece:

  • Wings: 8-10 minutes
  • Thighs and drumsticks: 12-14 minutes
  • Breasts: 15-18 minutes

Turn pieces occasionally for even browning. The chicken is done when it reaches an internal temperature of 165°F (74°C) and has a golden-brown exterior.

8. Drain and Rest

Transfer cooked pieces to a clean wire rack set over a baking sheet (not paper towels, which can make the coating soggy). Allow to rest for 10-15 minutes before serving. This resting period allows juices to redistribute throughout the meat.

Nutritional Information

Per serving (based on 1 piece of mixed chicken):

  • Calories: 390-450 (varies by piece)
  • Protein: 25-30g
  • Fat: 20-25g
  • Saturated Fat: 5-7g
  • Carbohydrates: 20-25g
  • Fiber: 1g
  • Sodium: 600-700mg
  • Sugar: 2g

Note: Nutritional values are approximate and will vary based on specific chicken pieces, exact ingredients used, and portion sizes.

Healthier Alternatives

While traditional fried chicken is an indulgence, there are several ways to create a healthier version:

  • Air Fryer Method: Use an air fryer at 400°F (200°C) for 20-25 minutes, spraying the coated chicken with a light coating of oil spray before cooking.
  • Oven-Baked Option: Bake at 425°F (220°C) on a wire rack for 35-40 minutes until crispy.
  • Coating Substitutions:

– Replace half the all-purpose flour with almond flour or chickpea flour
– Use panko breadcrumbs for extra crunch with less absorption of oil

  • Oil Alternatives: Consider using avocado oil, which has a high smoke point and healthier fat profile.
  • Skinless Chicken: Remove the skin before brining for a significantly lower fat content.

Serving Suggestions

Elevate your crispy fried chicken with these complementary sides and pairings:

  • Classic Southern Sides:

– Buttermilk biscuits with honey butter
– Creamy mashed potatoes with gravy
– Collard greens or braised kale
– Mac and cheese
– Corn on the cob

  • Fresh Accompaniments:

– Coleslaw with vinegar dressing
– Dill pickle spears
– Sliced tomatoes with salt and pepper
– Green salad with buttermilk ranch dressing

  • Sauces for Dipping:

– Honey-sriracha sauce
– Alabama white BBQ sauce
– Buffalo sauce with blue cheese
– Maple-dijon glaze

  • Beverage Pairings:

– Sweet tea or lemonade
– Craft beer (particularly IPA or wheat beer)
– Sparkling wine or champagne (the acidity cuts through the richness)

Common Mistakes

Avoid these pitfalls to ensure your fried chicken recipe turns out perfectly:

1. Oil Temperature Issues:
– Too hot: burns the exterior before the interior cooks
– Too cool: results in greasy, soggy chicken
– Solution: Use a thermometer and maintain 325-350°F (165-175°C)

2. Overcrowding the Pan:
– Causes oil temperature to drop dramatically
– Results in uneven cooking and soggy coating
– Solution: Fry in small batches, allowing ample space between pieces

3. Insufficient Seasoning:
– Bland chicken despite the crispy exterior
– Solution: Season both the brine and the flour mixture generously

4. Skipping the Rest Time:
– Causes coating to fall off when cutting into the chicken
– Results in loss of juices
– Solution: Allow 10-15 minutes resting time after frying

5. Inconsistent Piece Sizes:
– Some pieces overcook while others remain undercooked
– Solution: Cut larger pieces (especially breasts) into smaller, uniform portions

Storing Tips

Properly storing leftover fried chicken preserves both flavor and texture:

  • Immediate Storage: Allow chicken to cool completely before refrigerating (within 2 hours of cooking).
  • Refrigeration:

– Place in shallow airtight containers
– Alternately, wrap tightly in heavy-duty aluminum foil
– Store for up to 3-4 days

  • Freezing:

– Wrap individual pieces in foil, then place in freezer bags
– Remove as much air as possible
– Label with date
– Freeze for up to 4 months

  • Reheating Methods:

– Oven (preferred): 375°F (190°C) for 15-20 minutes on a wire rack
– Air fryer: 375°F (190°C) for 4-5 minutes
– Microwave (least desirable): 30-second intervals at 70% power
– Avoid reheating more than once

Conclusion

Mastering this fried chicken recipe opens the door to endless culinary possibilities. The techniques you’ve learned—brining, proper dredging, temperature control—apply to many other dishes beyond fried chicken. While achieving that perfect golden crust might take practice, the results are well worth the effort. Remember that regional variations exist across the American South and worldwide, each with unique spice blends and cooking methods. Don’t be afraid to experiment with different seasonings once you’ve mastered the basic technique. Whether served at a summer picnic, Sunday dinner, or special gathering, homemade crispy fried chicken creates lasting memories and satisfied appetites. The combination of crunchy exterior and juicy, flavorful meat makes this dish a timeless classic that will never go out of style.

FAQs

Q: Why do I need to use buttermilk in my fried chicken recipe?
A: Buttermilk contains acids that help tenderize the meat by breaking down proteins. It also adds tanginess and helps the coating adhere better to the chicken.

Q: Can I use chicken breasts only for this recipe?
A: Yes, though breasts tend to dry out more easily. Consider cutting them into smaller, even-sized pieces and reducing the cooking time slightly to prevent overcooking.

Q: What’s the best oil for frying chicken?
A: Neutral oils with high smoke points work best. Vegetable oil, peanut oil, or a combination of vegetable oil and shortening are excellent choices. Some Southern traditions call for lard for authentic flavor.

Q: How can I tell when the chicken is done without a thermometer?
A: Pierce the thickest part with a knife—juices should run clear, not pink. The meat should feel firm, and when cooking dark meat, the bones may start to pull away slightly from the meat.

Q: Can I reuse the oil after frying chicken?
A: Yes, strain it through a fine-mesh sieve lined with cheesecloth once cooled. Store in an airtight container away from light and heat. You can typically reuse it 2-3 times before discarding.

Delicious Chicken Alfredo Recipe You Can Make Tonight

Introduction

There’s something magical about the combination of tender chicken, al dente pasta, and a velvety, Parmesan-infused cream sauce that makes chicken alfredo a timeless favorite in American households. This Italian-American classic has evolved over decades to become one of the most beloved creamy pasta dishes across the country. Whether you’re cooking for a special date night or preparing a comforting family dinner, mastering this chicken alfredo recipe will surely impress your guests and satisfy your cravings for something rich and indulgent.

Originally created in Rome by restaurateur Alfredo di Lelio in the early 20th century, the dish has been adapted countless times, but the essence remains the same: simplicity and quality ingredients coming together to create something greater than the sum of its parts. Today, we’ll walk through a foolproof approach to creating restaurant-quality chicken alfredo in your own kitchen, with tips and variations to make it your own signature dish.

Ingredients List

For the Chicken:
– 2 boneless, skinless chicken breasts (approximately 1 pound)
– 2 tablespoons olive oil
– 1 teaspoon Italian seasoning
– 1/2 teaspoon garlic powder
– Salt and freshly ground black pepper to taste

For the Pasta:
– 8 ounces fettuccine pasta
– 1 teaspoon salt (for pasta water)

For the Alfredo Sauce:
– 4 tablespoons unsalted butter
– 3 cloves garlic, minced
– 1 1/2 cups heavy cream
– 1 cup freshly grated Parmesan cheese
– 1/4 teaspoon nutmeg (freshly grated, if possible)
– Salt and white pepper to taste

Optional Garnishes:
– 2 tablespoons fresh parsley, chopped
– Extra grated Parmesan cheese
– Red pepper flakes for heat
– Lemon zest for brightness

Timing

Prep Time: 15 minutes
Cook Time: 25 minutes
Total Time: 40 minutes
Servings: 4
Difficulty Level: Intermediate

Step-by-Step Instructions

Preparing the Chicken:

1. Pat the chicken breasts dry with paper towels. This ensures better browning.
2. Season both sides of the chicken with Italian seasoning, garlic powder, salt, and pepper.
3. Heat olive oil in a large skillet over medium-high heat until shimmering.
4. Add the chicken breasts to the skillet and cook for 5-7 minutes on each side until golden brown and cooked through (internal temperature should reach 165°F/74°C).
5. Remove the chicken from the skillet and let it rest for 5 minutes before slicing into thin strips. Cover with foil to keep warm.

Cooking the Pasta:

1. While the chicken is cooking, bring a large pot of water to a boil.
2. Add 1 teaspoon of salt to the boiling water.
3. Add the fettuccine pasta and cook according to package instructions until al dente (typically 8-10 minutes).
4. Reserve 1/2 cup of pasta water before draining. This starchy water can help thin the sauce if needed.
5. Drain the pasta but do not rinse, as the starch on the pasta helps the sauce adhere better.

Making the Alfredo Sauce:

1. Using the same skillet where you cooked the chicken (don’t clean it—those browned bits add flavor), reduce heat to medium-low.
2. Add butter and let it melt completely.
3. Add minced garlic and sauté for 30 seconds until fragrant but not browned.
4. Slowly pour in the heavy cream while whisking constantly.
5. Bring the mixture to a gentle simmer (do not boil) and cook for 3-4 minutes until it starts to thicken slightly.
6. Gradually whisk in the grated Parmesan cheese until completely melted and smooth.
7. Add the nutmeg and season with salt and white pepper to taste.
8. If the sauce becomes too thick, add some of the reserved pasta water, one tablespoon at a time.

Bringing It All Together:

1. Add the cooked fettuccine to the sauce and toss gently to coat every strand.
2. Place the sliced chicken on top of the pasta or gently fold it into the pasta.
3. Cook for an additional 1-2 minutes to allow the pasta to absorb some of the sauce.
4. Sprinkle with chopped parsley and additional Parmesan if desired.
5. Serve immediately while hot.

Nutritional Information

Per serving (based on 4 servings):

Calories: 720
Protein: 35g
Carbohydrates: 40g
Fat: 48g
Saturated Fat: 28g
Cholesterol: 190mg
Sodium: 650mg
Fiber: 2g
Sugar: 3g

Please note that nutritional values are approximate and may vary based on specific ingredients used.

Healthier Alternatives

While traditional chicken alfredo is undeniably delicious, it’s also quite rich. Here are some modifications to lighten up this classic among creamy pasta dishes:

– Substitute half the heavy cream with chicken broth for a lighter sauce
– Use half-and-half instead of heavy cream
– Incorporate whole wheat or chickpea pasta for added fiber
– Add sautéed vegetables like broccoli, spinach, or peas for nutritional value
– Use less Parmesan and enhance flavor with herbs instead
– Try Greek yogurt mixed with a little milk as a cream alternative
– For a dairy-free version, use cashew cream and nutritional yeast instead of heavy cream and Parmesan

Serving Suggestions

Chicken alfredo is a versatile main course that pairs beautifully with:

Garlic bread or breadsticks: Perfect for soaking up extra sauce
Simple green salad: The acidity and freshness balance the richness of the dish
Roasted vegetables: Asparagus, cherry tomatoes, or Brussels sprouts complement the creamy sauce
Light white wine: A crisp Pinot Grigio or unoaked Chardonnay makes an excellent pairing
Lemon wedges: A squeeze of fresh lemon juice can cut through the richness

For a complete Italian-inspired dinner, serve smaller portions of the chicken alfredo as a first course, followed by a simple protein main with vegetables.

Common Mistakes

Even experienced home cooks can run into issues when preparing chicken alfredo. Here are some pitfalls to avoid:

1. Overcooking the pasta: Always cook pasta al dente, as it will continue cooking slightly when tossed with the hot sauce.

2. Boiling the cream: This can cause separation. Keep it at a gentle simmer.

3. Using pre-grated cheese: Pre-packaged Parmesan often contains anti-caking agents that prevent smooth melting. Grate your own for best results.

4. Not drying the chicken: Excess moisture prevents proper browning and can water down your sauce.

5. Adding cheese to a very hot sauce: This can result in a grainy texture. Let the sauce cool slightly before adding cheese.

6. Rushing the process: Good alfredo sauce needs time to develop flavor and thicken properly.

7. Not seasoning properly: Taste as you go and adjust salt levels accordingly.

Storing Tips

This chicken alfredo recipe makes excellent leftovers if stored properly:

Refrigeration: Store in an airtight container for up to 3 days.

Reheating: Add a splash of milk or cream when reheating over low heat to revive the sauce. Microwave reheating works in 30-second intervals with stirring in between.

Freezing: While possible, cream-based sauces can separate when frozen and thawed. If freezing, do so before adding the pasta and then prepare fresh pasta when reheating the sauce and chicken.

Make-ahead tips: You can prepare the chicken and alfredo sauce separately up to 2 days ahead, then combine with freshly cooked pasta just before serving.

Conclusion

Mastering this chicken alfredo recipe is a culinary achievement worth celebrating. The combination of tender chicken and perfectly cooked pasta enveloped in a rich, velvety sauce creates a dining experience that bridges the gap between everyday comfort food and special-occasion indulgence. While it may not be an everyday meal due to its richness, it certainly deserves a place in your repertoire of impressive dishes that deliver reliable results.

Remember that cooking is about personalization—don’t be afraid to adjust the seasonings to your taste or incorporate some of the healthier alternatives if you’re looking to enjoy this creamy pasta dish more frequently. The beauty of chicken alfredo lies in its adaptability and the way it brings people together around the table, creating moments of shared enjoyment and satisfaction.

FAQs

Can I use chicken thighs instead of breasts for this recipe?
Absolutely! Chicken thighs can be a more flavorful and juicy alternative. Just adjust cooking time accordingly as thighs may take slightly longer to cook through.

Why is my alfredo sauce grainy?
This typically happens when cheese is added to a sauce that’s too hot or when using pre-packaged grated cheese with anti-caking agents. Allow your sauce to cool slightly before adding freshly grated cheese.

Can I make chicken alfredo ahead of time for a party?
For best results, prepare the components separately and assemble just before serving. Alfredo sauce tends to thicken considerably when cooled and may separate when reheated.

What’s the best type of Parmesan to use?
Parmigiano-Reggiano is ideal, but any good quality, freshly grated Parmesan will work well. Avoid the shelf-stable pre-grated varieties in plastic containers.

Is there a non-dairy alternative for this recipe?
Yes! Cashew cream makes an excellent base for dairy-free alfredo. Blend soaked raw cashews with water until smooth, and use nutritional yeast to provide that cheesy flavor.

What can I add to make my chicken alfredo more colorful?
Sun-dried tomatoes, roasted red peppers, fresh peas, or sautéed spinach are all great additions that bring color and nutritional value to the dish.

Why does my sauce always seem to break or separate?
This usually happens when the sauce is heated too quickly or at too high a temperature. Keep heat moderate and stir constantly when making alfredo sauce.

Delicious Orange Chicken Recipe You Can Make Tonight

Introduction

There’s something irresistible about that perfect balance of sweet, tangy, and savory flavors that come together in a plate of classic orange chicken. This beloved Chinese-American dish has found its way into our hearts (and stomachs) with its crispy exterior, juicy interior, and that signature orange sauce that’s both bright and comforting. While you might be tempted to reach for takeout, making this orange chicken recipe at home allows you to control the ingredients, adjust the flavors to your preference, and enjoy it fresh from your own kitchen.

This homemade version captures all the elements you love about Chinese orange chicken from your favorite restaurant but elevates it with fresh ingredients and authentic techniques. Whether you’re cooking for a family dinner or meal prepping for the week ahead, this recipe delivers restaurant-quality results with surprisingly little effort. The vibrant citrus notes combined with the subtle heat create a dish that’s both familiar and exciting – exactly what great home cooking should be.

Ingredients List

For the Chicken:
– 2 pounds boneless, skinless chicken thighs (cut into 1-inch pieces)
– 2 large eggs (beaten)
– 1 cup cornstarch
– ½ cup all-purpose flour
– 1 teaspoon salt
– ½ teaspoon black pepper
– Vegetable oil for frying

For the Orange Sauce:
– Zest of 1 orange
– 1 cup fresh orange juice (approximately 3-4 oranges)
– ½ cup granulated sugar
– ¼ cup rice vinegar
– 2 tablespoons soy sauce (low-sodium preferred)
– 1 tablespoon sesame oil
– 3 cloves garlic (minced)
– 1 tablespoon fresh ginger (grated)
– ¼ teaspoon red pepper flakes (adjust to taste)
– 2 tablespoons cornstarch (mixed with 2 tablespoons water)

For Garnish:
– 3 green onions (sliced)
– 1 tablespoon sesame seeds
– Extra orange zest
– Steamed rice (for serving)

Timing

Preparation Time: 25 minutes
Cooking Time: 30 minutes
Total Time: 55 minutes
Servings: 4-6 people

Step-by-Step Instructions

Prepare the Chicken:

1. Pat the chicken pieces dry with paper towels to remove excess moisture. This helps the coating stick better and creates crispier chicken.

2. In a medium bowl, whisk together eggs, salt, and pepper.

3. In a separate large bowl, mix cornstarch and flour until well combined.

4. Dip each chicken piece into the egg mixture, allowing excess to drip off, then coat thoroughly in the cornstarch-flour mixture. Place the coated pieces on a plate or tray.

5. For extra crispiness, let the coated chicken rest for 10 minutes before frying. This allows the coating to adhere better to the chicken.

Fry the Chicken:

6. In a large, deep skillet or wok, heat about 2 inches of vegetable oil to 350°F (175°C). If you don’t have a thermometer, test the oil by dropping in a small piece of bread – it should sizzle immediately and brown within about 60 seconds.

7. Working in batches to avoid overcrowding, carefully add the chicken pieces to the hot oil. Fry for 4-5 minutes, turning occasionally, until golden brown and cooked through (internal temperature should reach 165°F/74°C).

8. Transfer cooked chicken to a paper towel-lined plate to drain excess oil.

Make the Orange Sauce:

9. In a medium saucepan, combine orange zest, orange juice, sugar, rice vinegar, soy sauce, sesame oil, minced garlic, grated ginger, and red pepper flakes.

10. Bring the mixture to a gentle boil over medium heat, stirring occasionally.

11. In a small bowl, whisk together 2 tablespoons cornstarch with 2 tablespoons water to create a slurry.

12. Once the sauce is boiling, stir in the cornstarch slurry and continue to cook, stirring constantly, until the sauce thickens enough to coat the back of a spoon (about 1-2 minutes).

Combine and Serve:

13. Transfer the fried chicken to a large bowl. Pour the hot orange sauce over the chicken and toss gently until all pieces are well coated.

14. Garnish with sliced green onions, sesame seeds, and additional orange zest if desired.

15. Serve immediately over steamed rice for a complete meal.

Nutritional Information

Per serving (based on 6 servings, excluding rice):
Calories: 420
Protein: 28g
Carbohydrates: 42g
Dietary Fiber: 1g
Sugars: 21g
Fat: 16g
Saturated Fat: 3g
Cholesterol: 145mg
Sodium: 680mg

Note: Nutritional values are approximate and may vary based on specific ingredients and portion sizes.

Healthier Alternatives

This orange chicken recipe can be adapted to suit various dietary needs without sacrificing flavor:

Baked Instead of Fried: Coat the chicken as directed, then arrange on a parchment-lined baking sheet. Spray with cooking oil and bake at 425°F (220°C) for 15-20 minutes, flipping halfway through.

Air Fryer Option: Cook the coated chicken in an air fryer at 380°F (193°C) for about 12-15 minutes, shaking the basket halfway through cooking.

Reduce Sugar: Cut the sugar in the sauce by half and add 1-2 tablespoons of honey or maple syrup for natural sweetness.

Gluten-Free Version: Use gluten-free soy sauce and replace all-purpose flour with gluten-free flour or additional cornstarch.

Lower Carb: Use almond flour instead of all-purpose flour, and substitute a monk fruit sweetener for the granulated sugar.

Serving Suggestions

Elevate your orange chicken with these complementary sides and serving ideas:

Classic Pairing: Serve over steamed white rice or brown rice for a traditional meal.

Vegetable Additions: Add steamed broccoli, snow peas, or bell peppers either mixed with the chicken or on the side for a complete meal.

Alternative Grains: Try serving over quinoa or cauliflower rice for a nutrient boost or lower-carb option.

Fresh Elements: Include a side of cucumber salad dressed with rice vinegar and sesame oil to cut through the richness of the dish.

Family Style: For a complete Chinese-inspired feast, pair with vegetable spring rolls, steamed dumplings, or hot and sour soup.

Common Mistakes

Avoid these pitfalls when preparing your orange chicken recipe:

Overcrowding the Pan: Frying too many pieces at once lowers the oil temperature and results in soggy chicken. Work in batches for the crispiest results.

Sauce Consistency: If your sauce becomes too thick, thin it with a little orange juice or water. If it’s too thin, mix a little more cornstarch with cold water and add gradually.

Using Cold Chicken: Allow chicken to come to room temperature before cooking for more even cooking and better coating adhesion.

Skipping the Zest: The orange zest contains essential oils that give the dish its characteristic aroma and flavor depth. Don’t skip this ingredient!

Rushing the Sauce: Allow your sauce to properly reduce and thicken for the best flavor development. Patience yields better results.

Storing Tips

Make the most of your homemade orange chicken with these storage recommendations:

Refrigeration: Store leftovers in an airtight container in the refrigerator for up to 3 days. Keep the sauce separate from any unused fried chicken if possible to maintain crispiness.

Freezing: The cooked chicken (without sauce) can be frozen for up to 2 months. The sauce can be frozen separately in ice cube trays then transferred to freezer bags.

Reheating: For the best texture when reheating, warm the chicken in a 350°F (175°C) oven for 10-15 minutes until crisp and hot throughout. Microwave reheating will result in softer chicken.

Meal Prep: Prepare double batches of the sauce and freeze portions for quick weeknight meals. You’ll just need to fry fresh chicken and heat the sauce.

Conclusion

Mastering this orange chicken recipe brings the vibrant flavors of Chinese-American cuisine right to your kitchen. The balance of crispy, tender chicken with the sweet-tangy orange sauce creates a meal that’s both satisfying and impressive. While it might seem complex at first glance, breaking it down into simple steps makes it an achievable dish even for those new to cooking Asian-inspired meals.

What makes this recipe special is its adaptability—adjust the heat level, sweetness, or cooking method to suit your preferences and dietary needs. Whether you’re cooking for a special occasion or simply craving something beyond ordinary weeknight fare, this orange chicken delivers restaurant-quality results with the added benefit of fresh ingredients and personalized touches. Give it a try, and you might find yourself reaching for this recipe instead of the takeout menu next time the craving strikes.

FAQs

Can I use chicken breast instead of thighs?
Yes, chicken breast works well in this recipe. Just be careful not to overcook it as breast meat tends to dry out more quickly than thighs. Reduce the frying time to 3-4 minutes and check for doneness.

How can I make this orange chicken recipe less sweet?
Reduce the sugar to ¼ cup and increase the vinegar slightly for a more tangy profile. You can also add more orange zest for flavor without the added sweetness.

Is there a way to make this dish ahead of time?
Yes! Prepare the sauce up to 3 days ahead and store it in the refrigerator. You can also bread the chicken and keep it refrigerated for up to 4 hours before frying. Combine freshly fried chicken with reheated sauce just before serving.

What if I don’t have fresh oranges?
While fresh is best, you can substitute with ¾ cup of store-bought orange juice and 1 tablespoon of orange marmalade to provide the zesty flavor component.

Can I make this recipe with other meats or tofu?
Absolutely! This sauce pairs wonderfully with crispy tofu, shrimp, or even pork. Adjust cooking times accordingly for different proteins, but follow the same sauce instructions.

Delicious Butter Chicken Recipe: Easy Steps to Savor

Introduction

Few dishes capture the essence of Indian cuisine like a well-prepared butter chicken. This creamy, tomato-based curry has won hearts worldwide with its rich texture and complex flavor profile that balances tanginess, sweetness, and spice. While often confused with chicken tikka masala recipe variations (which gained popularity in the UK), authentic butter chicken originated in Delhi, India, during the 1950s at the Moti Mahal restaurant. The story goes that leftover tandoori chicken was simmered in a buttery tomato gravy to prevent it from drying out – thus creating culinary history. Today, we’re sharing a traditional butter chicken recipe that stays true to its roots while being accessible for home cooks. Whether you’re new to Indian cooking or looking to perfect your technique, this step-by-step guide will help you create restaurant-quality butter chicken in your own kitchen.

Ingredients List

For the chicken marinade:
– 1.5 pounds boneless, skinless chicken thighs, cut into 2-inch pieces
– 1 cup plain yogurt
– 1 tablespoon fresh lemon juice
– 2 teaspoons ground turmeric
– 2 teaspoons garam masala
– 2 teaspoons ground cumin
– 3 cloves garlic, minced
– 1 tablespoon fresh ginger, grated
– 1 teaspoon salt

For the sauce:
– 4 tablespoons unsalted butter, divided
– 1 large onion, finely diced
– 3 cloves garlic, minced
– 1 tablespoon fresh ginger, grated
– 1-2 green chilies, sliced (adjust to taste)
– 2 teaspoons ground cumin
– 2 teaspoons ground coriander
– 1 teaspoon garam masala
– 1/4 teaspoon cayenne pepper (adjust to taste)
– 14 oz can tomato puree
– 1 cup heavy cream
– 1 teaspoon kasoori methi (dried fenugreek leaves)
– 1 tablespoon sugar
– Salt to taste
– Fresh cilantro, chopped (for garnish)

Timing

Preparation time: 20 minutes
Marination time: 2 hours minimum (overnight preferred)
Cooking time: 35-40 minutes
Total time: 3 hours (including minimum marination)
Serves: 4-6 people

Step-by-Step Instructions

Marinate the chicken:
1. In a large bowl, combine yogurt, lemon juice, turmeric, garam masala, cumin, minced garlic, grated ginger, and salt.
2. Add chicken pieces and coat thoroughly.
3. Cover and refrigerate for at least 2 hours or preferably overnight.

Cook the marinated chicken:
1. Preheat your oven to 425°F (220°C).
2. Line a baking sheet with foil and place a wire rack on top.
3. Arrange the marinated chicken pieces on the rack, leaving space between each piece.
4. Bake for 15-18 minutes until slightly charred on the edges.
5. Alternatively, you can grill the chicken or cook it in a pan until it’s about 80% done.

Prepare the sauce:
1. Heat 2 tablespoons of butter in a large, heavy-bottomed pot over medium heat.
2. Add onions and cook until soft and translucent (about 5 minutes).
3. Add minced garlic, grated ginger, and green chilies. Sauté for 1-2 minutes until fragrant.
4. Add ground cumin, coriander, garam masala, and cayenne pepper. Stir continuously for 30 seconds to toast the spices.
5. Pour in the tomato puree and bring to a simmer. Cook for 10-15 minutes until the sauce thickens and the oil starts to separate.
6. Using an immersion blender or regular blender (carefully, in batches if needed), puree the sauce until smooth.
7. Return the sauce to the pot and bring back to a gentle simmer.
8. Stir in the heavy cream, remaining 2 tablespoons of butter, kasoori methi (crushing it between your palms first), and sugar.
9. Season with salt to taste.

Combine and finish:
1. Add the partially cooked chicken pieces to the sauce.
2. Simmer gently for 8-10 minutes until the chicken is fully cooked and tender.
3. Adjust consistency with a splash of water if the sauce is too thick.
4. Garnish with fresh cilantro before serving.

Nutritional Information

Per serving (based on 6 servings):
– Calories: 480
– Protein: 28g
– Carbohydrates: 12g
– Fat: 36g
– Saturated Fat: 19g
– Cholesterol: 195mg
– Sodium: 730mg
– Fiber: 2g
– Sugar: 6g

Note: Nutritional values are approximate and may vary based on specific ingredients used.

Healthier Alternatives

If you’re looking to enjoy butter chicken with fewer calories or dietary restrictions, consider these modifications:

Reduce cream: Substitute half the cream with plain Greek yogurt for tanginess with less fat.
Lighter protein option: Use chicken breast instead of thighs to reduce fat content.
Dairy-free version: Replace butter with ghee or coconut oil and heavy cream with coconut cream.
Lower sugar: Omit the added sugar and use naturally sweet, ripe tomatoes.
Increase vegetables: Add bell peppers, peas, or spinach to boost nutritional value.
Use less butter: The name notwithstanding, you can reduce the butter by half without significantly impacting flavor.

Serving Suggestions

Traditional butter chicken pairs beautifully with:

Basmati rice: Fragrant, long-grain rice is the classic accompaniment.
Naan bread: Perfect for scooping up the rich sauce.
Roti or chapati: Whole wheat flatbreads offer a healthier alternative to naan.
Cucumber raita: A cooling yogurt side dish balances the richness.
Kachumber salad: A simple chopped salad of cucumber, tomatoes, and onions with lemon juice.
Dal: A side of yellow lentils creates a complete protein-packed meal.
Vegetable biryani: For a more elaborate meal, serve alongside vegetable biryani.

For a complete dinner party menu, add a vegetarian side dish like saag paneer (spinach with cheese) or aloo gobi (potato and cauliflower).

Common Mistakes

Avoid these pitfalls when preparing your butter chicken recipe:

1. Skipping the marination: This crucial step tenderizes the chicken and infuses it with flavor.
2. Rushing the sauce: Allow proper simmering time for flavors to develop and meld together.
3. Not blending the sauce: A smooth sauce is characteristic of authentic butter chicken.
4. Using cold cream: Adding cold cream directly can cause curdling; bring it to room temperature first.
5. Omitting the fenugreek leaves: Kasoori methi gives butter chicken its distinctive flavor; don’t skip it.
6. Overcooking the chicken: This results in dry, tough meat instead of tender, juicy pieces.
7. Insufficient seasoning: Taste and adjust salt levels at the end of cooking.
8. Using low-fat dairy: Full-fat yogurt and heavy cream provide the authentic richness.

Storing Tips

Butter chicken actually improves in flavor when stored properly:

Refrigeration: Store in an airtight container for 3-4 days. The flavors will continue to develop and meld.
Freezing: Butter chicken freezes exceptionally well for up to 3 months. Freeze in portion-sized containers for easy reheating.
Thawing: Thaw overnight in the refrigerator for best results.
Reheating: Warm gently on the stovetop over medium-low heat, stirring occasionally. Add a splash of water or cream if the sauce has thickened too much.
Separation: If you notice the sauce separating when reheated, whisk vigorously to recombine.
Storage containers: Use glass containers rather than plastic to prevent staining from the turmeric and tomatoes.

Conclusion

Mastering this butter chicken recipe allows you to bring authentic Indian flavors into your home cooking repertoire. The balance of spices, the velvety texture of the sauce, and the tender chicken pieces create a memorable dish that’s far superior to takeout versions. While it might seem intimidating at first, breaking down the process into marination, chicken cooking, sauce preparation, and final combining makes it manageable even for novice cooks. Don’t be afraid to adjust the spice levels to suit your preference – authentic Indian cooking is all about personalizing flavors to your taste. With practice, you’ll develop an intuitive understanding of how the spices work together, allowing you to craft your signature version of this beloved dish. Share your creation with friends and family for a truly impressive homemade feast.

FAQs

Can I use chicken breast instead of thighs?
Yes, though chicken thighs remain juicier and more flavorful. If using breasts, be careful not to overcook them, as they can dry out more easily.

What can I substitute for kasoori methi (dried fenugreek leaves)?
While nothing perfectly replicates its unique flavor, a combination of mustard greens and maple syrup (just a small amount) can approximate the taste. Alternatively, you can omit it, though the dish will lack some of its authentic character.

Is butter chicken very spicy?
Traditional butter chicken is mild to medium in spice level. The recipe provided allows you to adjust the heat by controlling the amount of green chilies and cayenne pepper.

What’s the difference between butter chicken and chicken tikka masala recipes?
While similar, butter chicken tends to be creamier, sweeter, and milder, with a tomato-butter base. Chicken tikka masala typically has a more complex spice profile, tangier tomato base, and sometimes includes bell peppers and onions in the sauce.

Can I make this dish ahead of time for a party?
Absolutely! Butter chicken tastes even better the next day as flavors develop. Simply reheat gently before serving, adding a touch of cream if needed to restore the silky texture.

Is this recipe gluten-free?
Yes, this butter chicken recipe is naturally gluten-free, just ensure your spice blends are from gluten-free sources as some commercial mixes may contain fillers.

Delicious Marry Me Chicken Recipe for Romantic Dinners

Introduction

There’s a reason this creamy, sun-dried tomato pasta dish has earned its romantic name. The marry me chicken recipe has captured hearts (and appetites) across dinner tables worldwide, promising flavors so irresistible they might just inspire a proposal. This Italian-American fusion combines tender chicken breasts with a rich, creamy sauce featuring sun-dried tomatoes, herbs, and parmesan cheese – creating a restaurant-quality dish that’s surprisingly simple to make at home.

Whether you’re planning a special date night dinner, looking to impress guests, or simply want to elevate your weeknight chicken dinner recipes collection, this dish delivers exceptional flavor without requiring professional culinary skills. The combination of tangy sun-dried tomatoes, aromatic herbs, and a velvety sauce creates layers of flavor that seem far more complex than the ingredient list suggests.

Originally popularized on food blogs and social media, this recipe has become a staple for home cooks seeking that perfect balance between impressive and achievable. Let’s dive into how you can create this swoon-worthy dish in your own kitchen.

Ingredients List

For 4 servings of this delectable marry me chicken recipe, you’ll need:

For the Chicken:
– 4 boneless, skinless chicken breasts (about 2 pounds)
– 1 teaspoon kosher salt
– ½ teaspoon black pepper
– ½ teaspoon garlic powder
– ½ teaspoon Italian seasoning
– 3 tablespoons all-purpose flour
– 2 tablespoons olive oil
– 2 tablespoons butter

For the Sauce:
– 4 cloves garlic, minced
– ⅓ cup chicken broth
– 1 cup heavy cream
– ½ cup grated parmesan cheese
– ½ cup sun-dried tomatoes in oil, drained and roughly chopped
– 1 teaspoon Italian seasoning
– ½ teaspoon red pepper flakes (adjust to taste)
– Fresh basil leaves for garnish

The beauty of this recipe lies in its accessibility – most ingredients are likely already in your pantry, making it perfect for an impromptu special dinner without requiring a special shopping trip.

Timing

Total time: 40 minutes
– Preparation: 10 minutes
– Cooking: 30 minutes

This efficient timing makes the marry me chicken recipe ideal for weeknight cooking when you want something special without spending hours in the kitchen. The quick prep-to-table time also makes it suitable for last-minute dinner guests or date nights.

Step-by-Step Instructions

Prepare the Chicken:

1. Pat the chicken breasts dry with paper towels. If the chicken breasts are very thick, consider butterflying them or pounding them to an even thickness of about ¾ inch for even cooking.

2. In a small bowl, combine the salt, pepper, garlic powder, and Italian seasoning. Season both sides of the chicken breasts with this mixture.

3. Lightly dredge each seasoned chicken breast in flour, shaking off any excess.

4. Heat olive oil and butter in a large skillet over medium-high heat until the butter is melted and slightly bubbling.

5. Add the chicken breasts to the skillet and cook for 4-5 minutes on each side until golden brown and cooked through (internal temperature should reach 165°F). If your chicken breasts are thicker, you might need to cook them a bit longer.

6. Transfer the cooked chicken to a plate and cover loosely with foil to keep warm.

Make the Sauce:

1. In the same skillet (don’t clean it – those browned bits add flavor!), add the minced garlic and sauté for about 30 seconds until fragrant.

2. Pour in the chicken broth to deglaze the pan, scraping up any browned bits from the bottom of the pan with a wooden spoon.

3. Reduce heat to medium-low and add the heavy cream, stirring constantly.

4. Add the parmesan cheese and stir until melted and incorporated into the sauce.

5. Stir in the chopped sun-dried tomatoes, Italian seasoning, and red pepper flakes.

6. Allow the sauce to simmer for 2-3 minutes until it begins to thicken slightly.

Finish the Dish:

1. Return the chicken breasts to the skillet, nestling them into the sauce.

2. Spoon some sauce over each chicken breast and allow everything to simmer together for about 3-4 minutes until the chicken is warmed through and the sauce has thickened to your desired consistency.

3. Garnish with fresh basil leaves just before serving.

The key to perfecting this marry me chicken recipe is not rushing the sauce – allowing it to simmer properly creates that perfect creamy consistency that makes this dish so special.

Nutritional Information

Per serving (based on 4 servings):
– Calories: Approximately 520
– Protein: 42g
– Fat: 35g
– Carbohydrates: 10g
– Fiber: 1g
– Sodium: 780mg

While this dish is undeniably rich and indulgent, it’s also high in protein and can be part of a balanced meal when paired with appropriate sides. For those monitoring specific nutritional needs, the recipe can be modified as suggested in the next section.

Healthier Alternatives

To create a lighter version of the marry me chicken recipe while maintaining its delicious flavors:

– Substitute the heavy cream with half-and-half or a mixture of milk and Greek yogurt
– Use half the amount of parmesan cheese, or try a reduced-fat variety
– Reduce the oil used for cooking by using a non-stick pan and cooking spray
– Skip the flour dredging step for a lower-carb option
– Use chicken thighs without skin for a leaner protein option
– Add extra vegetables like spinach, artichoke hearts, or bell peppers to boost nutritional value

These modifications can reduce the calorie and fat content while preserving the dish’s signature creamy, savory flavor profile that makes it one of the most beloved chicken dinner recipes.

Serving Suggestions

This versatile dish pairs beautifully with various accompaniments:

Starches: Serve over angel hair pasta, linguine, or creamy risotto to soak up the delicious sauce. Alternatively, crusty Italian bread, mashed potatoes, or polenta make excellent bases.

Vegetables: Balance the richness with simple steamed asparagus, roasted Brussels sprouts, or a fresh arugula salad with lemon vinaigrette.

Wine Pairing: The creamy sauce pairs wonderfully with a medium-bodied Chardonnay, Pinot Grigio, or light Pinot Noir.

For a complete dinner experience, consider starting with a light appetizer like bruschetta or a simple Italian salad before serving this show-stopping main course.

Common Mistakes

Even the simplest recipes have potential pitfalls. Avoid these common mistakes when preparing your marry me chicken recipe:

1. Overcooking the chicken: This leads to dry, tough meat. Use a meat thermometer to ensure chicken reaches 165°F but doesn’t exceed it significantly.

2. Curdling the sauce: Adding cold cream to a very hot pan can cause curdling. Lower the heat before adding the cream and avoid boiling the sauce.

3. Under-seasoning: The dish’s appeal comes from its rich flavor profile. Don’t be shy with seasonings and be sure to taste and adjust before serving.

4. Rushing the process: Allow proper time for reducing and thickening the sauce to achieve the ideal velvety texture.

5. Cutting the chicken immediately: Let the chicken rest a few minutes before slicing to keep juices intact.

Storing Tips

This marry me chicken recipe makes excellent leftovers:

Refrigeration: Store in an airtight container for up to 3 days. The flavors often deepen and improve overnight, making it perfect for meal prep.

Freezing: While possible, freezing is not ideal as cream-based sauces can separate when thawed. If you must freeze, store in freezer-safe containers for up to 1 month.

Reheating: Warm gently in a covered skillet over medium-low heat, adding a splash of cream or chicken broth if the sauce has thickened too much. Alternatively, microwave at 50% power, stirring occasionally.

Make-ahead option: Prepare the chicken and sauce separately up to a day ahead, then combine and heat through just before serving.

Conclusion

The marry me chicken recipe stands as a testament to how a few quality ingredients, combined with simple techniques, can create a truly memorable meal. Its balance of creamy, tangy, and savory flavors makes it much more than just another entry in your collection of chicken dinner recipes – it’s a celebration-worthy dish that brings restaurant elegance to your home table.

Whether you’re cooking for a special someone, entertaining guests, or simply treating yourself to an elevated dinner, this recipe delivers exceptional results without requiring culinary school expertise. The combination of tender chicken, sun-dried tomatoes, and that irresistible cream sauce creates a dish that lives up to its romantic name – one that might not literally prompt a proposal, but will certainly win hearts around your dinner table.

FAQs

Can I use chicken thighs instead of breasts?
Absolutely! Boneless, skinless chicken thighs work wonderfully in this recipe and often stay more tender. Just adjust cooking time accordingly as thighs may require a few extra minutes.

Is there a dairy-free alternative for this recipe?
Yes, you can substitute the heavy cream with full-fat coconut milk and use nutritional yeast instead of parmesan cheese. The flavor profile will change slightly, but it will still be delicious.

Can I add vegetables to make it a complete one-pan meal?
Certainly! Spinach, kale, artichoke hearts, or bell peppers make excellent additions. Add leafy greens at the very end just to wilt, and heartier vegetables earlier in the sauce-making process.

What if I don’t have sun-dried tomatoes?
While sun-dried tomatoes are signature to this dish, you could substitute roasted red peppers or fresh cherry tomatoes (cooked down in the sauce) for a different but still delicious flavor profile.

Can this recipe be doubled for a larger crowd?
Yes, this recipe doubles easily. Use a larger pan to ensure the chicken pieces aren’t overcrowded, which could lead to steaming rather than proper browning.

Easy Chicken Parmesan Recipe: Quick & Delicious!

Introduction

There’s something undeniably comforting about a plate of perfectly prepared chicken parmesan – that golden, crispy exterior giving way to tender chicken, all topped with bubbling cheese and tangy tomato sauce. This classic Italian-American dish has found its way into homes and restaurants across the world, becoming a beloved comfort food staple. Whether you’re cooking for a special occasion or just craving some homemade goodness, this chicken parmesan recipe delivers restaurant-quality results right in your kitchen. The combination of crispy, breaded chicken cutlets, rich tomato sauce, and melted cheese creates a symphony of flavors and textures that’s hard to resist. This recipe strikes the perfect balance between authentic techniques and practical, approachable cooking methods that anyone can master.

Ingredients List

For the Chicken:
– 4 boneless, skinless chicken breasts (about 2 pounds total)
– 1 cup all-purpose flour
– 1 teaspoon salt
– 1/2 teaspoon black pepper
– 3 large eggs
– 2 tablespoons milk
– 2 cups Italian-seasoned breadcrumbs
– 1/2 cup grated Parmesan cheese, plus extra for serving
– 1/4 cup olive oil
– 1/4 cup vegetable oil

For the Sauce:
– 2 tablespoons olive oil
– 1 small onion, finely diced
– 3 garlic cloves, minced
– 1 can (28 ounces) crushed tomatoes
– 1 teaspoon dried oregano
– 1 teaspoon dried basil
– 1/2 teaspoon sugar
– Salt and pepper to taste

For Assembly:
– 8 ounces mozzarella cheese, sliced or shredded
– 1/4 cup fresh basil leaves, chopped (optional)
– 1/4 teaspoon red pepper flakes (optional)

Timing

– Preparation Time: 30 minutes
– Cooking Time: 35 minutes
– Total Time: 1 hour 5 minutes
– Serves: 4 people

Step-by-Step Instructions

Prepare the Chicken:

1. Place each chicken breast between two sheets of plastic wrap and pound to an even 1/4-inch thickness using a meat mallet or heavy pan.

2. Set up a breading station with three shallow dishes:
– First dish: Combine flour, salt, and pepper
– Second dish: Whisk together eggs and milk
– Third dish: Mix breadcrumbs and 1/2 cup Parmesan cheese

3. Dredge each chicken breast first in the flour mixture, shaking off excess, then dip in the egg mixture, and finally coat with the breadcrumb mixture, pressing gently to adhere.

4. Place breaded chicken on a plate and refrigerate for 15 minutes to help the coating stick better.

Make the Sauce:

1. While the chicken is chilling, heat 2 tablespoons olive oil in a medium saucepan over medium heat.

2. Add diced onion and cook until translucent, about 4-5 minutes.

3. Add minced garlic and cook for another 30 seconds until fragrant.

4. Pour in crushed tomatoes, oregano, basil, and sugar. Season with salt and pepper to taste.

5. Reduce heat to low and simmer for 15-20 minutes, stirring occasionally.

Cook the Chicken:

1. Preheat your oven to 425°F (220°C).

2. In a large skillet, heat olive oil and vegetable oil over medium-high heat until shimmering.

3. Working in batches if necessary, add the breaded chicken and cook until golden brown, about 2-3 minutes per side.

4. Transfer the browned chicken to a baking sheet lined with parchment paper.

Assemble and Bake:

1. Spoon about 1/4 cup of sauce over each chicken breast.

2. Layer mozzarella cheese on top of each piece.

3. Sprinkle with additional Parmesan cheese if desired.

4. Bake in the preheated oven for 15-20 minutes, or until the chicken reaches an internal temperature of 165°F (74°C) and the cheese is melted and bubbly.

5. If desired, switch to broil for the final 1-2 minutes to get the cheese golden and slightly browned.

6. Let rest for 5 minutes before serving. Garnish with fresh basil and red pepper flakes if using.

Nutritional Information

Per serving (1 chicken breast with sauce and cheese):
– Calories: 620
– Protein: 52g
– Carbohydrates: 28g
– Fat: 34g
– Saturated Fat: 12g
– Cholesterol: 225mg
– Sodium: 980mg
– Fiber: 3g
– Sugar: 6g

Note: Nutritional values are approximate and may vary based on specific ingredients used.

Healthier Alternatives

Looking to lighten up this classic chicken parmesan recipe? Try these modifications:

Baked Instead of Fried: Skip the pan-frying entirely and bake the breaded chicken at 425°F for about 15 minutes before adding sauce and cheese.

Whole Wheat Breadcrumbs: Substitute whole wheat breadcrumbs for added fiber and nutrients.

Reduced-Fat Cheese: Use part-skim mozzarella to cut down on fat without sacrificing too much flavor.

Air Fryer Option: Cook the breaded chicken in an air fryer at 375°F for 10-12 minutes before topping with sauce and cheese and finishing in the oven.

Lighter Protein: Use chicken tenders or chicken cutlets which are naturally thinner and require less oil for cooking.

Veggie Boost: Add finely chopped vegetables like bell peppers, carrots, or spinach to your sauce for extra nutrition.

Serving Suggestions

The best chicken parmesan deserves the perfect accompaniments:

Classic Pairing: Serve over al dente spaghetti or linguine tossed with a bit of olive oil or extra sauce.

Lighter Option: Pair with roasted vegetables like asparagus, broccoli, or zucchini for a lower-carb meal.

Fresh Side: A simple green salad with lemon vinaigrette offers a bright contrast to the rich main dish.

Garlic Bread: Homemade garlic bread makes an excellent vehicle for soaking up extra sauce.

Elegant Touch: For a restaurant-style presentation, place the chicken parmesan on a bed of sautéed spinach with a side of rosemary roasted potatoes.

Wine Pairing: A medium-bodied red wine like Chianti or Sangiovese complements the tomato sauce and cheese perfectly.

Common Mistakes

Avoid these pitfalls when preparing your chicken parmesan recipe:

1. Uneven Chicken Thickness: Failing to pound the chicken to an even thickness leads to uneven cooking – some parts overcooked, others undercooked.

2. Skipping the Refrigeration: Not chilling the breaded chicken before cooking can cause the coating to fall off during frying.

3. Crowding the Pan: Frying too many chicken pieces at once lowers the oil temperature, resulting in soggy rather than crispy chicken.

4. Sauce Overload: Adding too much sauce can make the crispy coating soggy. A moderate amount is best.

5. Impatient Cheese Melting: Not allowing enough time for the cheese to properly melt and bubble in the oven.

6. Cutting Too Soon: Not letting the chicken rest before serving causes juices to escape, resulting in drier meat.

Storing Tips

Make the most of leftovers with these storage recommendations:

Refrigeration: Store leftover chicken parmesan in an airtight container for up to 3 days.

Freezing Cooked Chicken Parmesan: Freeze fully assembled and baked chicken parmesan by cooling completely, then wrapping individual portions in aluminum foil and placing in freezer bags. Consume within 2 months.

Freezing Uncooked Breaded Chicken: Freeze the breaded chicken (before frying and topping) by placing pieces on a baking sheet until solid, then transferring to freezer bags. This can be stored for up to 3 months.

Reheating: For best results, reheat in a 350°F oven until warmed through (about 10-15 minutes). Avoid microwave reheating if possible as it makes the breading soggy.

Make-Ahead Sauce: The tomato sauce can be prepared up to 3 days in advance and refrigerated, or frozen for up to 3 months.

Conclusion

Mastering this chicken parmesan recipe allows you to bring an Italian-American classic to your table with confidence. The combination of crispy, golden chicken, tangy tomato sauce, and melted cheese creates a satisfying meal that’s perfect for family dinners or special occasions. Don’t be afraid to make this recipe your own by adjusting the seasonings or trying some of the healthier modifications suggested. With practice, you’ll develop an intuitive feel for the perfect balance of flavors and textures that make chicken parmesan such a beloved dish. Whether you’re a seasoned cook or trying this recipe for the first time, the end result is sure to impress and satisfy. Remember, the best chicken parmesan is the one made with care and served with love.

FAQs

Can I use chicken thighs instead of breasts?
Yes, boneless, skinless chicken thighs can be used as a juicier alternative. Pound them to even thickness and adjust cooking time as needed, as thighs may take slightly longer to cook.

How do I know when the chicken is fully cooked?
The safest method is using an instant-read thermometer—chicken should reach an internal temperature of 165°F (74°C). Alternatively, cut into the thickest part; the meat should be opaque with no pink showing.

Can I make chicken parmesan without breadcrumbs?
Yes, for a gluten-free version, use crushed pork rinds, almond flour, or gluten-free breadcrumbs. For a lower-carb option, try a mixture of grated parmesan and crushed pork rinds.

What’s the best type of mozzarella to use?
Fresh mozzarella offers a more authentic taste and superior melt, while pre-shredded mozzarella provides convenience. Low-moisture mozzarella is preferred over very wet varieties to prevent soggy chicken.

Can I prepare any components ahead of time?
Yes! The sauce can be made up to 3 days ahead. The chicken can be breaded and refrigerated for up to 8 hours before cooking. Complete assembly just before baking for best results.

Why is my breading falling off during cooking?
This typically happens if: (1) the chicken is too wet before breading, (2) the breading isn’t pressed on firmly enough, or (3) the breaded chicken wasn’t chilled before cooking. Pat chicken dry before starting the breading process.