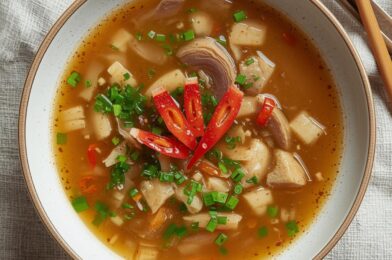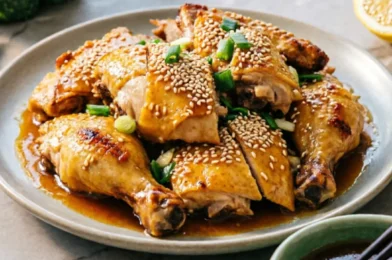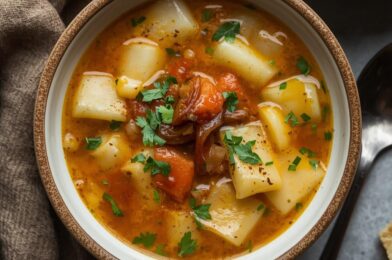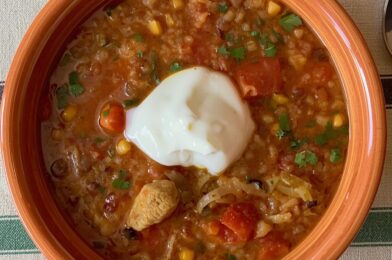
Delicious Lentil Soup Recipe for Cozy Nights

Introduction

There’s something incredibly comforting about a steaming bowl of hearty lentil soup on a chilly day. This simple yet nourishing dish has been a staple across cultures for thousands of years, and for good reason. Lentils are nutritional powerhouses packed with protein, fiber, and essential nutrients, making this soup not just delicious but also incredibly good for you. Whether you’re a seasoned cook or a beginner in the kitchen, this vegetarian lentil soup recipe offers the perfect balance of simplicity and flavor that will warm both body and soul.

The beauty of this recipe lies in its versatility. You can customize it based on seasonal vegetables, spice preferences, or dietary restrictions without compromising on taste. Perfect for meal prep, budget-friendly dining, or simply as a wholesome family meal, this soup delivers on all fronts. Let’s dive into creating this nourishing pot of goodness that has stood the test of time across kitchens worldwide.

Ingredients List

For this classic vegetarian lentil soup, you’ll need:

Main Ingredients:

  • 1 cup dried lentils (green or brown work best)
  • 2 tablespoons olive oil
  • 1 large onion, diced
  • 2 medium carrots, diced
  • 2 celery stalks, diced
  • 4 garlic cloves, minced
  • 1 can (14 oz) diced tomatoes
  • 6 cups vegetable broth (low sodium preferred)
  • 1 bay leaf

Spices and Herbs:

  • 1 teaspoon ground cumin
  • 1 teaspoon dried thyme
  • ½ teaspoon dried oregano
  • ½ teaspoon smoked paprika
  • ¼ teaspoon red pepper flakes (optional)
  • Salt and freshly ground black pepper to taste

For Finishing:

  • 2 cups fresh spinach or kale, chopped (stems removed)
  • 2 tablespoons fresh lemon juice
  • ¼ cup fresh parsley, chopped

Optional Add-ins:

  • 1 cup diced potatoes
  • 1 zucchini, diced
  • 1 bell pepper, diced
  • 1 teaspoon curry powder (for a different flavor profile)

Timing

Preparation Time: 15 minutes
Cooking Time: 35-40 minutes
Total Time: About 55 minutes

This lentil soup recipe is perfect for weeknight meals as it comes together in under an hour. If you’re short on time, you can prepare the vegetables ahead and store them in the refrigerator. For even quicker preparation, consider using pre-chopped vegetables from the grocery store.

Step-by-Step Instructions

1. Prepare the Lentils

  • Sort through the dried lentils to remove any stones or debris.
  • Rinse thoroughly under cold running water until the water runs clear.
  • Set aside to drain.

2. Sauté the Aromatics

  • Heat olive oil in a large pot or Dutch oven over medium heat.
  • Add diced onion and cook for 3-4 minutes until translucent.
  • Add carrots and celery, cooking for another 4-5 minutes until they begin to soften.
  • Stir in minced garlic and cook for 30 seconds until fragrant, being careful not to burn.

3. Add Seasonings

  • Add cumin, thyme, oregano, smoked paprika, and red pepper flakes (if using).
  • Stir for 30 seconds to toast the spices and release their flavors.
  • Season with a pinch of salt and freshly ground black pepper.

4. Combine Main Ingredients

  • Add the rinsed lentils to the pot.
  • Pour in the diced tomatoes with their juice.
  • Add the vegetable broth and bay leaf.
  • Stir to combine all ingredients.

5. Simmer the Soup

  • Bring the mixture to a boil, then reduce heat to maintain a gentle simmer.
  • Cover partially with a lid and cook for 25-30 minutes, or until lentils are tender but not mushy.
  • Stir occasionally to prevent sticking.

6. Final Additions

  • Once lentils are tender, add the chopped spinach or kale.
  • Stir until the greens are wilted, about 2-3 minutes.
  • Remove the bay leaf.
  • Stir in fresh lemon juice.
  • Taste and adjust seasoning as needed.

7. Serve

  • Ladle the hot soup into bowls.
  • Garnish with fresh parsley.
  • Serve with crusty bread or a side salad if desired.

Nutritional Information

This vegetarian lentil soup is not just delicious—it’s also incredibly nutritious. Here’s an approximate breakdown per serving (based on 6 servings):

  • Calories: 220
  • Protein: 12g
  • Carbohydrates: 33g
  • Fiber: 15g
  • Fat: 5g (mostly healthy unsaturated fats from olive oil)
  • Iron: 35% of daily value
  • Folate: 90% of daily value
  • Vitamin A: 70% of daily value
  • Vitamin C: 20% of daily value

Lentils are particularly notable for their high protein content, making this soup an excellent option for vegetarians and vegans. The combination of lentils and vegetables creates a complete meal rich in vitamins, minerals, and antioxidants.

Healthier Alternatives

While this lentil soup recipe is already quite healthy, here are some modifications to suit different dietary needs:

Lower Sodium:

  • Use no-salt-added diced tomatoes and low-sodium or homemade vegetable broth.
  • Increase flavor with additional herbs instead of salt.

Higher Protein:

  • Add quinoa (¼ cup) during the last 15 minutes of cooking.
  • Stir in a cup of cooked chickpeas.

Lower Carb:

  • Reduce lentils to ¾ cup and add more low-carb vegetables like zucchini, bell peppers, or cauliflower.
  • Use turnips instead of potatoes if including root vegetables.

Oil-Free:

  • Sauté vegetables in a few tablespoons of vegetable broth instead of oil.
  • Ensure you’re using a good non-stick pot to prevent sticking.

Serving Suggestions

Transform your lentil soup from a simple dish to a memorable meal with these serving ideas:

Accompaniments:

  • A slice of warm, crusty whole grain bread or garlic bread for dipping
  • A dollop of plant-based yogurt or a swirl of coconut cream
  • Croutons or crispy roasted chickpeas for added texture
  • A sprinkle of nutritional yeast for a cheesy flavor (great for vegans)

Side Dishes:

  • A simple green salad with lemon vinaigrette
  • Roasted vegetables like Brussels sprouts or sweet potatoes
  • A small portion of quinoa or brown rice to make the meal more substantial

Beverage Pairings:

  • A light-bodied red wine like Pinot Noir
  • A crisp apple cider
  • Sparkling water with a squeeze of lemon

Common Mistakes

Avoid these pitfalls to ensure your vegetarian lentil soup turns out perfect every time:

1. Not sorting or rinsing lentils properly:
Always check for small stones and rinse thoroughly to remove dirt and debris.

2. Overcooking the lentils:
Different lentil varieties have different cooking times. Green and brown lentils hold their shape well but red lentils break down quickly. Check frequently after the 20-minute mark.

3. Under-seasoning:
Lentils absorb flavors well but can taste bland if not properly seasoned. Don’t be shy with herbs and spices.

4. Adding acidic ingredients too early:
Tomatoes and lemon juice can prevent lentils from softening if added too early in the cooking process. If using red lentils, add tomatoes only after lentils have started to soften.

5. Not using enough liquid:
Lentils absorb a lot of liquid as they cook. If your soup becomes too thick, add more broth or water.

Storing Tips

Your lentil soup will keep well and even develop better flavors over time:

Refrigeration:

  • Allow soup to cool completely before transferring to airtight containers.
  • Store in the refrigerator for up to 5 days.
  • The soup will thicken when chilled; add a splash of water or broth when reheating.

Freezing:

  • Freeze in portion-sized containers for up to 3 months.
  • Leave about an inch of space at the top of containers to allow for expansion.
  • Thaw overnight in the refrigerator or use the defrost function on your microwave.

Reheating:

  • Stovetop: Reheat on medium-low heat, stirring occasionally.
  • Microwave: Heat in 1-minute intervals, stirring between each interval.
  • Add fresh herbs or a squeeze of lemon after reheating to brighten flavors.

Conclusion

This versatile lentil soup recipe proves that nutritious food doesn’t have to be complicated or boring. With its rich combination of plant-based protein, vegetables, and aromatic spices, this soup nourishes both body and soul. The beauty of this recipe lies in its adaptability—customize it with seasonal ingredients, adjust the consistency to your preference, or experiment with different spice profiles.

Whether you’re looking for a budget-friendly meal, trying to incorporate more plant-based options into your diet, or simply craving something warm and comforting, this vegetarian lentil soup delivers on all fronts. Make a big batch on Sunday for easy, nutritious meals throughout the week, or serve it as a starter for your next dinner party—either way, this timeless recipe is sure to become a staple in your cooking repertoire.

FAQs

Q: Can I use red lentils instead of green or brown?
A: Yes, but red lentils cook much faster and break down more, creating a thicker, more pureed soup. Reduce cooking time to about 15-20 minutes.

Q: Is this lentil soup recipe vegan?
A: Yes, this recipe is completely plant-based and suitable for vegans.

Q: Can I make this in a slow cooker?
A: Absolutely! Sauté the aromatics first, then transfer everything except the spinach and lemon juice to the slow cooker. Cook on low for 6-8 hours or high for 3-4 hours. Add the greens and lemon juice during the last 15 minutes.

Q: How can I make this soup thicker?
A: You can blend a portion (about 2 cups) of the soup and return it to the pot, add a diced potato when adding the lentils, or simply let it simmer uncovered for a few extra minutes.

Q: My lentils aren’t softening. What went wrong?
A: Old lentils take longer to cook. Also, acidic ingredients like tomatoes can prevent lentils from softening. Try adding tomatoes later in the cooking process, or ensure you’re using fresh lentils.

Q: Can I add meat to this soup?
A: While this is designed as a vegetarian lentil soup, you can certainly add cooked bacon, ham, or sausage for a non-vegetarian version. Brown the meat first, then proceed with the recipe.
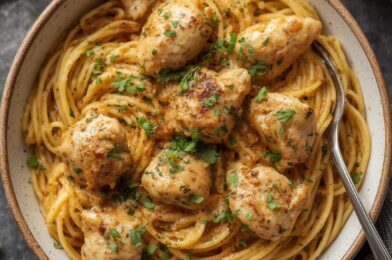
Delicious Chicken Pasta Recipes for Quick Dinners

Introduction

Pasta and chicken create one of those culinary combinations that never disappoints. Whether you’re looking for a quick weeknight meal or something to impress weekend dinner guests, chicken pasta recipes offer versatility, comfort, and satisfaction all in one dish. The beauty of pasta dishes with chicken lies in their adaptability – you can go creamy and indulgent, light and lemony, or packed with vegetables for extra nutrition. This particular recipe strikes the perfect balance between comforting and sophisticated, bringing together tender chicken pieces with al dente pasta in a flavorful sauce that will have everyone asking for seconds. Perfect for busy families, meal prep enthusiasts, or anyone who appreciates a delicious homemade meal without excessive complexity, this dish has become a reliable staple in many households. Let’s explore how simple ingredients transform into an extraordinary meal that satisfies both the palate and the soul.

Ingredients List

For the Pasta and Chicken:
– 8 oz (225g) pasta (penne, fettuccine, or linguine work well)
– 1 lb (450g) boneless, skinless chicken breasts, cut into bite-sized pieces
– 2 tablespoons olive oil, divided
– 3 cloves garlic, minced
– 1 medium onion, finely diced
– 1 red bell pepper, sliced
– 1 cup cherry tomatoes, halved
– 1 cup fresh spinach (optional)
– 1 teaspoon dried oregano
– 1 teaspoon dried basil
– ½ teaspoon red pepper flakes (adjust to taste)
– Salt and freshly ground black pepper to taste

For the Sauce:
– 1 cup chicken broth
– ½ cup heavy cream (or half and half for a lighter version)
– ¼ cup grated Parmesan cheese, plus more for serving
– 1 tablespoon all-purpose flour
– 1 tablespoon butter
– 1 lemon, juiced and zested

For Garnish:
– Fresh basil leaves, chopped
– Additional grated Parmesan
– Freshly ground black pepper

Timing

Preparation Time: 15 minutes
Cooking Time: 25 minutes
Total Time: 40 minutes
Serves: 4 people

Step-by-Step Instructions

1. Prepare the Ingredients
– Bring a large pot of salted water to a boil for the pasta.
– While waiting for the water to boil, cut the chicken into bite-sized pieces and season with salt and pepper.
– Dice the onion, mince the garlic, slice the bell pepper, and halve the cherry tomatoes.
– Measure out all other ingredients and have them ready.

2. Cook the Pasta
– Add the pasta to the boiling water and cook according to package instructions until al dente.
– Reserve ½ cup of pasta water before draining.
– Drain the pasta and toss with a small amount of olive oil to prevent sticking.

3. Cook the Chicken
– Heat 1 tablespoon of olive oil in a large skillet over medium-high heat.
– Add the chicken pieces and cook for 5-6 minutes until golden brown and cooked through.
– Remove the chicken from the skillet and set aside.

4. Sauté the Vegetables
– In the same skillet, add the remaining tablespoon of olive oil.
– Add the onions and cook for 2-3 minutes until translucent.
– Add the minced garlic and cook for another 30 seconds until fragrant.
– Add the bell pepper and cherry tomatoes, cooking for 3-4 minutes until slightly softened.

5. Create the Sauce
– Reduce heat to medium-low.
– Add butter to the skillet and let it melt.
– Sprinkle flour over the vegetables and stir for 1 minute to cook out the raw flour taste.
– Gradually add the chicken broth while stirring continuously to avoid lumps.
– Pour in the heavy cream and stir to combine.
– Add the dried herbs, red pepper flakes, and lemon zest.
– Let the sauce simmer for 2-3 minutes until it starts to thicken.

6. Combine Everything
– Return the cooked chicken to the skillet.
– Add the drained pasta and toss to coat in the sauce.
– If the sauce is too thick, add some of the reserved pasta water, a tablespoon at a time.
– Stir in the Parmesan cheese and fresh spinach (if using).
– Add the lemon juice and toss until everything is well combined and the spinach is wilted.

7. Finish and Serve
– Taste and adjust seasonings as needed.
– Remove from heat and let it rest for 2 minutes.
– Serve in bowls topped with fresh basil, additional Parmesan cheese, and a crack of black pepper.

Nutritional Information

Per Serving (based on 4 servings):
– Calories: 520
– Protein: 35g
– Carbohydrates: 48g
– Fat: 22g
– Saturated Fat: 9g
– Fiber: 4g
– Sugar: 5g
– Sodium: 480mg
– Cholesterol: 95mg

Note: Nutritional values are approximate and may vary based on specific ingredients and portion sizes.

Healthier Alternatives

Make this chicken pasta recipe fit your dietary needs with these simple swaps:

1. Lower Calorie Version:
– Use whole wheat pasta instead of regular pasta
– Substitute half and half or milk for heavy cream
– Increase the vegetable to pasta ratio
– Use only 1 tablespoon of oil total

2. Gluten-Free Option:
– Swap regular pasta for gluten-free pasta (rice, corn, or legume-based)
– Use cornstarch instead of flour to thicken the sauce (1 teaspoon mixed with a tablespoon of cold water)

3. Dairy-Free Adaptation:
– Replace heavy cream with coconut milk or cashew cream
– Skip the Parmesan or use a dairy-free alternative
– Use olive oil instead of butter

4. Higher Protein Version:
– Use protein-enriched pasta
– Increase chicken to 1.5 pounds
– Add a handful of toasted pine nuts or almonds

Serving Suggestions

Elevate your chicken pasta experience with these serving ideas:

– Pair with a simple arugula salad dressed with lemon vinaigrette to cut through the richness
– Serve with garlic bread or focaccia for mopping up the sauce
– Accompany with a crisp, chilled white wine like Pinot Grigio or Sauvignon Blanc
– For a complete meal, start with a light appetizer like bruschetta or a small cup of vegetable soup
– Add a side of steamed or roasted vegetables like asparagus or broccolini for extra nutrients
– For family-style serving, place in a large pasta bowl topped with extra herbs and serve at the table

Common Mistakes

Avoid these pitfalls when preparing pasta dishes with chicken:

1. Overcooking the pasta – Always cook pasta al dente as it will continue cooking slightly when added to the sauce.

2. Cutting chicken unevenly – Ensure chicken pieces are uniform in size to cook at the same rate.

3. Overcrowding the pan – Cook chicken in batches if necessary to achieve proper browning rather than steaming.

4. Under-seasoning – Taste and adjust seasonings throughout the cooking process, especially salt.

5. Skipping the pasta water – That starchy water is liquid gold for adjusting sauce consistency.

6. Rushing the sauce – Allow proper time for the sauce to simmer and thicken for best flavor development.

7. Not resting the dish – Letting the finished pasta rest for a couple of minutes allows flavors to meld and sauce to be absorbed.

Storing Tips

Make the most of leftovers with these storage recommendations:

Refrigeration: Store leftovers in an airtight container for up to 3-4 days.

Freezing: This dish can be frozen for up to 2 months. Freeze in portion-sized containers for easy reheating.

Reheating: When reheating, add a splash of chicken broth or water to revive the sauce. Heat gently over medium-low heat or microwave at 50% power, stirring occasionally.

Meal Prep: You can prepare components separately (cooked pasta, chicken, and sauce) and store them individually for quicker assembly during the week.

Sauce Separation: If your sauce separates after refrigeration, gently reheat while whisking to recombine.

Conclusion

This versatile chicken pasta recipe demonstrates why pasta dishes with chicken remain a perennial favorite in home kitchens everywhere. The combination of tender chicken, perfectly cooked pasta, and a flavorful sauce creates a meal that satisfies on multiple levels – it’s comforting yet special, simple yet sophisticated. What makes this recipe particularly valuable is its adaptability; you can easily adjust ingredients based on what’s in your pantry or to accommodate dietary preferences. Whether you’re cooking for a busy weeknight dinner, meal prepping for the week ahead, or looking to impress dinner guests without spending hours in the kitchen, this recipe delivers reliable results every time. Master this foundation, and you’ll have countless variations at your fingertips, ensuring that chicken pasta dishes remain a welcome sight at your table for years to come.

FAQs

1. Can I use chicken thighs instead of chicken breasts?
Yes! Boneless, skinless chicken thighs work wonderfully in this recipe and often provide more flavor and moisture. Just be aware they may take slightly longer to cook through.

2. What’s the best pasta shape for this recipe?
Medium shapes like penne, fusilli, or farfalle work well as they catch the sauce in their ridges and curves. Long pasta like fettuccine or linguine is also excellent. Choose based on your preference!

3. Can I make this recipe ahead of time?
You can prepare components ahead of time (cook chicken, make sauce), but for best results, cook the pasta fresh and combine everything just before serving. If you must make the entire dish ahead, undercook the pasta slightly as it will absorb moisture as it sits.

4. How can I add more vegetables to this dish?
This recipe is very adaptable! Consider adding mushrooms, zucchini, asparagus, broccoli, or sun-dried tomatoes. Just adjust cooking times accordingly – harder vegetables should be added earlier in the process.

5. Is there a way to make this recipe in one pot?
Yes! Cook the chicken and vegetables as directed, then remove them temporarily. Add additional liquid (about 2.5-3 cups of broth), bring to a boil, add pasta directly to the pot and cook until al dente. Return the chicken and vegetables, add cream and cheese, and finish as directed.

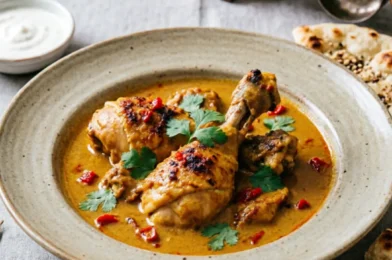
Delicious Chicken Curry Recipe for a Flavorful Meal

Introduction

Indulge in the rich, aromatic flavors of a perfectly prepared chicken curry that transports your taste buds straight to the heart of South Asian cuisine. This classic dish, beloved worldwide, combines tender chicken pieces with a fragrant blend of spices and a velvety sauce that’s both comforting and exciting. Whether you’re a curry aficionado or trying your hand at this dish for the first time, this authentic chicken curry recipe strikes the perfect balance between traditional techniques and accessible ingredients. The beauty of this spicy chicken curry lies in its versatility – easily adjustable to your preferred heat level while maintaining the depth of flavor that makes curry so irresistible. As the gentle simmer fills your kitchen with intoxicating aromas, you’ll understand why this dish has become a staple in homes across continents, bringing people together around tables to share something truly special.

Ingredients List

For the Curry Base:
– 1.5 lbs (700g) boneless, skinless chicken thighs, cut into bite-sized pieces
– 2 medium onions, finely diced
– 4 garlic cloves, minced
– 1 inch (2.5 cm) fresh ginger, grated
– 2 tablespoons vegetable oil or ghee
– 1 can (14 oz/400g) diced tomatoes
– 1 cup (240ml) chicken stock
– 1/2 cup (120ml) coconut milk or plain yogurt

Spice Blend:
– 2 tablespoons curry powder
– 1 teaspoon ground cumin
– 1 teaspoon ground coriander
– 1 teaspoon turmeric
– 1/2 teaspoon red chili powder (adjust to taste for spiciness)
– 1/4 teaspoon cinnamon
– 2 whole cardamom pods (optional)
– 2 bay leaves
– Salt and pepper to taste

For Garnish:
– Fresh cilantro leaves, chopped
– 1 lime, cut into wedges
– Sliced green chilies (optional for extra heat)

Timing

Preparation Time: 15-20 minutes
Marination Time: 30 minutes (optional but recommended)
Cooking Time: 35-40 minutes
Total Time: 1 hour 25 minutes (including optional marination)
Serves: 4 people

Step-by-Step Instructions

Step 1: Prepare the Chicken
1. Pat the chicken pieces dry with paper towels
2. Season with salt, pepper, and 1 teaspoon of curry powder
3. If time permits, let the chicken marinate for 30 minutes in the refrigerator
4. This allows the flavors to penetrate the meat more deeply

Step 2: Prepare the Base
1. Heat oil or ghee in a large, deep pan over medium heat
2. Add the diced onions and sauté for 5-7 minutes until they turn golden brown
3. Add the minced garlic and grated ginger, stirring for another minute until fragrant
4. This aromatic foundation is crucial for an authentic chicken curry recipe

Step 3: Create the Spice Base
1. Add all the spices (curry powder, cumin, coriander, turmeric, chili powder, cinnamon) to the onion mixture
2. Toast the spices for 1-2 minutes, stirring constantly to prevent burning
3. This process releases the essential oils in the spices, intensifying the flavor
4. Add the cardamom pods and bay leaves

Step 4: Cook the Chicken
1. Increase heat to medium-high and add the chicken pieces
2. Sear for 4-5 minutes, turning occasionally, until the chicken is lightly browned on all sides
3. The searing process locks in the juices and adds another layer of flavor

Step 5: Create the Sauce
1. Add the diced tomatoes and stir well to combine with the spices and chicken
2. Pour in the chicken stock
3. Bring the mixture to a boil, then reduce heat to low
4. Cover and simmer for 15-20 minutes, allowing the sauce to thicken and the chicken to cook through

Step 6: Finishing Touches
1. Stir in the coconut milk or yogurt
2. Simmer uncovered for an additional 5-7 minutes until the sauce reaches your desired consistency
3. Taste and adjust seasoning as needed – add more salt or spices to achieve your perfect balance
4. Remove bay leaves and cardamom pods before serving

Step 7: Serve
1. Transfer to a serving dish
2. Garnish with fresh cilantro leaves
3. Serve with lime wedges on the side
4. Add sliced green chilies for those who enjoy extra heat in their spicy chicken curry

Nutritional Information

Per serving (approximately 1/4 of recipe):

Calories: 320
Protein: 28g
Carbohydrates: 12g
Fat: 18g (6g saturated)
Fiber: 3g
Sugar: 5g
Sodium: 580mg

This nutritional profile may vary depending on exact ingredients and portion sizes. The chicken curry recipe offers a good balance of protein and moderate carbohydrates, making it a satisfying main dish.

Healthier Alternatives

Make this chicken curry recipe even more nutritious with these simple swaps and additions:

Use skinless chicken breast instead of thighs to reduce the fat content
Increase the vegetable content by adding bell peppers, spinach, cauliflower, or peas
Substitute light coconut milk or low-fat yogurt to reduce calories and saturated fat
Use less oil by opting for a non-stick pan and using cooking spray
Reduce sodium by using low-sodium chicken stock and adjusting salt to taste
Add more fiber by serving with brown rice or quinoa instead of white rice

These modifications maintain the authentic flavor profile while boosting nutritional value. Remember that traditional spices like turmeric, ginger, and garlic used in spicy chicken curry offer natural anti-inflammatory benefits.

Serving Suggestions

Elevate your chicken curry experience with these perfect accompaniments:

Rice options: Basmati rice, jeera (cumin) rice, or coconut rice
Bread companions: Fresh naan, roti, paratha, or chapati for scooping up the sauce
Cooling sides: Cucumber raita or a simple yogurt with mint to balance the heat
Additional vegetables: Serve with a side of sautéed spinach or roasted cauliflower
Chutneys and pickles: Mango chutney, lime pickle, or onion relish add contrasting flavors
Refreshing drinks: Lassi, iced tea with mint, or a light beer complement the spices beautifully

For a complete dinner experience, start with a light appetizer like papadums with chutney before serving your main chicken curry dish.

Common Mistakes

Avoid these pitfalls to ensure your chicken curry recipe turns out perfectly every time:

1. Rushing the onions: Not cooking onions long enough results in a less developed flavor base
2. Burning the spices: Toasting spices enhances flavor, but burning them creates bitterness
3. Overcooking the chicken: This leads to dry, tough meat instead of tender, juicy pieces
4. Underseasoning: Curries need adequate salt to bring out the complex spice flavors
5. Adding yogurt or coconut milk too early: This can cause curdling; add towards the end of cooking
6. Cooking at too high heat: A gentle simmer develops flavors better than a rapid boil
7. Not tasting as you go: Adjust seasonings throughout the cooking process for balanced flavor

Taking the time to properly execute each step ensures your spicy chicken curry will have the authentic depth of flavor that makes this dish special.

Storing Tips

Make the most of your chicken curry with these storage recommendations:

Refrigeration: Store cooled leftovers in an airtight container for up to 3-4 days
Freezing: This curry freezes exceptionally well for up to 3 months in freezer-safe containers
Portioning: Consider freezing in individual portions for convenient future meals
Reheating: Warm gently on the stovetop with a splash of water to restore consistency
Flavor development: Many curry enthusiasts believe the flavor improves after a day in the refrigerator as the spices continue to meld
Food safety: Ensure the curry is properly cooled before refrigerating and always reheat until steaming hot

These storage practices help you enjoy your chicken curry recipe beyond the initial meal, making it an excellent option for meal prep and planned leftovers.

Conclusion

Mastering this chicken curry recipe opens the door to endless culinary possibilities, allowing you to create restaurant-quality meals in your own kitchen. What makes this dish truly special is how it combines simple ingredients with thoughtful technique to create something greater than the sum of its parts. As you become more comfortable with the process, don’t hesitate to experiment with different spice combinations, protein options, or additional vegetables to make this recipe your own. The beauty of curry lies in its adaptability—whether you prefer a mild, comforting dish or a fiery spicy chicken curry that challenges the taste buds. Beyond just a delicious meal, cooking curry connects you to centuries of culinary tradition and the shared human experience of creating food that brings joy. Each time you prepare this dish, you’ll discover new nuances in flavor and likely find your technique improving, resulting in an ever more delightful curry experience.

FAQs

1. Can I use chicken breast instead of thighs in this chicken curry recipe?
Yes, chicken breasts work well but require careful cooking to prevent drying out. Reduce the simmering time to about 10-15 minutes and check for doneness.

2. How can I make my curry spicier?
To increase heat, add more red chili powder, fresh chopped chilies, or a teaspoon of cayenne pepper. Alternatively, serve with fresh chili slices on the side so each person can adjust their heat level.

3. Can I make this chicken curry in a slow cooker?
Absolutely! Sauté the onions, garlic, ginger, and spices first, then transfer everything to a slow cooker. Cook on low for 4-5 hours or high for 2-3 hours, adding the coconut milk or yogurt in the last 30 minutes.

4. Is this curry gluten-free?
The basic recipe is gluten-free, but always check your curry powder and stock ingredients as some commercial versions may contain gluten additives.

5. Can I make this curry vegetarian?
Yes! Substitute the chicken with chickpeas, paneer cheese, tofu, or a variety of vegetables like cauliflower, potato, and peas. Use vegetable stock instead of chicken stock.

6. What if I don’t have all the spices listed?
A good quality curry powder alone can work in a pinch. The additional spices add complexity, but you’ll still get a delicious result with just curry powder, salt, and pepper.

7. Why is my curry watery?
Allow the curry to simmer uncovered for longer to reduce the sauce. Alternatively, mix 1 teaspoon of cornstarch with 1 tablespoon of cold water and stir into the simmering curry to thicken it.

8. Can I prepare this curry in advance for a party?
Yes, this curry actually improves in flavor when made a day ahead. Reheat gently before serving, adding a splash of cream or coconut milk to refresh the sauce.

Delicious Miso Soup Recipe: Quick & Easy to Make!

Introduction

Discover the soul-warming comfort of a traditional miso soup recipe that brings authentic Japanese flavors right to your kitchen. This simple yet profound dish has been a cornerstone of Japanese cuisine for centuries, offering both nourishment and a deeply satisfying umami experience. Whether you’re looking to expand your culinary horizons or simply crave a light, warming soup, this classic Japanese soup recipe delivers on all fronts. Made with fermented soybean paste, dashi stock, tofu, and seaweed, traditional miso soup balances simplicity with complex flavors. It’s quick to prepare yet carries the weight of Japanese culinary tradition in every spoonful. Perfect as a starter, side dish, or light meal on its own, mastering this foundational recipe opens the door to countless variations and personal adaptations.

Ingredients List

For Dashi Stock (4 servings):

  • 4 cups water
  • 1 piece kombu (dried kelp), approximately 4 inches square
  • 1/2 cup bonito flakes (katsuobushi)

For Miso Soup:

  • 4 cups dashi stock (from above or instant dashi)
  • 3-4 tablespoons miso paste (white, yellow, or red)
  • 7 oz soft tofu, cubed
  • 2 green onions, thinly sliced
  • 2 tablespoons wakame seaweed, dried (expands when soaked)

Optional Add-ins:

  • Sliced mushrooms (shiitake or enoki work well)
  • Daikon radish, thinly sliced
  • Spinach leaves
  • Thinly sliced carrots
  • Small cubes of potato

Timing

Preparation Time: 10 minutes
Cooking Time: 15 minutes
Total Time: 25 minutes

Step-by-Step Instructions

Making Dashi Stock:

1. Place the kombu in a pot with 4 cups of cold water. Let it soak for 30 minutes to extract maximum flavor.
2. Heat the pot over medium heat. Just before the water boils (you’ll see small bubbles forming around the kombu), remove the kombu to prevent the stock from becoming bitter.
3. Add the bonito flakes and bring to a boil. Once boiling, reduce heat and simmer for 30 seconds.
4. Turn off the heat and allow the bonito flakes to sink to the bottom, about 10 minutes.
5. Strain the stock through a fine-mesh sieve or cheesecloth into a clean pot. Your dashi is now ready to use.

Making Miso Soup:

1. If using dried wakame, place it in a small bowl with cold water and let it rehydrate for 5 minutes, then drain.
2. Heat the dashi stock over medium heat until hot but not boiling.
3. Take a small amount of hot dashi in a ladle or cup and dissolve the miso paste completely in this liquid.
4. Add the dissolved miso back into the pot of dashi and stir well. Important: Never boil the soup after adding miso as it destroys its flavor and nutritional properties.
5. Add the cubed tofu and wakame to the soup and heat through for about 2 minutes.
6. Turn off the heat and garnish with sliced green onions.
7. Serve immediately in individual bowls.

For Variations:

  • If adding vegetables like daikon or carrots, add them to the dashi before incorporating the miso paste and simmer until tender.
  • For mushrooms, add them just before the tofu and simmer for 2-3 minutes.
  • Leafy greens like spinach should be added in the final minute of cooking.

Nutritional Information

A typical serving of traditional miso soup (approximately 1 cup) contains:

  • Calories: 85-100 kcal
  • Protein: 6-7g
  • Fat: 3-4g
  • Carbohydrates: 8-10g
  • Fiber: 1-2g
  • Sodium: 600-800mg (varies significantly based on the miso paste used)
  • Contains significant amounts of vitamin K, manganese, zinc, copper, and various B vitamins

Miso soup is particularly notable for being a good source of probiotics due to the fermented miso paste, which contains beneficial bacteria that support gut health. However, be mindful that the sodium content can be high, which is important to consider for those monitoring their salt intake.

Healthier Alternatives

To create a lower-sodium version of this classic miso soup recipe:

  • Choose a reduced-sodium miso paste, which can cut sodium by up to 40%
  • Use less miso paste (2 tablespoons instead of 3-4) and enhance flavor with more vegetables
  • Make a mushroom-based dashi rather than using bonito flakes for a vegetarian alternative with less sodium

For increased nutritional value:

  • Add more vegetables like kale, bok choy, or broccoli for additional vitamins and minerals
  • Incorporate protein-rich ingredients such as edamame or thinly sliced chicken
  • Use brown rice miso, which contains more fiber than white miso
  • Substitute firm tofu for soft tofu if you prefer more protein and a heartier texture

For dietary restrictions:

  • Make it vegan by using kombu-only dashi or mushroom dashi
  • For gluten sensitivity, ensure your miso paste is labeled gluten-free (some varieties contain barley)
  • Create a soy-free version using chickpea miso and replacing tofu with vegetables or a small amount of shredded chicken

Serving Suggestions

Traditional miso soup is incredibly versatile and can be enjoyed in numerous ways:

  • Serve as a starter before a Japanese meal featuring sushi, sashimi, or tempura
  • Pair with a bowl of steamed rice and pickled vegetables for a light, balanced meal
  • Complement grilled fish or seafood dishes for a complete protein-rich dinner
  • Enjoy alongside onigiri (rice balls) for a quick, satisfying lunch
  • Serve in small cups as an appetizer for dinner parties
  • For breakfast, Japanese-style, pair with steamed rice, grilled fish, and a soft-boiled egg

For aesthetic presentation:

  • Use traditional Japanese soup bowls with lids to keep the soup hot
  • Arrange the green onions artfully on top just before serving
  • Consider black lacquered soup spoons to contrast with the soup’s color
  • When incorporating additional ingredients, place them deliberately rather than randomly floating

Common Mistakes

Even with such a seemingly simple Japanese soup recipe, there are several pitfalls that can affect your results:

Boiling Miso: Perhaps the most common error is adding miso paste directly to boiling liquid. This destroys the beneficial enzymes and subtle flavors. Always dissolve miso in a small amount of warm, not boiling, broth before adding it back to the pot, and never boil the soup afterward.

Using Too Much Miso: It’s easy to overdo the miso paste, resulting in an overpoweringly salty soup. Start with less than you think you need – you can always add more to taste.

Improper Seaweed Handling: Dried wakame expands significantly when hydrated. Using too much can overwhelm the soup with its oceanic flavor and gelatinous texture. A little goes a very long way.

Aggressive Stirring: Vigorous stirring can break apart the delicate tofu cubes. Stir gently to preserve the integrity of the ingredients.

Using Only One Type of Miso: Different miso varieties offer different flavor profiles. White miso is milder and sweeter, while red miso is more robust and savory. Consider using a blend for complex flavor.

Ignoring Seasonal Ingredients: Traditional Japanese cooking emphasizes seasonality. Adapt your miso soup recipe to incorporate what’s fresh and available.

Storing Tips

While miso soup is best enjoyed fresh, there are practical ways to store components or leftovers:

Dashi Stock:

  • Refrigerate for up to 3 days in an airtight container
  • Freeze in ice cube trays, then transfer to freezer bags for up to 3 months
  • For convenience, freeze in 1-cup portions for quick single servings

Prepared Miso Soup:

  • Store in the refrigerator for up to 2 days
  • When reheating, do so gently on the stovetop and avoid boiling
  • The flavor will diminish somewhat after storage, so you may need to add a small amount of fresh miso paste when reheating

Miso Paste:

  • Keep refrigerated in an airtight container
  • Will last for months (check expiration date on packaging)
  • A thin layer of oxidation on top is normal – simply scrape it off before using

Ingredient Prep:

  • Pre-cut tofu can be stored in water in the refrigerator for 2-3 days
  • Pre-slice green onions and store in an airtight container with a slightly damp paper towel for 1-2 days

Conclusion

Mastering a traditional miso soup recipe is more than just adding another dish to your repertoire – it’s embracing a cornerstone of Japanese culinary philosophy that values simplicity, balance, and umami. What makes this soup special is not complexity but rather the careful attention to quality ingredients and proper technique. As you become comfortable with the basic formula, you’ll find yourself naturally experimenting with seasonal vegetables, different miso varieties, and various proteins to create your perfect bowl. This adaptability is precisely what has made miso soup endure for centuries in Japanese households. Whether you’re seeking comfort food, a light appetizer, or a nourishing quick meal, this humble yet profound soup delivers on all fronts while connecting you to traditions that span generations. Remember that the best miso soup is one made with care and attention to detail – qualities that elevate even the simplest of foods to something truly special.

FAQs

What type of miso paste is best for beginners?
White (shiro) miso is recommended for beginners as it has the mildest and sweetest flavor. As you become more familiar with miso, you can experiment with yellow or red varieties which have progressively stronger flavors.

Can I make miso soup without dashi?
While traditional miso soup uses dashi as its base, you can substitute with vegetable broth or even water in a pinch. However, the distinctive umami flavor will be less pronounced without dashi.

Is miso soup gluten-free?
Not all miso pastes are gluten-free as some contain barley. Look specifically for miso labeled “gluten-free” or made exclusively from soybeans if you have gluten sensitivity.

How nutritious is miso soup?
Miso soup is relatively low in calories but rich in probiotics, vitamins (particularly B vitamins), and minerals like zinc and manganese. The fermentation process makes nutrients more bioavailable.

Can children eat miso soup?
Yes, miso soup is generally suitable for children, though you might want to use less miso paste to reduce sodium content. It’s an excellent way to introduce umami flavors and vegetables to developing palates.

Why should miso paste be added at the end of cooking?
Miso contains beneficial live enzymes and probiotics that are destroyed by high heat. Adding it at the end and avoiding boiling preserves these health benefits and the delicate flavor profile.

How can I make my miso soup more filling?
Add more protein sources like extra tofu, shredded chicken, or seafood. You can also incorporate hearty vegetables like sweet potatoes, kabocha squash, or more substantial mushrooms like king oyster.

What’s the difference between instant miso soup and homemade?
Instant varieties typically contain dehydrated ingredients and often higher sodium levels. Homemade miso soup offers fresher ingredients, more control over sodium content, and generally more complex flavors.

Pasta Modelleri: Lezzetli ve Yaratıcı Tarifler Burada!

Introduction

Italian cuisine has gifted the world with countless culinary treasures, but perhaps none as versatile and beloved as pasta. With hundreds of pasta modelleri (pasta types) available today, this staple food has evolved far beyond its humble beginnings. From the delicate strands of angel hair to the robust tubes of rigatoni, each shape serves a specific purpose in capturing and complementing various sauces and ingredients. This diversity is what makes pasta not just a meal, but an experience that changes with every variety you try. The beautiful thing about makarna çeşitleri (pasta varieties) is that they offer endless possibilities for creativity in the kitchen, regardless of your culinary expertise. Whether you’re a busy parent looking for a quick weeknight dinner or a food enthusiast eager to experiment with authentic Italian techniques, there’s a pasta dish waiting to be discovered. Let’s explore one classic recipe that showcases the wonderful adaptability of pasta.

Ingredients List

For this classic pasta dish that highlights the versatility of pasta modelleri, you’ll need:

For the pasta:
– 500g of your preferred pasta (spaghetti, fettuccine, or penne work well)
– 2 tablespoons salt (for pasta water)
– 4 liters water

For the sauce:
– 3 tablespoons extra virgin olive oil
– 4 cloves garlic, thinly sliced
– 1 medium onion, finely diced
– 400g cherry tomatoes, halved
– 250g fresh spinach leaves
– 200g mushrooms, sliced
– 1 teaspoon dried oregano
– 1 teaspoon dried basil
– ½ teaspoon red pepper flakes (optional)
– Salt and freshly ground black pepper to taste

For garnish:
– Fresh basil leaves, torn
– Grated Parmesan cheese
– Additional olive oil for drizzling

This ingredient list highlights how different makarna çeşitleri can be paired with the same sauce components, allowing for customization based on preference and availability.

Timing

Understanding the timing for preparing different pasta modelleri is crucial for achieving that perfect al dente texture. Here’s a breakdown of the timing for this recipe:

Preparation time: 15 minutes
Cooking time: 25 minutes
Total time: 40 minutes

Note that cooking times will vary slightly depending on which pasta shape you choose. Here’s a quick reference guide for popular makarna çeşitleri:

– Angel hair (Capellini): 2-3 minutes
– Spaghetti: 8-10 minutes
– Fettuccine: 10-12 minutes
– Penne: 10-12 minutes
– Rigatoni: 12-15 minutes
– Farfalle: 10-12 minutes

Always check the package instructions for specific cooking times, as they may vary by brand and thickness.

Step-by-Step Instructions

1. Prepare your workspace: Gather all ingredients and utensils before beginning. Having everything ready will make the cooking process smoother.

2. Boil the water: In a large pot, bring 4 liters of water to a rolling boil. Add 2 tablespoons of salt to the water. The water should taste salty like the sea—this is crucial for flavoring the pasta from within.

3. Cook the pasta: Add your chosen pasta modelleri to the boiling water and cook according to the package instructions until al dente (firm to the bite). Stir occasionally to prevent sticking.

4. Start the sauce: While the pasta cooks, heat olive oil in a large skillet over medium heat. Add the sliced garlic and diced onion, sautéing until translucent (about 3-4 minutes).

5. Add vegetables: Increase heat to medium-high and add the sliced mushrooms. Cook until they begin to brown (about 5 minutes), then add the cherry tomatoes, dried herbs, and red pepper flakes if using.

6. Simmer: Reduce heat to medium and continue cooking until tomatoes soften and release their juices (about 5-7 minutes). Season with salt and pepper.

7. Reserve pasta water: Before draining the pasta, reserve 1 cup of the starchy pasta cooking water.

8. Combine: Drain the pasta and add it directly to the sauce in the skillet. Add the fresh spinach and toss everything together, allowing the heat to wilt the spinach. If the mixture seems dry, add splashes of the reserved pasta water to create a silky sauce that clings to the pasta.

9. Finish: Remove from heat and garnish with torn basil leaves, grated Parmesan cheese, and a light drizzle of olive oil.

10. Serve: Transfer to warm plates or a large serving bowl and enjoy immediately while hot.

This method works beautifully with various makarna çeşitleri, though you may want to consider that thicker pasta shapes like rigatoni or penne hold up better with chunky sauces, while delicate shapes like angel hair pair wonderfully with lighter, oil-based preparations.

Nutritional Information

Understanding the nutritional profile of different pasta modelleri can help you make informed dietary choices. For a standard serving (approximately 2 ounces or 56g dry pasta) of this recipe:

Calories: Approximately 350-400 kcal (varies based on pasta type)
Carbohydrates: 60-70g
Protein: 10-15g
Fat: 9-12g (primarily from olive oil)
Fiber: 3-5g (higher in whole grain pasta varieties)
Sodium: 300-500mg (varies based on salt added)

Different makarna çeşitleri have similar nutritional profiles, with the main variations occurring between refined and whole grain options. Whole grain pasta provides more fiber and micronutrients, making it a more nutritious choice for those monitoring their health.

Healthier Alternatives

For those looking to enjoy pasta modelleri with a healthier twist, consider these alternatives:

1. Whole grain pasta: Contains more fiber and nutrients than traditional white pasta.

2. Legume-based pasta: Made from chickpeas, lentils, or beans, these alternatives offer higher protein and fiber while being naturally gluten-free.

3. Vegetable noodles: “Zoodles” (zucchini noodles) or spiralized vegetables can replace some or all of the pasta for a lower-carb option.

4. Ancient grain pasta: Varieties made from quinoa, amaranth, or spelt offer different nutritional profiles and flavors.

5. Portion control: Simply reducing your pasta portion and increasing vegetables can make a significant difference in the meal’s nutritional balance.

When adapting makarna çeşitleri recipes to be healthier, consider that alternative pastas may have different cooking times and water absorption rates. Generally, they benefit from being slightly undercooked to maintain texture.

Serving Suggestions

The beauty of pasta modelleri lies in their versatility for serving. Here are some suggestions to elevate your pasta experience:

Pairing with protein: Add grilled chicken, shrimp, or white beans to create a more substantial meal.

Seasonal variations: Adapt your vegetable choices based on what’s in season—summer squash and fresh tomatoes in summer, hearty greens and roasted root vegetables in winter.

Wine pairing: A medium-bodied red wine like Chianti or Sangiovese complements tomato-based sauces, while a crisp white wine like Pinot Grigio works well with lighter, oil-based preparations.

Side dishes: A simple green salad dressed with lemon and olive oil or roasted vegetables make perfect accompaniments to balance the meal.

Bread service: Offer crusty Italian bread for sopping up any remaining sauce—an essential part of the pasta dining experience.

Different makarna çeşitleri may inspire different serving styles. For example, stuffed pasta like ravioli often needs minimal accompaniment, while long noodles like spaghetti benefit from being served with a side of bread for twirling assistance.

Common Mistakes

When preparing pasta modelleri, avoid these common pitfalls:

1. Undersalting the pasta water: This is your only chance to season the pasta itself. The water should taste salty like seawater.

2. Overcooking: Pasta should be al dente—with a slight resistance when bitten. Overcooked pasta becomes mushy and loses its ability to hold sauce.

3. Rinsing after cooking: This removes starches that help the sauce adhere to the pasta. Only rinse pasta if using it for cold dishes like pasta salad.

4. Adding oil to pasta water: This is unnecessary and can prevent sauce from adhering properly.

5. Using a pot that’s too small: Pasta needs room to expand and move freely as it cooks.

6. Forgetting to reserve pasta water: This starchy liquid is valuable for adjusting sauce consistency.

7. Choosing the wrong shape: Not all makarna çeşitleri work with every sauce. Generally, thinner sauces pair with delicate shapes, while chunky sauces need pasta with ridges or cavities to capture the sauce.

Storing Tips

Proper storage of both dry and cooked pasta modelleri ensures quality and safety:

For dry pasta:
– Store in a cool, dry place in an airtight container
– Properly stored, it can last 1-2 years
– Check for signs of discoloration or insects before using

For cooked pasta:
– Refrigerate in an airtight container within two hours of cooking
– Consume within 3-5 days
– Reheat thoroughly before consuming

For freezing cooked pasta:
– Slightly undercook the pasta before freezing
– Toss with a small amount of olive oil to prevent sticking
– Freeze in portion-sized containers for up to 3 months
– Reheat directly from frozen by dropping into boiling water briefly or microwaving with a splash of water

Different makarna çeşitleri may store differently—delicate shapes tend to break more easily, while robust shapes hold their form better during storage and reheating.

Conclusion

The world of pasta modelleri offers a culinary canvas limited only by your imagination. From the quick weeknight dinner solution to the centerpiece of a special gathering, pasta’s versatility makes it one of the most beloved foods worldwide. By understanding the nuances of different makarna çeşitleri and how they interact with various sauces and ingredients, you can elevate this humble staple to extraordinary culinary heights. Whether you prefer traditional recipes passed down through generations or contemporary interpretations that push boundaries, pasta provides a foundation for endless creativity in the kitchen. Remember that cooking pasta is as much about technique as it is about ingredients—respecting the cooking time, properly salting the water, and choosing complementary sauces will make all the difference. As you explore the diverse world of pasta, you’ll discover personal favorites and perhaps even develop signature dishes that reflect your unique taste and style.

FAQs

Q: What’s the best pasta shape for thick, chunky sauces?
A: Pasta shapes with ridges, tubes, or cavities like rigatoni, penne, or farfalle are ideal for chunky sauces as they capture sauce components effectively.

Q: Can I cook different pasta modelleri together?
A: It’s not recommended unless they have identical cooking times. Different shapes and thicknesses require different cooking times to reach the perfect al dente texture.

Q: Why is my pasta sticking together after cooking?
A: This typically happens when pasta isn’t stirred during cooking or when it sits too long after draining. Toss freshly drained pasta with sauce immediately or with a small amount of olive oil if not using right away.

Q: Is fresh pasta better than dried pasta?
A: Neither is superior—they’re simply different products with different applications. Dried pasta works better with heartier sauces, while fresh pasta complements delicate, butter or cream-based sauces.

Q: How can I tell when pasta is perfectly cooked?
A: Perfect al dente pasta should offer slight resistance when bitten but without any crunchiness. For a practical test, cut a piece in half—there should be no visible white flour core in the center.

Q: Are all makarna çeşitleri made from the same ingredients?
A: Traditional Italian pasta is made from durum wheat semolina and water (and sometimes eggs for egg pasta). However, you can now find pasta made from alternative grains, legumes, and vegetables for different dietary needs.

Easy Sesame Chicken Recipe for a Delicious Dinner

Introduction

Creating the perfect sesame chicken recipe at home can transform your typical weeknight dinner into a restaurant-quality experience without the takeout price tag. This Chinese-American favorite combines crispy chicken pieces with a sweet and savory sauce, finished with a sprinkle of toasted sesame seeds. Unlike some heavy restaurant versions, making it at home allows you to control the ingredients, resulting in a healthier yet equally delicious meal. Whether you’re a novice in the kitchen or an experienced home chef, this recipe offers a straightforward approach to creating this beloved dish. The sweet-savory balance, combined with the nutty aroma of sesame, creates a flavor profile that appeals to most palates, making it a reliable crowd-pleaser for family dinners or entertaining guests. Let’s dive into this classic chicken stir fry that brings the essence of Asian cuisine right to your dining table.

Ingredients List

For the Chicken:
– 1.5 pounds boneless, skinless chicken thighs or breasts, cut into 1-inch pieces
– 2 large eggs, beaten
– 1 cup cornstarch
– 1/2 teaspoon salt
– 1/4 teaspoon black pepper
– Vegetable oil for frying

For the Sauce:
– 1/3 cup honey
– 1/4 cup soy sauce (low-sodium preferred)
– 3 tablespoons rice vinegar
– 2 tablespoons brown sugar
– 2 tablespoons sesame oil
– 1 tablespoon cornstarch
– 2 tablespoons water
– 1 tablespoon minced fresh ginger
– 3 cloves garlic, minced
– 1/4 teaspoon red pepper flakes (optional, for heat)

For Garnish:
– 2 tablespoons toasted sesame seeds
– 3 green onions, thinly sliced
– Steamed rice, for serving
– Steamed broccoli or other vegetables (optional)

Timing

Preparation Time: 20 minutes
Cooking Time: 25 minutes
Total Time: 45 minutes
Servings: 4

Step-by-Step Instructions

Preparing the Chicken:

1. Cut and Season: Begin by cutting your chicken into even 1-inch cubes. In a large bowl, season the chicken pieces with salt and pepper.

2. Create Coating Station: In one bowl, beat the eggs. In another bowl, place the cornstarch.

3. Coat Chicken: Dip each piece of chicken first into the beaten eggs, then thoroughly coat with cornstarch, shaking off any excess. Place the coated chicken on a plate without overcrowding.

4. Prepare for Frying: Heat about 1/2 inch of vegetable oil in a large, deep skillet or wok over medium-high heat until it reaches approximately 350°F (175°C).

Cooking Process:

5. Fry Chicken: Working in batches to avoid overcrowding, fry the coated chicken pieces until golden brown and crispy, about 4-5 minutes per batch. Use a slotted spoon to transfer the fried chicken to a paper towel-lined plate.

6. Prepare Sauce: While the chicken is frying, combine all sauce ingredients except the cornstarch slurry in a medium bowl. For the slurry, mix cornstarch and water in a separate small bowl until smooth, then add to the sauce mixture.

7. Cook Sauce: In a clean wok or large skillet, heat 1 tablespoon of oil over medium heat. Add garlic and ginger, sautéing for about 30 seconds until fragrant. Pour in the sauce mixture and bring to a simmer, stirring occasionally.

8. Thicken Sauce: Allow the sauce to simmer until it begins to thicken, about 2-3 minutes. If it becomes too thick, add a tablespoon of water at a time until reaching desired consistency.

9. Combine: Add the fried chicken to the sauce, tossing gently to coat each piece thoroughly. Continue cooking for 1-2 minutes to ensure the chicken is hot and fully coated.

10. Finish and Serve: Sprinkle with toasted sesame seeds and sliced green onions. Serve immediately over steamed rice with your choice of vegetables.

Nutritional Information

Per serving (excluding rice and additional vegetables):
Calories: 420
Protein: 28g
Carbohydrates: 35g
Fat: 18g
Fiber: 1g
Sugar: 18g
Sodium: 890mg

Note: Nutritional values are approximate and may vary based on specific ingredients and portion sizes.

Healthier Alternatives

This classic sesame chicken recipe can be modified to suit various dietary needs:

1. Air Fryer Method: Instead of deep-frying, use an air fryer at 375°F for about 12-15 minutes, turning halfway through. This reduces oil usage significantly while maintaining crispiness.

2. Baked Version: Coat chicken pieces as directed, then bake on a parchment-lined baking sheet at 400°F for 20-25 minutes, turning once.

3. Reduce Sugar: Cut the brown sugar and honey amounts in half for a less sweet version that still maintains flavor balance.

4. Gluten-Free Option: Use tamari or certified gluten-free soy sauce and ensure your cornstarch is free from cross-contamination.

5. Lower Carb: Skip the cornstarch coating and simply sauté the chicken pieces before adding to the sauce. You can thicken the sauce with xanthan gum instead of cornstarch.

6. More Vegetables: Transform this into a more complete chicken stir fry by adding bell peppers, snow peas, carrots, or broccoli during the final cooking stage.

Serving Suggestions

Elevate your sesame chicken with these complementary sides and presentation ideas:

– Serve over steamed jasmine or brown rice for a traditional approach
– For a lower-carb option, use cauliflower rice or spiralized zucchini
– Pair with steamed or stir-fried broccoli, which beautifully absorbs the sauce
– Add color and nutrition with a side of stir-fried bell peppers and snap peas
– Include vegetable spring rolls or a light cucumber salad for a complete meal
– For an elegant presentation, serve in a bowl lined with large lettuce leaves
– Garnish with additional toasted sesame seeds, thinly sliced red chilies, or microgreens
– Offer condiments like chili oil, sriracha, or extra soy sauce on the side

Common Mistakes

Avoid these pitfalls to perfect your sesame chicken recipe:

1. Overcrowding the Pan: Frying too many chicken pieces at once lowers the oil temperature, resulting in soggy rather than crispy chicken. Work in batches instead.

2. Inconsistent Chicken Sizes: Uneven pieces cook at different rates, leading to some overcooked and others undercooked. Aim for uniform 1-inch cubes.

3. Sauce Too Thick/Thin: The sauce should coat the back of a spoon but still flow. If too thick, add water; if too thin, simmer longer or add a touch more cornstarch slurry.

4. Burning the Garlic and Ginger: These aromatics burn quickly, leading to bitter flavors. Sauté just until fragrant, about 30 seconds.

5. Adding Sauce to Cold Pan: This prevents proper caramelization. Ensure your pan is hot before adding sauce ingredients.

6. Skipping the Cornstarch Coating: This crucial step creates the signature crispy exterior that holds up against the sauce.

7. Not Toasting Sesame Seeds: Raw sesame seeds lack the nutty flavor that defines the dish. Toast them in a dry pan until golden for maximum impact.

Storing Tips

Make the most of your sesame chicken with these storage guidelines:

Refrigeration: Store leftovers in an airtight container for up to 3 days. The sauce will absorb into the chicken, softening the coating somewhat.

Freezing: While possible to freeze for up to 2 months, the texture of the chicken will change, becoming less crispy when thawed. Store sauce and chicken separately when possible.

Reheating: For best results, reheat in a skillet over medium heat with a splash of water to rejuvenate the sauce. Avoid microwave reheating which can make the chicken rubbery.

Meal Prep: Prepare the sauce up to 3 days ahead and store refrigerated. The chicken is best cooked fresh, but can be marinated a day ahead if desired.

Separate Components: For meal planning, store cooked rice, vegetables, and chicken separately to maintain optimal textures, combining only when ready to eat.

Conclusion

Mastering this sesame chicken recipe opens the door to creating restaurant-quality Chinese-American cuisine in your own kitchen. The balance of sweet, savory, and nutty flavors creates a dish that satisfies cravings while allowing you complete control over ingredients and nutritional content. Whether you follow the traditional preparation or opt for healthier alternatives, the distinctive flavor profile remains intact. As you become comfortable with the technique, consider experimenting with heat levels, additional vegetables, or serving styles to make this recipe uniquely yours. This versatile chicken stir fry can easily become a weeknight staple, special occasion centerpiece, or meal prep solution. With practice, you’ll find the perfect balance that suits your taste preferences while impressing family and friends with your culinary prowess.

FAQs

Can I use chicken breast instead of thighs?
Yes, chicken breast works well but tends to dry out more quickly than thighs. Reduce cooking time slightly and watch carefully to prevent overcooking.

Is there a non-fried version of this recipe?
Absolutely! See the Healthier Alternatives section for air fryer and baking methods that significantly reduce oil while maintaining flavor.

How can I make this sesame chicken spicier?
Increase the red pepper flakes to 1/2 teaspoon, add 1-2 tablespoons of sriracha to the sauce, or include thinly sliced fresh chilies in the final garnish.

Can I prepare components of this dish ahead of time?
Yes, the sauce can be made up to 3 days ahead and stored refrigerated. The chicken is best coated and fried just before serving for optimal texture.

What’s the best oil for frying the chicken?
Vegetable, canola, or peanut oil all work well due to their high smoke points. Avoid olive oil which has a lower smoke point and distinctive flavor.

Is this sesame chicken recipe gluten-free?
Not inherently, but it can be made gluten-free by substituting regular soy sauce with tamari or certified gluten-free soy sauce.

How can I prevent the chicken from becoming soggy when mixed with sauce?
Ensure your chicken is well-drained after frying, and toss it with the sauce just before serving. The thicker your sauce, the better it will coat without making the chicken soggy.

What vegetables pair well with this dish?
Broccoli, bell peppers, snap peas, carrots, water chestnuts, and baby corn all complement the flavors in this sesame chicken recipe and turn it into a complete chicken stir fry meal.

Delicious French Onion Soup Recipe for Comforting Flavor

Introduction

There’s something magical about the aroma of caramelized onions simmering on a stovetop, gradually transforming into a rich, savory broth. The French onion soup recipe has been a cornerstone of French cuisine for centuries, captivating taste buds with its complex flavors and comforting warmth. This classic dish strikes the perfect balance between simplicity and sophistication, using humble ingredients to create something truly extraordinary.

Originally developed as a peasant dish in 18th-century France, this soup has evolved from a practical way to use abundant onions into a celebrated culinary masterpiece. What sets this particular soup apart from other soup recipes is the patient caramelization process, which brings out the natural sweetness of the onions, creating a depth of flavor that’s impossible to rush.

Whether you’re looking to impress guests at a dinner party or simply seeking comfort on a chilly evening, mastering this timeless recipe will add a versatile dish to your culinary repertoire. The combination of sweet caramelized onions, rich beef broth, crusty bread, and melted Gruyère cheese creates a harmonious blend of flavors and textures that has stood the test of time.

Ingredients List

For 4 servings, you’ll need:

For the Soup Base:

  • 6 large yellow onions (about 3 pounds), thinly sliced
  • 3 tablespoons unsalted butter
  • 1 tablespoon olive oil
  • 1 teaspoon salt
  • 2 cloves garlic, minced
  • 2 tablespoons all-purpose flour
  • 1 cup dry white wine (such as Sauvignon Blanc or Pinot Grigio)
  • 8 cups beef stock (preferably homemade, but high-quality store-bought works)
  • 2 bay leaves
  • 2 sprigs fresh thyme
  • 1 tablespoon Worcestershire sauce
  • 1 teaspoon freshly ground black pepper
  • 1 tablespoon balsamic vinegar (optional)

For the Topping:

  • 1 French baguette, cut into 1-inch thick slices
  • 2 tablespoons olive oil
  • 2 cloves garlic, halved
  • 2 cups Gruyère cheese, grated (about 8 ounces)
  • 1/4 cup freshly grated Parmesan cheese
  • Fresh thyme leaves for garnish (optional)

Timing

  • Prep time: 15-20 minutes
  • Cooking time: 1 hour 45 minutes – 2 hours
  • Total time: Approximately 2 hours 15 minutes

The most time-intensive part of this french onion soup recipe is caramelizing the onions properly, which takes about 45-60 minutes. This process cannot be rushed without compromising the depth of flavor that defines this classic dish.

Step-by-Step Instructions

Step 1: Prepare the Onions
1. Slice the onions thinly and evenly. The uniform thickness ensures they caramelize at the same rate.
2. In a large Dutch oven or heavy-bottomed pot, heat the butter and olive oil over medium heat until the butter is melted.
3. Add the sliced onions and salt. Stir to coat the onions evenly with the fat.

Step 2: Caramelize the Onions
1. Reduce heat to medium-low and cook the onions, stirring occasionally, for 45-60 minutes. This slow cooking process is crucial for developing the deep, sweet flavor.
2. The onions should gradually turn from white to golden to a deep amber color. Be patient and avoid increasing the heat to speed up the process.
3. Once the onions have reduced significantly and turned a rich brown color, add minced garlic and cook for an additional 2 minutes.

Step 3: Create the Soup Base
1. Sprinkle flour over the caramelized onions and stir continuously for 2-3 minutes to cook out the raw flour taste.
2. Pour in the white wine and use a wooden spoon to scrape up any browned bits from the bottom of the pot. These bits (fond) contain concentrated flavor.
3. Allow the wine to simmer for 2-3 minutes until slightly reduced.
4. Add the beef stock, bay leaves, thyme sprigs, Worcestershire sauce, and black pepper.
5. Bring to a boil, then reduce heat and simmer, partially covered, for 30 minutes.
6. If using, stir in the balsamic vinegar during the last 5 minutes of simmering.

Step 4: Prepare the Bread Topping
1. Preheat your oven to 350°F (175°C).
2. Brush both sides of the baguette slices with olive oil and place them on a baking sheet.
3. Bake for 10-15 minutes until lightly toasted, flipping halfway through.
4. Remove from oven and rub each slice with the cut side of garlic cloves.
5. Increase the oven temperature to broil.

Step 5: Assemble and Finish
1. Remove bay leaves and thyme sprigs from the soup.
2. Ladle the hot soup into oven-safe crocks or bowls placed on a baking sheet.
3. Float 1-2 toasted baguette slices on top of each bowl.
4. Generously sprinkle with Gruyère and Parmesan cheeses.
5. Place under the broiler for 2-3 minutes, until the cheese is melted, bubbly, and lightly browned.
6. Garnish with fresh thyme leaves if desired and serve immediately.

Nutritional Information

Per serving (based on 4 servings):

  • Calories: 520
  • Protein: 24g
  • Carbohydrates: 43g
  • Fat: 26g
  • Saturated Fat: 13g
  • Cholesterol: 60mg
  • Sodium: 1250mg
  • Fiber: 4g
  • Sugar: 14g

Note that these values are approximate and can vary based on specific brands of ingredients used and exact portion sizes.

Healthier Alternatives

While the traditional french onion soup recipe is already relatively nutritious, here are some modifications to make it lighter:

  • Reduce butter: Use 1-2 tablespoons of butter instead of 3, and increase olive oil slightly.
  • Low-sodium broth: Opt for low-sodium or homemade beef stock to control salt content.
  • Cheese variations: Use reduced-fat Gruyère or substitute part of the cheese with a lighter alternative like part-skim mozzarella.
  • Bread alternatives: Use whole grain bread instead of white baguette for additional fiber.
  • Vegetarian version: Replace beef stock with mushroom or vegetable stock for a meat-free version (though this will change the traditional flavor profile).
  • Wine-free version: For those avoiding alcohol, substitute the wine with additional beef broth and a tablespoon of red wine vinegar.

Serving Suggestions

This classic soup makes a fantastic starter, but it can also stand as a main dish when served with the right accompaniments:

  • Pair with a simple green salad dressed with a light vinaigrette to balance the richness.
  • Serve alongside a half sandwich for a perfect lunch combination.
  • For a more formal dinner, present as a first course before a roasted chicken or beef dish.
  • In colder months, serve with a full-bodied red wine like Pinot Noir or Bordeaux.
  • For a complete French-inspired meal, follow with a light dessert like poached pears or crème brûlée.

Common Mistakes

Avoid these pitfalls when preparing your french onion soup recipe:

  • Rushing the caramelization: This is the most common mistake. Properly caramelized onions take time—at least 45 minutes. Cooking on too high heat will burn rather than caramelize.
  • Using the wrong onions: Yellow onions are ideal because of their perfect balance of sweetness and savory flavor. White onions lack sufficient sweetness, and red onions can turn the soup an unappetizing color.
  • Overcrowding the pot: Use a large enough pot so onions can caramelize properly without steaming.
  • Insufficient deglazing: Not properly scraping up the fond (browned bits) from the pot bottom means missing out on concentrated flavor.
  • Using low-quality cheese: The cheese crust is a defining feature of this soup, so using pre-shredded or low-quality cheese will significantly impact the final result.
  • Diluting the broth: Adding too much liquid or using weak broth will result in a less flavorful soup.

Storing Tips

This soup actually improves with time as the flavors meld together:

  • Refrigeration: Store the soup base (without bread and cheese) in an airtight container for up to 4 days in the refrigerator.
  • Freezing: Freeze the soup base in freezer-safe containers for up to 3 months. Thaw overnight in the refrigerator before reheating.
  • Reheating: Warm gently on the stovetop until hot, then proceed with the bread and cheese topping just before serving.
  • Make ahead: For entertaining, prepare the soup base a day ahead, then reheat and add the bread and cheese toppings just before serving.
  • Storing bread separately: If you’ve toasted extra bread for the topping, store it in an airtight container at room temperature for 1-2 days.

Conclusion

The french onion soup recipe embodies the beauty of traditional French cooking—transforming simple ingredients through technique and time into something extraordinary. The key to success lies in patience during the caramelization process, using quality ingredients, and understanding that some culinary masterpieces simply cannot be rushed.

This classic soup has endured through generations because it delivers a perfect harmony of sweet, savory, and umami flavors. The contrast between the deeply flavored broth and the crispy, cheesy bread topping creates a textural and flavor experience that few other soup recipes can match.

Whether you’re cooking to impress or simply seeking the comfort that only a well-crafted soup can provide, this recipe offers a rewarding culinary journey. From the first aromatic moments of slicing onions to that final gratifying pull of melted cheese, creating this soup is as pleasurable as eating it. So take your time, enjoy the process, and savor every spoonful of this timeless French classic.

FAQs

What type of onions work best for French onion soup?
Yellow onions are ideal because they have the perfect balance of sweetness and savory flavor when caramelized. Avoid sweet onions like Vidalias, which can make the soup overly sweet.

Can I make this soup vegetarian?
Yes, substitute the beef stock with mushroom stock or a rich vegetable stock. Adding a tablespoon of soy sauce or miso paste can help achieve a deeper umami flavor.

What cheese can I use if I can’t find Gruyère?
Swiss cheese is the best substitute, but Comté, Emmental, or a combination of provolone and Parmesan will also work well.

Why is my soup too pale in color?
The rich brown color comes from properly caramelizing the onions. This process takes time—at least 45-60 minutes of slow cooking. If your soup lacks color, your onions likely weren’t caramelized long enough.

Can I make French onion soup in a slow cooker?
While you can use a slow cooker for part of the process, the onions should still be caramelized in a pot first. After caramelization, transfer to a slow cooker with the remaining ingredients and cook on low for 6-8 hours.

How can I thicken my soup if it’s too thin?
Allow it to simmer uncovered for 10-15 additional minutes to reduce the liquid. Alternatively, make a small amount of beurre manié (equal parts butter and flour kneaded together) and whisk in small amounts until desired thickness is reached.

Is French onion soup gluten-free?
Traditional versions contain flour and bread, but you can make it gluten-free by omitting the flour (or using cornstarch) and topping with gluten-free bread.

Delicious Pasta Salad Recipes for Every Occasion

Introduction

There’s something undeniably satisfying about a well-made pasta salad that brings together the perfect balance of flavors, textures, and colors. This versatile dish has become a staple at picnics, potlucks, and family gatherings across the country, and for good reason. A good pasta salad offers a refreshing alternative to hot dishes, especially during warmer months when lighter fare is preferred. The beauty of pasta salad lies in its adaptability – whether you prefer a Mediterranean-inspired version with olives and feta or a classic American style with mayonnaise and vegetables, the possibilities are virtually endless.

What makes pasta salad particularly appealing is its make-ahead nature. Unlike many dishes that need to be served immediately, pasta salad often tastes better after the flavors have had time to meld together in the refrigerator. This cold pasta salad recipe we’re sharing today combines al dente pasta with crisp vegetables, tangy dressing, and complementary herbs to create a dish that’s both satisfying and refreshing. Whether you’re looking for a side dish for your next barbecue or a complete meal for lunch, this pasta salad recipe is sure to impress.

Ingredients List

For the pasta salad base:
– 1 pound (450g) short pasta (penne, rotini, or farfalle work best)
– 1 cup cherry tomatoes, halved
– 1 medium cucumber, diced
– 1 red bell pepper, diced
– ½ cup red onion, finely chopped
– ½ cup black olives, sliced
– ¼ cup fresh parsley, chopped
– ¼ cup fresh basil leaves, torn

For the dressing:
– ⅓ cup extra virgin olive oil
– 3 tablespoons red wine vinegar
– 1 tablespoon Dijon mustard
– 2 cloves garlic, minced
– 1 teaspoon dried oregano
– ½ teaspoon salt
– ¼ teaspoon black pepper

Optional add-ins:
– 8 ounces mozzarella pearls or feta cheese
– 1 cup artichoke hearts, quartered
– ½ cup sun-dried tomatoes, chopped
– ¼ cup toasted pine nuts
– 1 can chickpeas, drained and rinsed

Timing

Total Time: 30 minutes plus chilling time
– Prep Time: 15 minutes
– Cook Time: 10 minutes
– Chill Time: At least 1 hour (preferably 2-3 hours)

This cold pasta salad can be prepared up to 24 hours in advance, making it perfect for meal prep or entertaining.

Step-by-Step Instructions

1. Cook the pasta: Bring a large pot of salted water to a boil. Add the pasta and cook according to package directions until al dente. Remember that the pasta will continue to absorb liquid from the dressing, so it’s better to slightly undercook than overcook.

2. Cool the pasta properly: Once cooked, drain the pasta in a colander and rinse under cold running water to stop the cooking process. Toss the pasta occasionally as it cools to prevent sticking. For best results, spread the cooled pasta on a baking sheet and drizzle with a little olive oil, tossing to coat. This helps prevent clumping during refrigeration.

3. Prepare the vegetables: While the pasta cools, chop all the vegetables to a uniform size. For the best texture and appearance, aim for pieces that are similar in size to the pasta you’re using.

4. Make the dressing: In a small bowl, whisk together the olive oil, red wine vinegar, Dijon mustard, minced garlic, dried oregano, salt, and pepper until well combined and slightly emulsified.

5. Combine ingredients: In a large mixing bowl, combine the cooled pasta, prepared vegetables, and herbs. Pour the dressing over the mixture and toss gently to coat all ingredients evenly.

6. Add optional ingredients: If using cheese, artichokes, sun-dried tomatoes, pine nuts, or chickpeas, fold them in now. Be gentle to avoid breaking down the more delicate ingredients.

7. Chill before serving: Cover the bowl with plastic wrap and refrigerate for at least one hour, preferably 2-3 hours. This resting time allows the flavors to meld and develop.

8. Final adjustments: Before serving, taste the pasta salad and adjust the seasoning if needed. You may want to add a little more olive oil if the pasta has absorbed too much of the dressing.

Nutritional Information

Per serving (approximately 1 cup, based on 8 servings):
– Calories: 290
– Total Fat: 12g
– Saturated Fat: 2g
– Cholesterol: 0mg
– Sodium: 320mg
– Total Carbohydrates: 40g
– Dietary Fiber: 3g
– Sugars: 3g
– Protein: 7g

Note: Nutritional values will vary based on specific ingredients and any optional add-ins used.

Healthier Alternatives

Making a healthier pasta salad doesn’t mean sacrificing flavor. Consider these modifications:

1. Whole grain pasta: Swap traditional pasta for whole wheat, chickpea, or lentil pasta to increase fiber and protein content.

2. Increase the vegetable ratio: Use more vegetables and less pasta for a lower-carb version that’s still satisfying.

3. Lighten the dressing: Reduce the oil slightly and add a splash of lemon juice or additional vinegar for brightness without extra calories.

4. Add lean protein: Incorporate grilled chicken, canned tuna, or edamame to make this cold pasta salad a complete meal with better nutritional balance.

5. Boost healthy fats: Add avocado chunks just before serving for creaminess and heart-healthy fats.

Serving Suggestions

Pasta salad is incredibly versatile and pairs well with numerous main dishes:

– Serve alongside grilled meats or seafood for a perfect summer meal
– Offer as part of a buffet spread at potlucks or parties
– Pack in containers for picnics or beach outings
– Enjoy as a complete lunch with a slice of crusty bread
– Serve on a bed of greens for an even more vegetable-forward meal

For a visually appealing presentation, consider serving this cold pasta salad in a large, shallow bowl garnished with additional fresh herbs and a drizzle of good quality olive oil.

Common Mistakes

Even experienced cooks can run into issues when making pasta salad. Here’s how to avoid the most common pitfalls:

1. Overcooking the pasta: Always cook pasta to al dente, as it will continue to soften slightly as it absorbs the dressing.

2. Not cooling pasta properly: Rinsing pasta under cold water isn’t just to cool it down—it also removes excess starch that would cause clumping.

3. Under-seasoning: Cold foods need more seasoning than hot ones, so be generous with herbs and seasonings.

4. Adding delicate ingredients too early: Add soft cheese, avocado, or leafy herbs just before serving to maintain their texture and appearance.

5. Dressing too early or too late: Dress the pasta while still slightly warm (but not hot) for maximum flavor absorption, but save some dressing to refresh just before serving.

Storing Tips

Proper storage ensures your pasta salad remains fresh and delicious:

– Store in an airtight container in the refrigerator for up to 3-4 days.
– If preparing in advance for an event, keep delicate ingredients separate and add them just before serving.
– Reserved dressing can help refresh pasta salad that’s been refrigerated overnight, as the pasta tends to absorb liquid.
– Never leave pasta salad at room temperature for more than 2 hours, especially if it contains mayonnaise or cheese.
– Freezing pasta salad is not recommended as the vegetables will become mushy and the dressing may separate upon thawing.

Conclusion

Pasta salad represents the perfect blend of convenience, versatility, and flavor. This cold pasta salad recipe provides a foundation that you can easily customize to suit your preferences or what’s available in your pantry. The key to an exceptional pasta salad lies in the balance of textures, the quality of your dressing, and allowing time for the flavors to develop.

Whether you’re looking for a side dish that travels well to gatherings or a satisfying make-ahead lunch option, pasta salad delivers on all fronts. By following the tips and techniques outlined in this guide, you’ll be able to create a pasta salad that stands out from the ordinary and keeps everyone coming back for seconds.

Remember that the best pasta salad is one that reflects your personal taste preferences. Don’t be afraid to experiment with different ingredients, dressings, and flavor combinations to make this versatile dish your own signature creation.

FAQs

Q: Can I make pasta salad the day before serving?
A: Yes, pasta salad often tastes better the next day as the flavors have time to meld. Reserve a small amount of dressing to refresh it before serving.

Q: Why does my pasta get hard in the refrigerator?
A: Pasta continues to absorb liquid when refrigerated. To prevent hardening, make sure to dress the pasta while it’s still slightly warm and reserve some dressing to add before serving.

Q: Is pasta salad healthy?
A: Traditional pasta salad can be calorie-dense, but with modifications like using whole grain pasta, loading up on vegetables, and choosing lighter dressings, it can be made into a nutritionally balanced dish.

Q: How do I keep pasta from sticking together in pasta salad?
A: Rinse the pasta after cooking, then toss with a small amount of olive oil while it’s still warm. This creates a light coating that prevents sticking.

Q: What’s the best pasta shape for pasta salad?
A: Short, textured pasta shapes like rotini, farfalle (bow ties), penne, or fusilli work best as they hold dressing well and are easy to eat with a fork.

Easy Chicken Parmesan Recipe: Quick & Delicious!

Introduction

Nothing quite matches the appeal of a perfectly prepared Italian-inspired dish that brings restaurant-quality flavors to your home kitchen. This chicken parmesan recipe easy enough for beginners yet delicious enough to impress dinner guests has become a staple in American households for good reason. The combination of crispy breaded chicken, tangy tomato sauce, and melted cheese creates a comfort food masterpiece that satisfies even the pickiest eaters.

If you’ve been intimidated by making easy chicken parmesan before, rest assured this version simplifies the process without compromising on flavor. Perfect for busy weeknights when you need a hearty meal but don’t have hours to spend in the kitchen, this recipe strikes the ideal balance between convenience and taste. The techniques used here have been refined to ensure even novice cooks can achieve that perfect golden crust and juicy interior that defines an excellent chicken parmesan.

Ingredients List

For the chicken:
– 4 boneless, skinless chicken breasts (about 2 pounds total)
– 1 cup all-purpose flour
– 1 teaspoon salt
– ½ teaspoon black pepper
– 2 large eggs
– 1 tablespoon water
– 2 cups Italian seasoned breadcrumbs
– ½ cup grated Parmesan cheese
– 2 teaspoons Italian seasoning
– ½ cup vegetable oil for frying

For the topping:
– 2 cups marinara sauce (homemade or good-quality jarred)
– 2 cups shredded mozzarella cheese
– ¼ cup freshly grated Parmesan cheese
– 2 tablespoons fresh basil, chopped (for garnish)

Timing

– Prep time: 20 minutes
– Cook time: 30 minutes
– Total time: 50 minutes
– Servings: 4

Step-by-Step Instructions

1. Prepare the chicken:
Begin by placing each chicken breast between two sheets of plastic wrap. Using a meat mallet or heavy skillet, pound the chicken to an even ½-inch thickness. This ensures even cooking and tender meat in your easy chicken parmesan.

2. Set up the breading station:
Prepare three shallow dishes. In the first, combine flour, salt, and pepper. In the second, whisk together eggs and water. In the third, mix breadcrumbs, grated Parmesan, and Italian seasoning.

3. Bread the chicken:
Working with one piece at a time, dredge the chicken in the flour mixture, shaking off excess. Dip into the egg mixture, allowing extra to drip off, then press firmly into the breadcrumb mixture, ensuring an even coating on both sides. Place the breaded chicken on a plate and repeat with remaining pieces.

4. Rest the breaded chicken:
Allow the breaded chicken to rest for 5-10 minutes. This helps the coating adhere better during cooking – a crucial step many people skip when making chicken parmesan recipes.

5. Preheat the oven:
While the chicken rests, preheat your oven to 425°F (220°C) and prepare a baking sheet lined with parchment paper or aluminum foil.

6. Cook the chicken:
Heat oil in a large skillet over medium-high heat. When the oil is shimmering, carefully add two chicken breasts and cook for 3-4 minutes per side until golden brown. Transfer to paper towels to drain excess oil, then repeat with remaining chicken.

7. Assemble for baking:
Place the fried chicken on the prepared baking sheet. Spread ½ cup marinara sauce over each piece, then top with shredded mozzarella and a sprinkle of Parmesan cheese.

8. Bake:
Bake in the preheated oven for 15-20 minutes, until the cheese is melted, bubbly, and slightly golden, and the chicken reaches an internal temperature of 165°F (74°C).

9. Garnish and serve:
Remove from the oven and let rest for 5 minutes before garnishing with fresh chopped basil.

Nutritional Information

Per serving (1 chicken breast with sauce and cheese):
– Calories: 620
– Protein: 52g
– Carbohydrates: 35g
– Fat: 30g
– Saturated Fat: 10g
– Cholesterol: 215mg
– Sodium: 1150mg
– Fiber: 2g
– Sugar: 4g

This chicken parmesan recipe easy on the palate is admittedly indulgent. However, the high protein content makes it satisfying, and when paired with lighter sides like salad or roasted vegetables, it can be part of a balanced meal.

Healthier Alternatives

For those looking to lighten up this classic dish:

1. Baked instead of fried:
Skip the pan-frying completely. After breading, spray the chicken with olive oil cooking spray and bake at 425°F for 15-20 minutes before adding sauce and cheese.

2. Lighter breading:
Use whole wheat breadcrumbs and reduce the amount by 1/3, or try a mixture of panko breadcrumbs and ground almonds for extra crunch with less carbs.

3. Reduced cheese:
Cut the mozzarella in half and use part-skim varieties.

4. Protein modification:
Try the same technique with chicken tenders (reducing cooking time) or even eggplant slices for a vegetarian version of this easy chicken parmesan approach.

5. Low-carb option:
Skip the flour and breadcrumbs entirely and instead coat the chicken with a mixture of Parmesan cheese, almond flour, and Italian herbs.

Serving Suggestions

Transform your chicken parmesan into a complete meal with these serving ideas:

Classic pairing: Serve over spaghetti or fettuccine with extra marinara sauce on the side.
Lighter option: Place on a bed of zucchini noodles or spaghetti squash for a low-carb alternative.
Sandwich style: Place between toasted garlic bread or on a sub roll for an incredible chicken parm sandwich.
Family-style presentation: Arrange all chicken pieces in a large baking dish before adding sauce and cheese, then bake and bring the entire dish to the table for serving.
Side dishes: Complement with garlic bread, a Caesar salad, steamed broccoli, or roasted vegetables to round out the meal.

Common Mistakes

Avoid these pitfalls when preparing your chicken parmesan recipe easy enough for any home cook:

1. Skipping the pounding step: Uneven chicken breasts will cook unevenly, leaving some parts dry while others remain undercooked.

2. Wet breading: Not thoroughly patting the chicken dry before breading or pressing too lightly in the breadcrumb mixture leads to coating that falls off during cooking.

3. Overcrowding the pan: Frying too many pieces at once lowers the oil temperature, resulting in soggy rather than crispy chicken.

4. Too much sauce: Drowning the chicken in sauce before baking can make the crispy coating soggy. Use a moderate amount spread evenly.

5. Adding cold sauce: Using refrigerated sauce directly on the hot fried chicken can cause uneven cooking in the oven. Bring sauce to room temperature first or warm slightly.

6. Impatience with cheese: Not allowing enough time for the cheese to fully melt and begin to brown slightly means missing out on the perfect texture contrast in your easy chicken parmesan.

Storing Tips

Make the most of leftovers with these storage recommendations:

Refrigeration: Store leftovers in an airtight container for up to 3 days. For best results, store the chicken separate from any pasta or sides.

Freezing: Freeze the breaded and fried chicken (before adding sauce and cheese) for up to 3 months. Wrap individual pieces in plastic wrap, then aluminum foil, and place in a freezer bag.

Reheating: For the crispiest results, reheat in a 375°F oven for 10-15 minutes. If reheating with sauce and cheese already applied, cover with foil for the first half of reheating to prevent burning.

Meal prep: Prepare a double batch of the breaded chicken, cook completely, then freeze. This gives you a head start on future meals – simply thaw, top with sauce and cheese, and bake for a quick weeknight dinner.

Conclusion

This chicken parmesan recipe easy enough for beginners yet impressive enough for company demonstrates why this Italian-American classic has stood the test of time. The contrast between the crispy exterior, juicy chicken, tangy sauce, and melted cheese creates a symphony of flavors and textures that satisfies on a deep level.

Whether you’re cooking for a family dinner, meal prepping for the week ahead, or hosting friends, this approachable version delivers restaurant-quality results without complicated techniques. The recipe is also versatile – once you’ve mastered the basic method, you can customize it to suit your taste preferences or dietary needs.

Next time you’re craving comfort food with Italian flair, skip the takeout and try this easy chicken parmesan instead. Your taste buds – and your budget – will thank you for the homemade touch that makes all the difference.

FAQs

Can I use chicken thighs instead of breasts?
Yes, boneless skinless chicken thighs work well. They typically have more flavor but need to be pounded to even thickness just like the breasts. The cooking time might vary slightly as thighs can take a bit longer.

How do I know when the chicken is fully cooked?
The safest method is using an instant-read thermometer, which should register 165°F (74°C) when inserted into the thickest part of the chicken. If you don’t have a thermometer, ensure the juices run clear when the chicken is pierced.

Can I prepare this dish ahead of time?
Yes! You can bread the chicken up to 24 hours in advance (store covered in the refrigerator) or even fry the chicken earlier in the day. Complete the assembly with sauce and cheese just before baking.

What’s the best type of mozzarella to use?
For the meltiest result, use whole milk mozzarella that you shred yourself. Pre-shredded cheese contains anti-caking agents that can prevent proper melting. Fresh mozzarella is delicious but contains more moisture, which can make the breading soggy.

Is there a gluten-free version of this recipe?
Absolutely! Substitute the all-purpose flour with gluten-free flour and use gluten-free breadcrumbs. Many stores now carry gluten-free Italian seasoned breadcrumbs, or you can season plain gluten-free breadcrumbs with Italian herbs.

Delicious Homemade Potato Soup Recipe in 30 Minutes

Introduction

There’s nothing quite like a warm bowl of homemade potato soup on a chilly evening. This classic comfort food has earned its place at dinner tables around the world for good reason – it’s simple, satisfying, and infinitely adaptable. Whether you’re a novice cook or a seasoned chef, mastering a delicious potato soup recipe can be your secret weapon for impressing guests or simply treating yourself to something special after a long day.

This particular creamy potato soup balances rich texture with bright flavors, transforming humble potatoes into something truly exceptional. Unlike store-bought varieties, homemade potato soup allows you to control every aspect – from the thickness of the broth to the size of the potato chunks – creating a personalized experience that canned soups simply can’t match.

What makes this recipe stand out is its perfect balance of simplicity and depth of flavor. By layering aromatic vegetables, herbs, and just the right amount of dairy, we’ll create a soup that feels indulgent yet wholesome. Let’s dive into the details of creating this comforting classic that’s sure to become a regular in your cooking repertoire.

Ingredients List

To prepare this delicious potato soup, gather these ingredients:

Main Components:
– 6 medium russet potatoes (about 2.5 pounds), peeled and diced
– 1 large yellow onion, finely diced
– 3 medium carrots, peeled and diced
– 3 stalks celery, diced
– 4 cloves garlic, minced
– 4 cups low-sodium chicken or vegetable broth
– 2 cups whole milk
– 1/2 cup heavy cream
– 3 tablespoons unsalted butter
– 3 tablespoons all-purpose flour

Seasonings:
– 2 teaspoons salt (adjust to taste)
– 1 teaspoon freshly ground black pepper
– 1/2 teaspoon dried thyme
– 1 bay leaf
– 1/4 teaspoon nutmeg (optional, but adds wonderful warmth)

Optional Garnishes:
– 6 slices bacon, cooked and crumbled
– 1/2 cup shredded cheddar cheese
– 1/4 cup chopped fresh chives or green onions
– Sour cream for dolloping
– Extra virgin olive oil for drizzling

The beauty of this potato soup recipe lies in its adaptability. While russet potatoes create the creamiest texture due to their high starch content, Yukon Gold potatoes can be substituted for a more buttery flavor. For those with dietary restrictions, the dairy components can be adjusted without sacrificing the luxurious texture that makes a great creamy potato soup so irresistible.

Timing

Understanding the timing helps ensure your soup turns out perfectly:

Prep Time: 20 minutes (peeling and chopping vegetables)
Cook Time: 35-40 minutes
Total Time: About 1 hour

This potato soup recipe is perfect for weekend cooking or weeknight dinners when you have a little extra time. The good news is that most of the cooking time is hands-off, allowing you to tackle other tasks while your soup simmers to perfection.

For meal prep enthusiasts, consider prepping all vegetables the night before and storing them in the refrigerator. This simple step can reduce your active cooking time to just 35 minutes from start to finish.

Step-by-Step Instructions

1. Prepare the Base

Begin by melting the butter in a large Dutch oven or heavy-bottomed pot over medium heat. Add the diced onion, carrots, and celery, cooking for 5-7 minutes until the vegetables soften but don’t brown. The aromatic foundation of any good potato soup starts here – these vegetables create what’s known in culinary terms as a mirepoix, the flavor base that will elevate your soup.

2. Add Aromatics

Add the minced garlic and cook for another 30 seconds until fragrant. Be careful not to burn the garlic as it can quickly become bitter. Sprinkle the flour over the vegetables and stir continuously for 1-2 minutes to create a roux, which will help thicken your soup.

3. Build the Soup

Gradually pour in the chicken or vegetable broth while stirring constantly to prevent lumps from forming. Add the diced potatoes, bay leaf, thyme, salt, and pepper. Bring the mixture to a boil, then reduce the heat to maintain a gentle simmer. Cover and cook for 15-20 minutes, or until the potatoes are fork-tender.

4. Create Creaminess

Once potatoes are tender, remove the bay leaf. For an ultra-creamy potato soup, take about one-third of the soup and carefully transfer it to a blender (or use an immersion blender directly in the pot). Puree until smooth, then return to the pot if using a standard blender.

5. Finish with Dairy

Reduce heat to low. Stir in the milk and cream, warming gently without boiling (boiling can cause dairy to separate). Allow the soup to heat through for about 5 minutes. Taste and adjust seasoning as needed, adding the optional nutmeg for depth of flavor.

6. Garnish and Serve

Ladle the hot soup into bowls and invite everyone to customize their serving with their choice of garnishes. The contrast between the creamy soup and crunchy bacon bits or fresh herbs creates a delightful textural experience.

Nutritional Information

Per serving (approximately 1½ cups, without garnishes):

Calories: 325
Protein: 8g
Carbohydrates: 41g
Fat: 16g
Fiber: 4g
Sodium: 680mg

This nutritional profile reflects the rich, satisfying nature of a traditional creamy potato soup. The protein content can be increased by using bone broth instead of regular broth or adding more bacon as a topping.

Healthier Alternatives

For those watching their calories or with dietary restrictions, this potato soup recipe can be modified:

Lower fat option: Replace heavy cream with half-and-half or additional milk
Dairy-free version: Use unsweetened almond or oat milk and coconut cream
Lower carb alternative: Replace half the potatoes with cauliflower florets
Vegetarian/Vegan: Use vegetable broth and plant-based milk/cream alternatives
Gluten-free: Substitute the all-purpose flour with cornstarch or a gluten-free flour blend

These modifications may slightly alter the texture and richness of the final dish, but the essence of a comforting potato soup will remain intact. For added nutrition, consider incorporating more vegetables like spinach, kale, or corn.

Serving Suggestions

Turn your potato soup into a complete meal with these complementary pairings:

– A robust green salad with vinaigrette dressing to cut through the richness
– Crusty sourdough bread or warm dinner rolls for dipping
– Grilled cheese sandwiches for the ultimate comfort food combination
– Roasted vegetables as a side to add more nutrition and color to the plate
– A glass of Chardonnay or light-bodied Pinot Noir for wine enthusiasts

For entertaining, consider serving this creamy potato soup in small cups as a starter course, topped with a single crouton and a sprinkle of chives for an elegant presentation.

Common Mistakes

Avoid these pitfalls when preparing your potato soup:

1. Overcooking the potatoes: They should be tender but not falling apart, unless you’re making a completely pureed soup.
2. Boiling after adding dairy: This can cause curdling or separation. Always keep the heat low after adding milk and cream.
3. Under-seasoning: Potatoes absorb a lot of salt, so taste and adjust seasonings at the end.
4. Rushing the base: Take time to properly cook the aromatics for a deeper flavor foundation.
5. Cutting potatoes unevenly: Inconsistent sizes lead to uneven cooking. Aim for uniform pieces.
6. Using the wrong potatoes: Waxy potatoes won’t break down enough to create that classic creamy texture.

Storing Tips

This potato soup recipe yields approximately 6-8 servings, making it perfect for leftovers:

Refrigeration: Store in an airtight container for up to 3-4 days
Freezing: For best results, freeze the base before adding dairy. When ready to eat, thaw overnight and add fresh dairy when reheating
Reheating: Warm gently on the stovetop over medium-low heat, stirring occasionally. Add a splash of milk if the soup seems too thick
Meal prep: This soup actually improves in flavor after a day in the refrigerator as the flavors meld

Conclusion

Mastering this potato soup recipe gives you more than just a delicious meal—it provides a foundation for countless variations you can explore throughout the seasons. The humble potato transforms into something truly spectacular when treated with care and combined with complementary ingredients.

Whether you’re serving it as a starter for a special dinner, as the main event on a cozy night in, or as meal prep for busy weekdays, this versatile soup delivers comfort and satisfaction in every spoonful. The beauty of homemade soup lies not just in its flavor but in the way it brings people together around the table, creating moments of connection and comfort.

As you become confident with this recipe, don’t be afraid to make it your own. Add different herbs, experiment with cheese varieties, or incorporate seasonal vegetables. The possibilities are endless, but the heart of this comforting classic—the perfect creamy potato base—will always remain a reliable culinary friend.

FAQs

Can I make this potato soup in a slow cooker?
Yes! Add all ingredients except dairy to your slow cooker and cook on low for 6-8 hours or high for 3-4 hours. In the last 30 minutes, stir in the dairy components and continue heating until warmed through.

How can I make my potato soup thicker?
For a thicker consistency, puree more of the soup, add an extra tablespoon of flour when making the roux, or simmer uncovered for longer to reduce the liquid.

Can I use leftover mashed potatoes in this soup?
Absolutely! Stir in 2-3 cups of mashed potatoes instead of raw diced potatoes. Reduce the cooking time accordingly since the potatoes are already cooked.

Is this soup gluten-free?
Not as written, due to the flour. Substitute the flour with cornstarch or a 1:1 gluten-free flour blend to make it suitable for those with gluten sensitivities.

Can I make this soup ahead for a party?
Yes, it’s an excellent make-ahead option. Prepare the soup up to the dairy addition, refrigerate for up to 2 days, then reheat and add the dairy components just before serving.