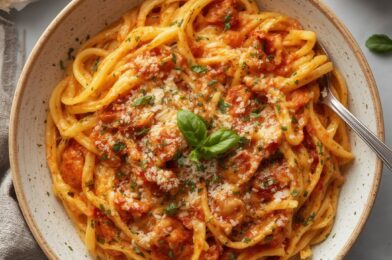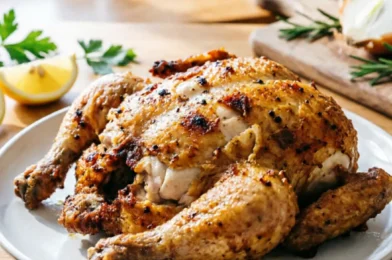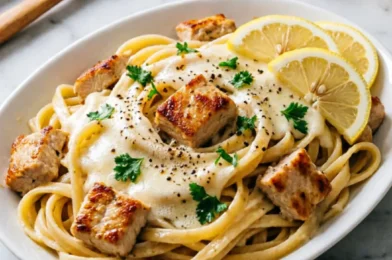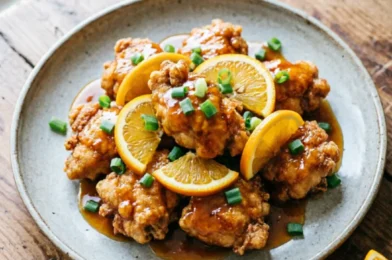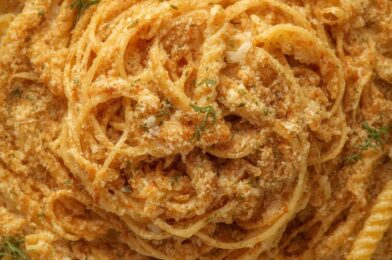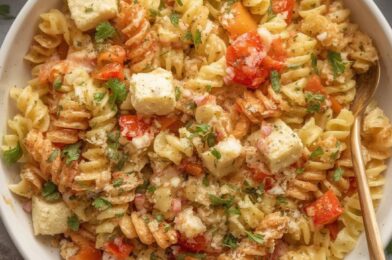
Delicious Pasta Salad Recipe for Every Occasion

Introduction

Creating the perfect pasta salad recipe is an art form that combines simple ingredients with creative flavor combinations. Whether you’re planning a summer picnic, need a quick lunch option, or preparing for a potluck dinner, a versatile cold pasta salad always delivers satisfaction. The beauty of pasta salad lies in its adaptability—you can customize it based on seasonal produce, dietary preferences, or whatever happens to be in your refrigerator. This classic dish strikes the perfect balance between hearty and refreshing, making it an ideal side dish or main course throughout the year. In this comprehensive guide, we’ll walk through everything you need to know to create a delicious pasta salad that will have everyone asking for your recipe.

Ingredients List

For the Base:

  • 16 oz (450g) pasta (rotini, farfalle, or penne work best)
  • 1 cup cherry tomatoes, halved
  • 1 medium cucumber, diced
  • 1 bell pepper (red, yellow, or orange), diced
  • ½ red onion, finely chopped
  • ½ cup black olives, sliced
  • ½ cup feta cheese, crumbled (optional)
  • ¼ cup fresh basil, chopped
  • ¼ cup fresh parsley, chopped

For the Dressing:

  • ⅓ cup extra virgin olive oil
  • 3 tablespoons red wine vinegar
  • 1 tablespoon lemon juice
  • 1 teaspoon Dijon mustard
  • 2 cloves garlic, minced
  • 1 teaspoon dried oregano
  • ½ teaspoon salt
  • ¼ teaspoon black pepper

Optional Add-ins:

  • Grilled chicken strips
  • Salami or pepperoni, diced
  • Artichoke hearts
  • Sun-dried tomatoes
  • Mozzarella pearls
  • Pine nuts or walnuts

Timing

Prep Time: 20 minutes
Cooking Time: 8-10 minutes
Cooling Time: 30 minutes
Total Time: 1 hour

Step-by-Step Instructions

1. Cook the pasta

  • Bring a large pot of water to a boil and add a generous amount of salt.
  • Add pasta and cook according to package instructions until al dente (typically 8-10 minutes).
  • Important: Don’t overcook the pasta as it will continue to absorb liquid from the dressing.
  • Drain thoroughly in a colander and rinse under cold water to stop the cooking process.

2. Prepare the vegetables

  • While the pasta cooks, chop all your vegetables to a uniform size.
  • For the best texture, aim for pieces that are small enough to fit on a fork with the pasta.
  • If using red onion, you can soak the chopped pieces in cold water for 5-10 minutes to reduce their sharpness.

3. Make the dressing

  • In a small bowl or jar, combine all dressing ingredients.
  • Whisk vigorously or shake (if using a jar with a lid) until well combined and emulsified.
  • Taste and adjust seasonings if needed.

4. Assemble the pasta salad

  • Place the cooled pasta in a large mixing bowl.
  • Add about half of the dressing and toss well.
  • Add all chopped vegetables, olives, and herbs to the bowl.
  • Pour the remaining dressing over the salad and toss everything together.
  • If using cheese or optional add-ins, gently fold them in now.

5. Chill before serving

  • Cover the pasta salad and refrigerate for at least 30 minutes.
  • This chilling time allows the flavors to meld together.
  • For the best taste, remove from the refrigerator about 15 minutes before serving.

Nutritional Information

The following nutritional information is approximate per serving (based on 8 servings) for the basic pasta salad recipe without optional add-ins:

  • Calories: 290
  • Carbohydrates: 40g
  • Protein: 8g
  • Fat: 12g
  • Saturated Fat: 2g
  • Sodium: 220mg
  • Fiber: 3g
  • Sugar: 3g

Note: These values will change depending on the specific ingredients used and any additional add-ins. Using whole wheat pasta will increase the fiber content, while adding proteins like chicken will increase the protein and calorie count.

Healthier Alternatives

Looking to make your cold pasta salad more nutritious? Try these healthier swaps and additions:

  • Pasta options: Substitute regular pasta with whole wheat, chickpea, lentil, or gluten-free pasta for added fiber and nutrients.
  • Increase the vegetables: Double the amount of vegetables to boost nutritional value and reduce the calorie density.
  • Lighter dressing: Use Greek yogurt as a base for a creamy dressing with less oil, or reduce the oil and increase the vinegar ratio.
  • Add protein: Incorporate legumes like chickpeas or white beans for plant-based protein.
  • Reduce cheese: Use a smaller amount of strongly flavored cheese like parmesan or feta instead of mild cheeses to maintain flavor while reducing calories.
  • Fresh herbs: Add more fresh herbs like dill, cilantro, or mint for flavor without additional calories.
  • Healthy fats: Include avocado or a small amount of nuts and seeds for healthy fats that help with nutrient absorption.

Serving Suggestions

The versatility of a good pasta salad recipe means it pairs well with numerous dishes:

  • Serve alongside grilled meats like chicken, steak, or fish
  • Offer as part of a buffet spread at parties or gatherings
  • Pack in lunch boxes with a side of fruit
  • Present on a bed of fresh greens for a more substantial meal
  • Pair with crusty bread and a light soup for a complete dinner
  • Bring to picnics or beach outings in a cooler
  • Serve at room temperature at outdoor summer barbecues

For an impressive presentation, consider serving your cold pasta salad in a large glass bowl to showcase the colorful ingredients, or in individual mason jars for a portable option.

Common Mistakes

Avoid these pitfalls when preparing your pasta salad:

1. Overcooking pasta: Always cook pasta al dente as it will continue to soften as it absorbs dressing.
2. Not cooling pasta properly: Hot pasta will continue cooking and can make vegetables wilt and cheese melt.
3. Under-seasoning: Cold dishes often need more seasoning than hot ones; taste and adjust accordingly.
4. Overdressing initially: Start with less dressing than you think you’ll need—you can always add more before serving.
5. Not allowing time for flavors to develop: Making pasta salad at the last minute won’t allow flavors to meld properly.
6. Using delicate vegetables too early: Add tender greens or soft herbs just before serving to prevent wilting.
7. Forgetting texture contrast: Include crunchy elements like nuts or crisp vegetables to balance the soft pasta.

Storing Tips

Proper storage ensures your pasta salad remains delicious for multiple days:

  • Store in an airtight container in the refrigerator for up to 3-4 days.
  • If preparing in advance, consider keeping some components separate—store dressing, delicate herbs, and crunchy elements separately and combine just before serving.
  • For meal prep purposes, portion into individual containers for grab-and-go lunches.
  • Before serving leftover pasta salad, give it a good stir and refresh with a splash of olive oil and vinegar or lemon juice.
  • If your pasta salad seems dry after refrigeration, this is normal as the pasta absorbs dressing over time—simply add a small amount of additional dressing.

Conclusion

Mastering a versatile pasta salad recipe is a valuable skill for any home cook. This endlessly adaptable dish provides a canvas for creativity while delivering satisfying meals with minimal effort. Whether you’re following our classic Mediterranean-inspired version or creating your own unique combination, the principles remain the same—quality ingredients, proper pasta cooking, balanced dressing, and thoughtful assembly. Cold pasta salad is more than just a side dish; it’s a celebration of flavors that can be customized to suit any season, occasion, or dietary preference. With the techniques and tips shared here, you’ll be able to confidently create pasta salads that impress friends and family while providing nutritious, delicious meals throughout the year.

FAQs

Can I make pasta salad ahead of time?
Yes, pasta salad actually improves when made 1-2 days ahead as it gives flavors time to develop. Just reserve some dressing to refresh it before serving.

How do I prevent my pasta salad from drying out?
Toss the pasta with a small amount of olive oil while it’s still warm, then add dressing while the pasta is still slightly warm to help it absorb the flavors without drying out.

What’s the best pasta shape for pasta salad?
Short, textured pasta shapes like rotini, farfalle (bow tie), fusilli, or penne work best because they hold dressing well and are easy to eat.

Is pasta salad healthy?
It can be! Increase vegetables, use whole grain pasta, add lean proteins, and make a lighter dressing for a more nutritious version.

How long can pasta salad sit out at room temperature?
For food safety, don’t leave pasta salad at room temperature for more than 2 hours, or 1 hour if the temperature is above 90°F (32°C).

Can I freeze pasta salad?
Freezing is not recommended as the texture of the pasta and vegetables will deteriorate upon thawing, resulting in a mushy salad.

How do I fix a bland pasta salad?
Add more acid (vinegar or lemon juice), salt, fresh herbs, or a sprinkle of parmesan cheese. Sometimes a pinch of red pepper flakes can also wake up flavors.

What can I add to make my pasta salad more filling?
Add proteins like grilled chicken, tuna, hard-boiled eggs, chickpeas, or cheese to make your pasta salad more substantial as a main dish.
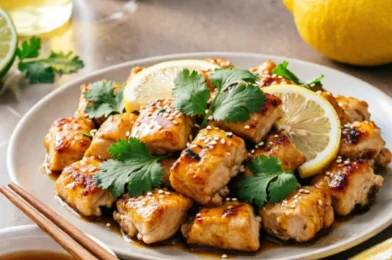
Delicious Lemon Chicken Recipe for Quick Family Dinners

Introduction

The perfect lemon chicken recipe combines the bright, zesty flavor of fresh lemons with succulent, tender chicken to create a dish that’s both refreshing and satisfying. This classic combination has stood the test of time, appearing on dinner tables around the world for generations. Whether you’re looking for a quick weeknight meal or an impressive dish for entertaining guests, this garlic lemon chicken recipe delivers exceptional flavor with minimal effort. The tangy citrus notes cut through the richness of the chicken, creating a balanced dish that awakens the palate while providing comforting familiarity. As a bonus, this recipe uses simple ingredients you likely already have in your pantry, making it an accessible option even when you haven’t planned ahead for dinner. Let’s explore how to create this delicious meal that’s sure to become a regular in your cooking rotation.

Ingredients List

For this classic lemon chicken recipe, you’ll need:

For the chicken:

  • 4 boneless, skinless chicken breasts (about 2 pounds)
  • 2 tablespoons olive oil
  • Salt and freshly ground black pepper
  • 2 tablespoons all-purpose flour (optional, for dredging)

For the lemon garlic sauce:

  • 4 tablespoons butter
  • 6 cloves garlic, minced
  • 1 cup chicken broth
  • 2 lemons (juice and zest)
  • 1 teaspoon dried oregano
  • 1 teaspoon dried thyme
  • 2 tablespoons fresh parsley, chopped
  • 1 tablespoon honey or sugar (optional, to balance acidity)

Optional garnishes:

  • Lemon slices
  • Additional fresh parsley
  • Capers (2 tablespoons)
  • Red pepper flakes (for heat)

The beauty of this garlic lemon chicken recipe lies in its simplicity. Each ingredient plays an important role: the garlic provides depth, the lemon delivers brightness, and the herbs add complexity. For those who prefer a creamier version, consider adding 1/4 cup of heavy cream to the sauce at the final stage of cooking.

Timing

Preparation time: 15 minutes
Cooking time: 25-30 minutes
Total time: 40-45 minutes

This lemon chicken recipe is perfect for busy weeknights when time is limited but you still want something delicious. The prep work is minimal—just slicing lemons, mincing garlic, and preparing the chicken. Most of the cooking time is hands-off, allowing you to prepare side dishes or set the table while the chicken cooks to perfection.

Step-by-Step Instructions

1. Prepare the chicken
* Pat the chicken breasts dry with paper towels.
* If the breasts are very thick, pound them to even thickness (about 1/2 inch) using a meat mallet or heavy pan.
* Season both sides generously with salt and pepper.
* Optional: lightly dredge in flour for a more golden exterior.

2. Cook the chicken
* Heat olive oil in a large skillet over medium-high heat.
* Once hot, add the chicken breasts and cook for 5-6 minutes per side until golden brown and cooked through (internal temperature should reach 165°F or 74°C).
* Remove chicken to a plate and cover loosely with foil to keep warm.

3. Prepare the lemon garlic sauce
* In the same skillet, reduce heat to medium and add butter.
* Once melted, add minced garlic and sauté for 30-60 seconds until fragrant but not browned.
* Pour in chicken broth, lemon juice, and lemon zest, then add dried oregano and thyme.
* Bring the sauce to a simmer and cook for 5 minutes, allowing it to reduce slightly.
* If using, add honey or sugar to balance the acidity.

4. Combine and finish
* Return the chicken to the skillet, spooning the sauce over the top.
* Simmer gently for 2-3 minutes to reheat the chicken and allow flavors to meld.
* Sprinkle with fresh parsley before serving.

For an extra-special presentation, garnish with thin lemon slices warmed in the sauce during the final minute of cooking.

Nutritional Information

Per serving (based on 4 servings):

  • Calories: 350
  • Protein: 35g
  • Carbohydrates: 8g
  • Fat: 19g
  • Fiber: 1g
  • Sugar: 3g
  • Sodium: 480mg

This lemon chicken recipe is relatively low in carbohydrates and high in protein, making it a good option for those following higher-protein diets. The primary sources of fat come from the olive oil and butter, which contain heart-healthy monounsaturated fats along with saturated fats.

Healthier Alternatives

To make this garlic lemon chicken recipe even more nutritious:

  • Reduce butter: Cut the butter amount in half and increase the olive oil slightly for a healthier fat profile.
  • Skip the flour: Eliminate the flour dredging step to reduce carbohydrates and make the dish gluten-free.
  • Use chicken thighs: Substitute skinless, boneless chicken thighs which contain more iron and zinc than breast meat.
  • Add vegetables: Enhance nutrition by adding 2 cups of baby spinach, asparagus, or broccoli to the skillet during the final few minutes of cooking.
  • Use low-sodium broth: Reduce the sodium content by selecting a low-sodium or homemade chicken broth.

These modifications maintain the delicious lemon-garlic flavor profile while increasing the nutritional value of your meal.

Serving Suggestions

This versatile lemon chicken recipe pairs beautifully with numerous side dishes:

Starchy sides:

  • Roasted garlic mashed potatoes
  • Lemon herb rice pilaf
  • Crusty bread for soaking up the delicious sauce
  • Orzo pasta tossed with a little olive oil and parmesan

Vegetable companions:

  • Steamed asparagus or green beans
  • Roasted Mediterranean vegetables (zucchini, bell peppers, eggplant)
  • Simple green salad with a light vinaigrette
  • Sautéed spinach with garlic

For a complete Mediterranean-inspired meal, serve this garlic lemon chicken recipe with a side of Greek salad and roasted potatoes seasoned with oregano and lemon zest. The bright flavors complement each other beautifully and create a cohesive dining experience.

Common Mistakes

Even simple recipes can go awry. Here are some pitfalls to avoid when preparing this lemon chicken recipe:

1. Overcooking the chicken: This is perhaps the most common mistake. Chicken breasts quickly go from juicy to dry when overcooked. Use a meat thermometer to ensure they reach 165°F but not much higher.

2. Not reducing the sauce enough: A watery sauce lacks flavor intensity. Take the time to let it simmer and reduce properly.

3. Burning the garlic: Garlic can go from perfectly golden to bitter and burnt in seconds. Watch it carefully and keep the heat moderate.

4. Using bottled lemon juice: The flavor profile of fresh lemons is significantly better than bottled juice, which often has a more artificial taste.

5. Skipping the zest: Lemon zest contains essential oils that provide intense citrus flavor. Omitting it diminishes the lemon profile considerably.

6. Not balancing the acidity: Some lemons are particularly tart. Don’t be afraid to add a touch of honey or sugar if needed to balance the flavors.

Storing Tips

This garlic lemon chicken recipe creates leftovers that store beautifully:

Refrigeration:

  • Store cooled leftovers in an airtight container for up to 3 days.
  • Keep the chicken submerged in the sauce to maintain moisture during storage.

Freezing:

  • This dish can be frozen for up to 3 months.
  • Freeze in individual portions for easy single-serving meals.
  • Allow extra sauce in each container as some will absorb into the chicken.

Reheating:

  • Thaw overnight in the refrigerator if frozen.
  • Reheat gently in a covered skillet over medium-low heat with a splash of chicken broth.
  • Alternatively, microwave at 70% power, covered, to prevent the chicken from drying out.
  • Add a fresh squeeze of lemon juice and sprinkle of herbs after reheating to brighten the flavors.

Conclusion

This lemon chicken recipe represents the perfect balance of simplicity and flavor. With just a handful of everyday ingredients, you can create a restaurant-quality meal that satisfies both weeknight cravings and special occasions. The bright acidity of lemon perfectly complements the savory garlic and herbs, creating a sauce that transforms ordinary chicken into something truly memorable. Whether you’re a novice cook or a seasoned chef, this versatile dish deserves a place in your regular rotation. The techniques used here—searing meat properly, creating a pan sauce, and balancing flavors—are fundamental cooking skills that will serve you well beyond this single recipe. So the next time you’re wondering what to make for dinner, remember this garlic lemon chicken recipe that combines accessibility with gourmet results.

FAQs

Can I use chicken thighs instead of breasts?
Yes! Boneless, skinless chicken thighs work wonderfully in this lemon chicken recipe. They’re more forgiving and often more flavorful, though they may require a slightly longer cooking time.

How do I know when the chicken is done cooking?
The safest method is using a meat thermometer to ensure the internal temperature reaches 165°F (74°C). Alternatively, cut into the thickest part—the meat should be opaque with no pink remaining.

Can I make this garlic lemon chicken recipe without garlic?
While garlic adds significant flavor, you can omit it if necessary. Consider adding extra herbs like rosemary or tarragon to compensate for the missing depth.

Is this recipe gluten-free?
If you skip the flour dredging step, this recipe is naturally gluten-free. Just ensure your chicken broth is also gluten-free (many commercial brands are).

Can I make this ahead for a dinner party?
Yes! Prepare the dish up to the point of combining the chicken with the sauce. Refrigerate separately, then reheat the sauce, add the chicken, and finish the dish just before serving.

What’s the best type of lemon to use?
Meyer lemons offer a sweeter, less acidic profile, making them excellent for this dish. However, regular Eureka or Lisbon lemons work perfectly well and are more commonly available.

Can I add wine to the sauce?
Absolutely! Replace half the chicken broth with a dry white wine like Sauvignon Blanc or Pinot Grigio for an even more complex flavor profile in your garlic lemon chicken recipe.

Delicious Lasagna Soup Recipe for Cozy Nights

Introduction

Craving the rich flavors of traditional lasagna but don’t have hours to spend layering pasta, sauce, and cheese? This lasagna soup recipe transforms the classic Italian comfort food into a delicious, hearty soup that delivers all the familiar tastes in a fraction of the time. Perfect for busy weeknights or chilly evenings, this one pot lasagna soup combines savory ground meat, aromatic herbs, tangy tomatoes, and creamy cheese in a soul-warming broth that’s sure to become a family favorite. The beauty of this dish lies in its simplicity—everything cooks together in a single pot, meaning less cleanup and more time to enjoy your meal. Whether you’re feeding a hungry crowd or meal-prepping for the week ahead, this adaptable recipe offers the perfect balance of convenience and comfort.

Ingredients List

For the Soup Base:
– 1 tablespoon olive oil
– 1 pound ground beef (or Italian sausage for extra flavor)
– 1 medium onion, diced
– 3 garlic cloves, minced
– 1 red bell pepper, diced
– 2 tablespoons tomato paste
– 1 teaspoon dried oregano
– 1 teaspoon dried basil
– 1/2 teaspoon dried thyme
– 1/4 teaspoon red pepper flakes (optional)
– 1 can (28 oz) crushed tomatoes
– 6 cups chicken or beef broth
– 2 tablespoons balsamic vinegar
– 1 tablespoon brown sugar
– 2 bay leaves
– 8 oz lasagna noodles, broken into pieces (about 10 noodles)
– Salt and black pepper to taste

For the Cheese Mixture:
– 1 cup ricotta cheese
– 1/2 cup grated Parmesan cheese
– 1 cup shredded mozzarella cheese
– 2 tablespoons fresh basil, chopped (plus extra for garnish)
– 1/4 teaspoon salt

Timing

Prep Time: 15 minutes
Cook Time: 30 minutes
Total Time: 45 minutes
Servings: 6-8 portions

Step-by-Step Instructions

1. Prepare the Base

Begin by heating olive oil in a large Dutch oven or pot over medium-high heat. Add the ground beef and cook until browned, about 5-7 minutes, breaking it apart with a wooden spoon as it cooks. If using Italian sausage, remove it from casings before browning.

2. Add Aromatics

Add the diced onion to the pot and sauté for 3-4 minutes until softened. Add the minced garlic and diced bell pepper, cooking for another 2 minutes until fragrant. Stir in the tomato paste and cook for 1-2 minutes to develop a deeper flavor.

3. Season the Mixture

Sprinkle in the dried oregano, basil, thyme, and red pepper flakes (if using). Cook for 30 seconds to release their aromas. Season with salt and black pepper to taste.

4. Create the Soup Base

Pour in the crushed tomatoes, broth, balsamic vinegar, and brown sugar. Add the bay leaves and stir to combine all ingredients thoroughly. Bring the mixture to a boil.

5. Cook the Pasta

Once boiling, add the broken lasagna noodle pieces to the pot. Reduce heat to medium-low and simmer, partially covered, for about 10-12 minutes, or until the pasta is tender. Stir occasionally to prevent the noodles from sticking together.

6. Prepare the Cheese Mixture

While the soup simmers, combine the ricotta, half of the Parmesan, half of the mozzarella, chopped fresh basil, and salt in a small bowl. Mix well and set aside.

7. Finishing Touches

Remove the bay leaves from the soup. Taste and adjust seasonings as needed. If the soup seems too thick, add a bit more broth to reach your desired consistency.

8. Serve

Ladle the hot soup into bowls. Top each serving with a generous dollop of the cheese mixture, then sprinkle with the remaining mozzarella and Parmesan cheese. Garnish with additional fresh basil if desired.

9. Optional Melt

For an authentic lasagna-like experience, place the bowls under the broiler for 1-2 minutes to melt the cheese on top (use broiler-safe bowls).

Nutritional Information

Per serving (based on 6 servings):
Calories: Approximately 450
Protein: 28g
Carbohydrates: 40g
Fat: 20g
Fiber: 4g
Sugar: 8g
Sodium: 850mg

Note: Nutritional values may vary based on specific ingredients and portion sizes used.

Healthier Alternatives

Make this lasagna soup recipe fit your dietary needs with these simple substitutions:

Lighter Version: Use lean ground turkey or chicken instead of beef to reduce fat content.
Lower Carb Option: Substitute the lasagna noodles with zucchini ribbons or reduce the amount of pasta by half.
Vegetarian Variation: Replace meat with a plant-based ground substitute or use 2 cups of chopped mushrooms and 1 can of white beans.
Gluten-Free Adaptation: Use gluten-free lasagna noodles or substitute with rice.
Dairy-Free Alternative: Replace the cheese mixture with dairy-free versions of ricotta and mozzarella, available at most grocery stores.
Lower Sodium: Use low-sodium broth and reduce added salt.

Serving Suggestions

Elevate your one pot lasagna soup experience with these complementary sides and garnishes:

Classic Pairing: Serve with a slice of garlic bread or breadsticks for dipping.
Lighter Side: Accompany with a crisp green salad dressed with a simple vinaigrette.
Extra Garnishes: Offer additional toppings like fresh basil, red pepper flakes, or a drizzle of extra virgin olive oil.
Wine Pairing: A medium-bodied Italian red wine like Chianti or Sangiovese complements the flavors beautifully.
Family Style: Place the pot in the center of the table with the cheese mixture and garnishes on the side, allowing everyone to customize their bowl.
Bread Bowl Option: For an impressive presentation, serve the soup in hollowed-out sourdough bread bowls.

Common Mistakes

Avoid these pitfalls when preparing your lasagna soup:

Overcooking the Pasta: Add the noodles at the right time to prevent them from becoming mushy. If making ahead, consider cooking and storing the pasta separately.
Scorching the Bottom: Stir occasionally, especially after adding the pasta, to prevent ingredients from sticking to the pot.
Seasoning Issues: Taste and adjust seasoning before serving. The pasta will absorb some of the saltiness as it cooks.
Too Thick or Thin: The soup should have a consistency between a traditional soup and a pasta dish. Add more broth if too thick or simmer longer if too thin.
Rushing the Process: Allow time for flavors to develop, especially when browning the meat and sautéing the aromatics.
Skipping the Cheese Mixture: This component is what gives the soup its authentic lasagna character, so don’t omit it.

Storing Tips

This one pot lasagna soup keeps well, making it perfect for meal prep:

Refrigeration: Store leftover soup in airtight containers for up to 4 days. The flavors often improve overnight as they meld together.
Freezing: For longer storage, freeze the soup without the pasta and cheese mixture for up to 3 months. Cook fresh pasta when reheating and add the cheese mixture before serving.
Pasta Separation: If planning leftovers, consider storing cooked pasta separately from the soup to prevent it from absorbing too much liquid and becoming soggy.
Reheating: Warm gently on the stovetop over medium-low heat, stirring occasionally. Add a splash of broth if needed to reach desired consistency.
Individual Portions: Freeze in single-serving containers for quick weeknight meals.
Cheese Storage: Store unused cheese mixture separately and bring to room temperature before topping reheated soup.

Conclusion

This lasagna soup recipe delivers all the comforting flavors of traditional layered lasagna in a convenient, soul-warming bowl. The beauty of this one pot wonder lies not only in its simplified preparation and cleanup but also in its versatility—easily adapted to different dietary needs while maintaining its rich, authentic taste. Whether you’re looking for a quick weeknight dinner solution, meal prep for busy days ahead, or a crowd-pleasing dish for casual entertaining, this recipe checks all the boxes. The combination of tender pasta, savory meat, tangy tomatoes, and creamy cheese creates a balanced, satisfying meal that will have everyone coming back for seconds. Give this lasagna soup a try the next time you’re craving comfort food without the fuss of traditional lasagna preparation—your taste buds and schedule will thank you.

FAQs

Can I make this lasagna soup in a slow cooker?
Yes! Brown the meat, onions, and garlic first, then transfer to a slow cooker with the remaining ingredients except pasta and cheese. Cook on low for 6-7 hours or high for 3-4 hours. Add broken lasagna noodles during the last 30 minutes of cooking.

How can I make this soup spicier?
Increase the red pepper flakes to 1/2 teaspoon or add a diced jalapeño with the bell pepper. You could also use spicy Italian sausage instead of ground beef.

Can I use different pasta shapes instead of lasagna noodles?
Absolutely! While lasagna noodles provide the authentic feel, any short pasta like rotini, farfalle, or campanelle works well. Adjust cooking time according to package instructions.

Is there a way to make this soup ahead for a party?
Prepare the soup base without the pasta and refrigerate for 1-2 days. When ready to serve, reheat the soup, add the pasta, and cook until tender. Prepare the cheese mixture fresh before serving.

What can I do if my soup is too acidic?
Add an additional tablespoon of brown sugar or a teaspoon of baking soda to neutralize acidity. Always add in small increments and taste between additions.

Can I use no-boil lasagna noodles in this recipe?
Yes, but they may absorb more liquid. Have extra broth on hand to adjust the consistency as needed, and reduce the simmering time slightly.

Delicious Pasta Recipes for Every Taste Bud

Introduction

Exploring the world of pasta recipes is like embarking on a delicious journey through Italian culinary traditions. From the rolling hills of Tuscany to the coastal villages of Sicily, Italian pasta dishes have been perfected over centuries, offering an incredible variety of flavors, textures, and cooking techniques. This classic Spaghetti Carbonara recipe captures the essence of authentic Italian cooking—simple ingredients transformed into something extraordinary. Whether you’re a seasoned home chef or just beginning your culinary adventures, this dish delivers restaurant-quality results with minimal effort. The combination of crispy pancetta, creamy eggs, sharp cheese, and perfectly al dente pasta creates a harmonious balance that has made this dish a staple on dinner tables worldwide. Let’s dive into this timeless recipe that showcases why pasta remains one of the most beloved and versatile foundations for countless memorable meals.

Ingredients List

For this classic carbonara (serves 4), you’ll need:

• 1 pound (454g) spaghetti
• 8 ounces (225g) pancetta or guanciale, diced
• 4 large eggs, room temperature
• 1 cup (100g) freshly grated Pecorino Romano cheese
• ½ cup (50g) freshly grated Parmigiano Reggiano cheese
• 2 cloves garlic, minced (optional)
• 1 tablespoon olive oil
• Freshly ground black pepper (generous amount)
• Salt for pasta water
• Fresh parsley, chopped (for garnish)

Chef’s Note: While many modern Italian pasta dishes include garlic in carbonara, purists might skip it. This recipe includes it as an optional ingredient, allowing you to decide based on your preference.

Timing

• Prep time: 15 minutes
• Cook time: 15 minutes
• Total time: 30 minutes

This quick-cooking time makes carbonara one of the most weeknight-friendly pasta recipes in any home cook’s repertoire. The efficiency-to-satisfaction ratio is unmatched among Italian pasta dishes!

Step-by-Step Instructions

1. Prepare the cheese and egg mixture:
– In a medium bowl, whisk together the eggs until well combined.
– Add the grated Pecorino Romano and Parmigiano Reggiano cheeses to the eggs.
– Add a generous amount of freshly ground black pepper (this is the “carbone” or “coal” that gives carbonara its name).
– Whisk until thoroughly combined, then set aside.

2. Cook the pasta:
– Bring a large pot of water to a rolling boil.
– Add salt generously (the water should taste like the sea).
– Add the spaghetti and cook according to package instructions until al dente (typically 8-10 minutes).
– Before draining, reserve 1 cup of the starchy pasta cooking water.

3. Prepare the pancetta:
– While the pasta cooks, heat olive oil in a large skillet over medium heat.
– If using, add the minced garlic and sauté for 30 seconds until fragrant.
– Add the diced pancetta or guanciale and cook until crisp and the fat has rendered, about 5-7 minutes.
– Remove from heat and set aside, keeping the rendered fat in the pan.

4. Combine and create the sauce:
– Drain the cooked pasta and immediately add it to the skillet with the pancetta.
– Working quickly, toss the pasta in the rendered fat to coat evenly.
– Allow the pasta to cool for about 30 seconds (this prevents the eggs from scrambling).
– Pour the egg and cheese mixture over the pasta while continuously tossing or stirring.
– Add splashes of the reserved pasta water as needed to create a smooth, silky sauce that coats each strand of pasta.

5. Finish and serve:
– The residual heat from the pasta will cook the eggs just enough to create a creamy sauce.
– Serve immediately, garnished with additional grated cheese, black pepper, and chopped parsley.

Pro Tip: The key to perfect carbonara lies in the timing of adding the egg mixture. The pasta should be hot enough to cook the eggs slightly but not so hot that they scramble. Continuous tossing is crucial to achieving that signature silky texture that makes this one of the most beloved pasta recipes worldwide.

Nutritional Information

Per serving (approximate values):

• Calories: 750
• Protein: 35g
• Carbohydrates: 75g
• Fat: 35g
• Saturated Fat: 14g
• Cholesterol: 240mg
• Sodium: 900mg
• Fiber: 3g

This traditional dish is calorie-dense due to the eggs, cheese, and pancetta, but can be enjoyed as part of a balanced diet when paired with lighter sides like a fresh salad.

Healthier Alternatives

While authentic carbonara is inherently rich, you can make adjustments to create a lighter version:

Protein adjustment: Substitute pancetta with turkey bacon or even mushrooms for a meat-free alternative.

Pasta selection: Use whole wheat or legume-based pasta for additional fiber and nutrients. These alternative pasta recipes still work beautifully with the carbonara technique.

Egg modification: Use 2 whole eggs and 2 egg whites instead of 4 whole eggs to reduce cholesterol.

Cheese considerations: Reduce the cheese quantities by about 25% and choose a well-aged cheese that has a stronger flavor, allowing you to use less without sacrificing taste.

Portion control: Serve smaller portions as a first course (primo piatto) in the traditional Italian style, followed by a protein and vegetable course.

Balance Perspective: While these modifications create a lighter dish, they do move away from the traditional recipe. Many Italian pasta dishes are meant to be enjoyed in their authentic form as occasional treats rather than significantly altered.

Serving Suggestions

Carbonara shines when properly paired with complementary dishes and beverages:

Wine pairing: A crisp white wine like Frascati or Pinot Grigio balances the richness of the dish perfectly. For red wine lovers, a light-bodied Chianti works wonderfully.

Side dishes: A simple arugula salad with lemon vinaigrette offers a refreshing contrast to the creamy pasta.

Starter options: Begin with light antipasti such as marinated vegetables or a small caprese salad.

Bread considerations: While tempting, heavy garlic bread might overwhelm the delicate flavors of the carbonara. Instead, offer a light, crusty Italian bread for sopping up any remaining sauce.

Complete meal structure: For a full Italian dining experience, serve smaller portions of pasta followed by a simple protein like grilled chicken or fish with seasonal vegetables.

Common Mistakes

Even experienced cooks sometimes struggle with carbonara. Here are pitfalls to avoid:

1. Scrambling the eggs: Adding the egg mixture to pasta that’s too hot results in carbonara’s most common failure. Allow the pasta to cool slightly and keep tossing continuously.

2. Using pre-grated cheese: Pre-packaged grated cheese contains anti-caking agents that prevent proper melting. Always grate your cheese fresh for authentic Italian pasta dishes.

3. Adding cream: Traditional carbonara contains no cream. The creamy texture comes solely from the eggs and cheese combined with starchy pasta water.

4. Overcooking the pasta: Perfectly al dente pasta is essential, as it will continue cooking slightly when tossed with the hot pancetta and fat.

5. Not using enough pepper: The “carbone” in carbonara refers to the generous amount of black pepper that gives the dish its distinctive flavor and appearance.

6. Using bacon instead of pancetta/guanciale: While possible in a pinch, regular bacon is often smoky, which changes the dish’s flavor profile significantly.

Storing Tips

While carbonara is best enjoyed immediately after preparation, here are some storage guidelines:

Refrigeration: If you must store leftovers, place in an airtight container in the refrigerator for up to 2 days.

Reheating method: To reheat, place in a skillet over low heat with a splash of water, tossing gently until just warmed through. Avoid microwave reheating, which tends to make the eggs rubbery.

Freezing: Not recommended. The egg-based sauce will separate and lose its creamy texture upon thawing.

Advance preparation: If planning ahead, you can pre-cook the pancetta and grate the cheese in advance, but the final dish should be assembled just before serving.

Conclusion

Carbonara represents the beautiful simplicity found in many classic Italian pasta dishes. With just a handful of quality ingredients and proper technique, you can create a restaurant-worthy meal that’s simultaneously sophisticated and comforting. The magic happens in that perfect moment when hot pasta, eggs, cheese, and pancetta come together to create something far greater than the sum of its parts. By understanding the principles behind this dish, you’ll not only master carbonara but gain insights that transfer to countless other pasta recipes. Remember that Italian cooking is about respecting ingredients and tradition while allowing your own touch to shine through. Whether you’re preparing a romantic dinner for two or a family meal, this timeless carbonara recipe promises to deliver satisfaction and perhaps become your new go-to dish when you’re craving something special yet achievable on even the busiest weeknights.

FAQs

Can I make carbonara with a different type of pasta?
Yes! While spaghetti is traditional, you can use other long pasta like fettuccine or linguine. Short pasta like rigatoni or penne also works well, as the tubular shape captures the sauce nicely.

Is it safe to eat a sauce made with raw eggs?
The heat from the pasta partially cooks the eggs, but they remain somewhat undercooked. Use the freshest, highest-quality eggs possible. If concerned, pasteurized eggs can be used as an alternative.

Why did my sauce turn lumpy?
This happens when the eggs cook too quickly and begin to scramble. To prevent this, temporarily remove the pan from heat when adding the egg mixture and keep the pasta moving constantly.

Can I make a vegetarian version of carbonara?
Yes! Try substituting the pancetta with sautéed mushrooms, which provide a similar umami flavor and meaty texture. Smoked sun-dried tomatoes can also add depth.

What’s the difference between pancetta and guanciale?
Both are Italian cured pork products, but guanciale is made from pork jowl or cheek, while pancetta comes from pork belly. Guanciale has a more intense flavor and is traditional in authentic carbonara.

Crispy Fried Chicken Recipe for the Perfect Dinner

Introduction

Achieving the perfect balance of crispy exterior and juicy interior is the holy grail when making fried chicken at home. This classic comfort food has deep roots in Southern American cuisine but has evolved into countless variations worldwide. Whether you’re a novice in the kitchen or an experienced home cook looking to refine your technique, this fried chicken recipe delivers consistently delicious results. The secret lies in the proper preparation, seasoning, and cooking method. We’ll walk through each step meticulously, ensuring your chicken turns out golden brown and irresistibly crunchy every time. From the initial brining process to the final temperature check, this guide covers all the essential elements needed to create restaurant-quality fried chicken in your own kitchen.

Ingredients List

For the Brine:

  • 4 cups buttermilk
  • 2 tablespoons kosher salt
  • 1 tablespoon black pepper
  • 2 teaspoons garlic powder
  • 1 teaspoon paprika
  • 3 pounds chicken pieces (mix of thighs, drumsticks, breasts, and wings)

For the Coating:

  • 3 cups all-purpose flour
  • 1 cup cornstarch
  • 1 tablespoon baking powder
  • 2 tablespoons kosher salt
  • 2 teaspoons black pepper
  • 2 teaspoons garlic powder
  • 2 teaspoons onion powder
  • 1 teaspoon paprika
  • 1 teaspoon cayenne pepper (adjust to taste)
  • 1 teaspoon dried herbs (thyme, oregano, or a blend)

For Frying:

  • 2 quarts vegetable oil, peanut oil, or lard for frying
  • 2 eggs, beaten
  • 1/4 cup water

Timing

Total Time: 3 hours 30 minutes

  • Prep Time: 30 minutes
  • Brining Time: 2 hours (or overnight for best results)
  • Coating Time: 15 minutes
  • Cooking Time: 25-30 minutes
  • Resting Time: 10-15 minutes

Step-by-Step Instructions

1. Prepare the Brine

Start by combining the buttermilk, salt, black pepper, garlic powder, and paprika in a large bowl. Whisk thoroughly until all seasonings are fully incorporated. The buttermilk serves two important purposes: its acidity tenderizes the chicken while the fat content helps lock in moisture during cooking.

2. Brine the Chicken

Submerge all chicken pieces in the buttermilk mixture, ensuring each piece is fully coated. Cover the bowl with plastic wrap and refrigerate for at least 2 hours. For optimal flavor and tenderness, brine overnight (up to 24 hours).

3. Prepare the Coating

In a large shallow dish, combine all the dry coating ingredients: flour, cornstarch, baking powder, salt, pepper, garlic powder, onion powder, paprika, cayenne, and dried herbs. The cornstarch is crucial for achieving that extra crispy texture, while baking powder helps create a light, airy crust.

4. Set Up Your Dredging Station

Create an efficient workflow by arranging your dredging station in this order:

  • Brined chicken (drain excess buttermilk)
  • A small bowl with beaten eggs mixed with water
  • The seasoned flour mixture
  • A wire rack placed over a baking sheet

5. Heat the Oil

Pour oil into a large, heavy-bottomed pot or deep cast-iron skillet until it reaches about 2-3 inches deep. Heat to 350°F (175°C). Use a candy or deep-fry thermometer to monitor the temperature accurately.

6. Coat the Chicken

Working with one piece at a time:

  • Remove chicken from the brine, allowing excess to drip off
  • Dip in the egg wash
  • Dredge thoroughly in the flour mixture, pressing firmly to ensure coating adheres
  • Shake off excess flour and place on the wire rack
  • Allow the coated pieces to rest for 5-10 minutes (this helps the coating adhere better)

7. Fry the Chicken

Carefully lower 3-4 pieces into the hot oil (don’t overcrowd). The oil temperature will drop slightly – aim to maintain around 325°F (165°C) during frying. Cook times vary by piece:

  • Wings: 8-10 minutes
  • Thighs and drumsticks: 12-14 minutes
  • Breasts: 15-18 minutes

Turn pieces occasionally for even browning. The chicken is done when it reaches an internal temperature of 165°F (74°C) and has a golden-brown exterior.

8. Drain and Rest

Transfer cooked pieces to a clean wire rack set over a baking sheet (not paper towels, which can make the coating soggy). Allow to rest for 10-15 minutes before serving. This resting period allows juices to redistribute throughout the meat.

Nutritional Information

Per serving (based on 1 piece of mixed chicken):

  • Calories: 390-450 (varies by piece)
  • Protein: 25-30g
  • Fat: 20-25g
  • Saturated Fat: 5-7g
  • Carbohydrates: 20-25g
  • Fiber: 1g
  • Sodium: 600-700mg
  • Sugar: 2g

Note: Nutritional values are approximate and will vary based on specific chicken pieces, exact ingredients used, and portion sizes.

Healthier Alternatives

While traditional fried chicken is an indulgence, there are several ways to create a healthier version:

  • Air Fryer Method: Use an air fryer at 400°F (200°C) for 20-25 minutes, spraying the coated chicken with a light coating of oil spray before cooking.
  • Oven-Baked Option: Bake at 425°F (220°C) on a wire rack for 35-40 minutes until crispy.
  • Coating Substitutions:

– Replace half the all-purpose flour with almond flour or chickpea flour
– Use panko breadcrumbs for extra crunch with less absorption of oil

  • Oil Alternatives: Consider using avocado oil, which has a high smoke point and healthier fat profile.
  • Skinless Chicken: Remove the skin before brining for a significantly lower fat content.

Serving Suggestions

Elevate your crispy fried chicken with these complementary sides and pairings:

  • Classic Southern Sides:

– Buttermilk biscuits with honey butter
– Creamy mashed potatoes with gravy
– Collard greens or braised kale
– Mac and cheese
– Corn on the cob

  • Fresh Accompaniments:

– Coleslaw with vinegar dressing
– Dill pickle spears
– Sliced tomatoes with salt and pepper
– Green salad with buttermilk ranch dressing

  • Sauces for Dipping:

– Honey-sriracha sauce
– Alabama white BBQ sauce
– Buffalo sauce with blue cheese
– Maple-dijon glaze

  • Beverage Pairings:

– Sweet tea or lemonade
– Craft beer (particularly IPA or wheat beer)
– Sparkling wine or champagne (the acidity cuts through the richness)

Common Mistakes

Avoid these pitfalls to ensure your fried chicken recipe turns out perfectly:

1. Oil Temperature Issues:
– Too hot: burns the exterior before the interior cooks
– Too cool: results in greasy, soggy chicken
– Solution: Use a thermometer and maintain 325-350°F (165-175°C)

2. Overcrowding the Pan:
– Causes oil temperature to drop dramatically
– Results in uneven cooking and soggy coating
– Solution: Fry in small batches, allowing ample space between pieces

3. Insufficient Seasoning:
– Bland chicken despite the crispy exterior
– Solution: Season both the brine and the flour mixture generously

4. Skipping the Rest Time:
– Causes coating to fall off when cutting into the chicken
– Results in loss of juices
– Solution: Allow 10-15 minutes resting time after frying

5. Inconsistent Piece Sizes:
– Some pieces overcook while others remain undercooked
– Solution: Cut larger pieces (especially breasts) into smaller, uniform portions

Storing Tips

Properly storing leftover fried chicken preserves both flavor and texture:

  • Immediate Storage: Allow chicken to cool completely before refrigerating (within 2 hours of cooking).
  • Refrigeration:

– Place in shallow airtight containers
– Alternately, wrap tightly in heavy-duty aluminum foil
– Store for up to 3-4 days

  • Freezing:

– Wrap individual pieces in foil, then place in freezer bags
– Remove as much air as possible
– Label with date
– Freeze for up to 4 months

  • Reheating Methods:

– Oven (preferred): 375°F (190°C) for 15-20 minutes on a wire rack
– Air fryer: 375°F (190°C) for 4-5 minutes
– Microwave (least desirable): 30-second intervals at 70% power
– Avoid reheating more than once

Conclusion

Mastering this fried chicken recipe opens the door to endless culinary possibilities. The techniques you’ve learned—brining, proper dredging, temperature control—apply to many other dishes beyond fried chicken. While achieving that perfect golden crust might take practice, the results are well worth the effort. Remember that regional variations exist across the American South and worldwide, each with unique spice blends and cooking methods. Don’t be afraid to experiment with different seasonings once you’ve mastered the basic technique. Whether served at a summer picnic, Sunday dinner, or special gathering, homemade crispy fried chicken creates lasting memories and satisfied appetites. The combination of crunchy exterior and juicy, flavorful meat makes this dish a timeless classic that will never go out of style.

FAQs

Q: Why do I need to use buttermilk in my fried chicken recipe?
A: Buttermilk contains acids that help tenderize the meat by breaking down proteins. It also adds tanginess and helps the coating adhere better to the chicken.

Q: Can I use chicken breasts only for this recipe?
A: Yes, though breasts tend to dry out more easily. Consider cutting them into smaller, even-sized pieces and reducing the cooking time slightly to prevent overcooking.

Q: What’s the best oil for frying chicken?
A: Neutral oils with high smoke points work best. Vegetable oil, peanut oil, or a combination of vegetable oil and shortening are excellent choices. Some Southern traditions call for lard for authentic flavor.

Q: How can I tell when the chicken is done without a thermometer?
A: Pierce the thickest part with a knife—juices should run clear, not pink. The meat should feel firm, and when cooking dark meat, the bones may start to pull away slightly from the meat.

Q: Can I reuse the oil after frying chicken?
A: Yes, strain it through a fine-mesh sieve lined with cheesecloth once cooled. Store in an airtight container away from light and heat. You can typically reuse it 2-3 times before discarding.

Delicious Chicken Alfredo Recipe You Can Make Tonight

Introduction

There’s something magical about the combination of tender chicken, al dente pasta, and a velvety, Parmesan-infused cream sauce that makes chicken alfredo a timeless favorite in American households. This Italian-American classic has evolved over decades to become one of the most beloved creamy pasta dishes across the country. Whether you’re cooking for a special date night or preparing a comforting family dinner, mastering this chicken alfredo recipe will surely impress your guests and satisfy your cravings for something rich and indulgent.

Originally created in Rome by restaurateur Alfredo di Lelio in the early 20th century, the dish has been adapted countless times, but the essence remains the same: simplicity and quality ingredients coming together to create something greater than the sum of its parts. Today, we’ll walk through a foolproof approach to creating restaurant-quality chicken alfredo in your own kitchen, with tips and variations to make it your own signature dish.

Ingredients List

For the Chicken:
– 2 boneless, skinless chicken breasts (approximately 1 pound)
– 2 tablespoons olive oil
– 1 teaspoon Italian seasoning
– 1/2 teaspoon garlic powder
– Salt and freshly ground black pepper to taste

For the Pasta:
– 8 ounces fettuccine pasta
– 1 teaspoon salt (for pasta water)

For the Alfredo Sauce:
– 4 tablespoons unsalted butter
– 3 cloves garlic, minced
– 1 1/2 cups heavy cream
– 1 cup freshly grated Parmesan cheese
– 1/4 teaspoon nutmeg (freshly grated, if possible)
– Salt and white pepper to taste

Optional Garnishes:
– 2 tablespoons fresh parsley, chopped
– Extra grated Parmesan cheese
– Red pepper flakes for heat
– Lemon zest for brightness

Timing

Prep Time: 15 minutes
Cook Time: 25 minutes
Total Time: 40 minutes
Servings: 4
Difficulty Level: Intermediate

Step-by-Step Instructions

Preparing the Chicken:

1. Pat the chicken breasts dry with paper towels. This ensures better browning.
2. Season both sides of the chicken with Italian seasoning, garlic powder, salt, and pepper.
3. Heat olive oil in a large skillet over medium-high heat until shimmering.
4. Add the chicken breasts to the skillet and cook for 5-7 minutes on each side until golden brown and cooked through (internal temperature should reach 165°F/74°C).
5. Remove the chicken from the skillet and let it rest for 5 minutes before slicing into thin strips. Cover with foil to keep warm.

Cooking the Pasta:

1. While the chicken is cooking, bring a large pot of water to a boil.
2. Add 1 teaspoon of salt to the boiling water.
3. Add the fettuccine pasta and cook according to package instructions until al dente (typically 8-10 minutes).
4. Reserve 1/2 cup of pasta water before draining. This starchy water can help thin the sauce if needed.
5. Drain the pasta but do not rinse, as the starch on the pasta helps the sauce adhere better.

Making the Alfredo Sauce:

1. Using the same skillet where you cooked the chicken (don’t clean it—those browned bits add flavor), reduce heat to medium-low.
2. Add butter and let it melt completely.
3. Add minced garlic and sauté for 30 seconds until fragrant but not browned.
4. Slowly pour in the heavy cream while whisking constantly.
5. Bring the mixture to a gentle simmer (do not boil) and cook for 3-4 minutes until it starts to thicken slightly.
6. Gradually whisk in the grated Parmesan cheese until completely melted and smooth.
7. Add the nutmeg and season with salt and white pepper to taste.
8. If the sauce becomes too thick, add some of the reserved pasta water, one tablespoon at a time.

Bringing It All Together:

1. Add the cooked fettuccine to the sauce and toss gently to coat every strand.
2. Place the sliced chicken on top of the pasta or gently fold it into the pasta.
3. Cook for an additional 1-2 minutes to allow the pasta to absorb some of the sauce.
4. Sprinkle with chopped parsley and additional Parmesan if desired.
5. Serve immediately while hot.

Nutritional Information

Per serving (based on 4 servings):

Calories: 720
Protein: 35g
Carbohydrates: 40g
Fat: 48g
Saturated Fat: 28g
Cholesterol: 190mg
Sodium: 650mg
Fiber: 2g
Sugar: 3g

Please note that nutritional values are approximate and may vary based on specific ingredients used.

Healthier Alternatives

While traditional chicken alfredo is undeniably delicious, it’s also quite rich. Here are some modifications to lighten up this classic among creamy pasta dishes:

– Substitute half the heavy cream with chicken broth for a lighter sauce
– Use half-and-half instead of heavy cream
– Incorporate whole wheat or chickpea pasta for added fiber
– Add sautéed vegetables like broccoli, spinach, or peas for nutritional value
– Use less Parmesan and enhance flavor with herbs instead
– Try Greek yogurt mixed with a little milk as a cream alternative
– For a dairy-free version, use cashew cream and nutritional yeast instead of heavy cream and Parmesan

Serving Suggestions

Chicken alfredo is a versatile main course that pairs beautifully with:

Garlic bread or breadsticks: Perfect for soaking up extra sauce
Simple green salad: The acidity and freshness balance the richness of the dish
Roasted vegetables: Asparagus, cherry tomatoes, or Brussels sprouts complement the creamy sauce
Light white wine: A crisp Pinot Grigio or unoaked Chardonnay makes an excellent pairing
Lemon wedges: A squeeze of fresh lemon juice can cut through the richness

For a complete Italian-inspired dinner, serve smaller portions of the chicken alfredo as a first course, followed by a simple protein main with vegetables.

Common Mistakes

Even experienced home cooks can run into issues when preparing chicken alfredo. Here are some pitfalls to avoid:

1. Overcooking the pasta: Always cook pasta al dente, as it will continue cooking slightly when tossed with the hot sauce.

2. Boiling the cream: This can cause separation. Keep it at a gentle simmer.

3. Using pre-grated cheese: Pre-packaged Parmesan often contains anti-caking agents that prevent smooth melting. Grate your own for best results.

4. Not drying the chicken: Excess moisture prevents proper browning and can water down your sauce.

5. Adding cheese to a very hot sauce: This can result in a grainy texture. Let the sauce cool slightly before adding cheese.

6. Rushing the process: Good alfredo sauce needs time to develop flavor and thicken properly.

7. Not seasoning properly: Taste as you go and adjust salt levels accordingly.

Storing Tips

This chicken alfredo recipe makes excellent leftovers if stored properly:

Refrigeration: Store in an airtight container for up to 3 days.

Reheating: Add a splash of milk or cream when reheating over low heat to revive the sauce. Microwave reheating works in 30-second intervals with stirring in between.

Freezing: While possible, cream-based sauces can separate when frozen and thawed. If freezing, do so before adding the pasta and then prepare fresh pasta when reheating the sauce and chicken.

Make-ahead tips: You can prepare the chicken and alfredo sauce separately up to 2 days ahead, then combine with freshly cooked pasta just before serving.

Conclusion

Mastering this chicken alfredo recipe is a culinary achievement worth celebrating. The combination of tender chicken and perfectly cooked pasta enveloped in a rich, velvety sauce creates a dining experience that bridges the gap between everyday comfort food and special-occasion indulgence. While it may not be an everyday meal due to its richness, it certainly deserves a place in your repertoire of impressive dishes that deliver reliable results.

Remember that cooking is about personalization—don’t be afraid to adjust the seasonings to your taste or incorporate some of the healthier alternatives if you’re looking to enjoy this creamy pasta dish more frequently. The beauty of chicken alfredo lies in its adaptability and the way it brings people together around the table, creating moments of shared enjoyment and satisfaction.

FAQs

Can I use chicken thighs instead of breasts for this recipe?
Absolutely! Chicken thighs can be a more flavorful and juicy alternative. Just adjust cooking time accordingly as thighs may take slightly longer to cook through.

Why is my alfredo sauce grainy?
This typically happens when cheese is added to a sauce that’s too hot or when using pre-packaged grated cheese with anti-caking agents. Allow your sauce to cool slightly before adding freshly grated cheese.

Can I make chicken alfredo ahead of time for a party?
For best results, prepare the components separately and assemble just before serving. Alfredo sauce tends to thicken considerably when cooled and may separate when reheated.

What’s the best type of Parmesan to use?
Parmigiano-Reggiano is ideal, but any good quality, freshly grated Parmesan will work well. Avoid the shelf-stable pre-grated varieties in plastic containers.

Is there a non-dairy alternative for this recipe?
Yes! Cashew cream makes an excellent base for dairy-free alfredo. Blend soaked raw cashews with water until smooth, and use nutritional yeast to provide that cheesy flavor.

What can I add to make my chicken alfredo more colorful?
Sun-dried tomatoes, roasted red peppers, fresh peas, or sautéed spinach are all great additions that bring color and nutritional value to the dish.

Why does my sauce always seem to break or separate?
This usually happens when the sauce is heated too quickly or at too high a temperature. Keep heat moderate and stir constantly when making alfredo sauce.

Delicious Orange Chicken Recipe You Can Make Tonight

Introduction

There’s something irresistible about that perfect balance of sweet, tangy, and savory flavors that come together in a plate of classic orange chicken. This beloved Chinese-American dish has found its way into our hearts (and stomachs) with its crispy exterior, juicy interior, and that signature orange sauce that’s both bright and comforting. While you might be tempted to reach for takeout, making this orange chicken recipe at home allows you to control the ingredients, adjust the flavors to your preference, and enjoy it fresh from your own kitchen.

This homemade version captures all the elements you love about Chinese orange chicken from your favorite restaurant but elevates it with fresh ingredients and authentic techniques. Whether you’re cooking for a family dinner or meal prepping for the week ahead, this recipe delivers restaurant-quality results with surprisingly little effort. The vibrant citrus notes combined with the subtle heat create a dish that’s both familiar and exciting – exactly what great home cooking should be.

Ingredients List

For the Chicken:
– 2 pounds boneless, skinless chicken thighs (cut into 1-inch pieces)
– 2 large eggs (beaten)
– 1 cup cornstarch
– ½ cup all-purpose flour
– 1 teaspoon salt
– ½ teaspoon black pepper
– Vegetable oil for frying

For the Orange Sauce:
– Zest of 1 orange
– 1 cup fresh orange juice (approximately 3-4 oranges)
– ½ cup granulated sugar
– ¼ cup rice vinegar
– 2 tablespoons soy sauce (low-sodium preferred)
– 1 tablespoon sesame oil
– 3 cloves garlic (minced)
– 1 tablespoon fresh ginger (grated)
– ¼ teaspoon red pepper flakes (adjust to taste)
– 2 tablespoons cornstarch (mixed with 2 tablespoons water)

For Garnish:
– 3 green onions (sliced)
– 1 tablespoon sesame seeds
– Extra orange zest
– Steamed rice (for serving)

Timing

Preparation Time: 25 minutes
Cooking Time: 30 minutes
Total Time: 55 minutes
Servings: 4-6 people

Step-by-Step Instructions

Prepare the Chicken:

1. Pat the chicken pieces dry with paper towels to remove excess moisture. This helps the coating stick better and creates crispier chicken.

2. In a medium bowl, whisk together eggs, salt, and pepper.

3. In a separate large bowl, mix cornstarch and flour until well combined.

4. Dip each chicken piece into the egg mixture, allowing excess to drip off, then coat thoroughly in the cornstarch-flour mixture. Place the coated pieces on a plate or tray.

5. For extra crispiness, let the coated chicken rest for 10 minutes before frying. This allows the coating to adhere better to the chicken.

Fry the Chicken:

6. In a large, deep skillet or wok, heat about 2 inches of vegetable oil to 350°F (175°C). If you don’t have a thermometer, test the oil by dropping in a small piece of bread – it should sizzle immediately and brown within about 60 seconds.

7. Working in batches to avoid overcrowding, carefully add the chicken pieces to the hot oil. Fry for 4-5 minutes, turning occasionally, until golden brown and cooked through (internal temperature should reach 165°F/74°C).

8. Transfer cooked chicken to a paper towel-lined plate to drain excess oil.

Make the Orange Sauce:

9. In a medium saucepan, combine orange zest, orange juice, sugar, rice vinegar, soy sauce, sesame oil, minced garlic, grated ginger, and red pepper flakes.

10. Bring the mixture to a gentle boil over medium heat, stirring occasionally.

11. In a small bowl, whisk together 2 tablespoons cornstarch with 2 tablespoons water to create a slurry.

12. Once the sauce is boiling, stir in the cornstarch slurry and continue to cook, stirring constantly, until the sauce thickens enough to coat the back of a spoon (about 1-2 minutes).

Combine and Serve:

13. Transfer the fried chicken to a large bowl. Pour the hot orange sauce over the chicken and toss gently until all pieces are well coated.

14. Garnish with sliced green onions, sesame seeds, and additional orange zest if desired.

15. Serve immediately over steamed rice for a complete meal.

Nutritional Information

Per serving (based on 6 servings, excluding rice):
Calories: 420
Protein: 28g
Carbohydrates: 42g
Dietary Fiber: 1g
Sugars: 21g
Fat: 16g
Saturated Fat: 3g
Cholesterol: 145mg
Sodium: 680mg

Note: Nutritional values are approximate and may vary based on specific ingredients and portion sizes.

Healthier Alternatives

This orange chicken recipe can be adapted to suit various dietary needs without sacrificing flavor:

Baked Instead of Fried: Coat the chicken as directed, then arrange on a parchment-lined baking sheet. Spray with cooking oil and bake at 425°F (220°C) for 15-20 minutes, flipping halfway through.

Air Fryer Option: Cook the coated chicken in an air fryer at 380°F (193°C) for about 12-15 minutes, shaking the basket halfway through cooking.

Reduce Sugar: Cut the sugar in the sauce by half and add 1-2 tablespoons of honey or maple syrup for natural sweetness.

Gluten-Free Version: Use gluten-free soy sauce and replace all-purpose flour with gluten-free flour or additional cornstarch.

Lower Carb: Use almond flour instead of all-purpose flour, and substitute a monk fruit sweetener for the granulated sugar.

Serving Suggestions

Elevate your orange chicken with these complementary sides and serving ideas:

Classic Pairing: Serve over steamed white rice or brown rice for a traditional meal.

Vegetable Additions: Add steamed broccoli, snow peas, or bell peppers either mixed with the chicken or on the side for a complete meal.

Alternative Grains: Try serving over quinoa or cauliflower rice for a nutrient boost or lower-carb option.

Fresh Elements: Include a side of cucumber salad dressed with rice vinegar and sesame oil to cut through the richness of the dish.

Family Style: For a complete Chinese-inspired feast, pair with vegetable spring rolls, steamed dumplings, or hot and sour soup.

Common Mistakes

Avoid these pitfalls when preparing your orange chicken recipe:

Overcrowding the Pan: Frying too many pieces at once lowers the oil temperature and results in soggy chicken. Work in batches for the crispiest results.

Sauce Consistency: If your sauce becomes too thick, thin it with a little orange juice or water. If it’s too thin, mix a little more cornstarch with cold water and add gradually.

Using Cold Chicken: Allow chicken to come to room temperature before cooking for more even cooking and better coating adhesion.

Skipping the Zest: The orange zest contains essential oils that give the dish its characteristic aroma and flavor depth. Don’t skip this ingredient!

Rushing the Sauce: Allow your sauce to properly reduce and thicken for the best flavor development. Patience yields better results.

Storing Tips

Make the most of your homemade orange chicken with these storage recommendations:

Refrigeration: Store leftovers in an airtight container in the refrigerator for up to 3 days. Keep the sauce separate from any unused fried chicken if possible to maintain crispiness.

Freezing: The cooked chicken (without sauce) can be frozen for up to 2 months. The sauce can be frozen separately in ice cube trays then transferred to freezer bags.

Reheating: For the best texture when reheating, warm the chicken in a 350°F (175°C) oven for 10-15 minutes until crisp and hot throughout. Microwave reheating will result in softer chicken.

Meal Prep: Prepare double batches of the sauce and freeze portions for quick weeknight meals. You’ll just need to fry fresh chicken and heat the sauce.

Conclusion

Mastering this orange chicken recipe brings the vibrant flavors of Chinese-American cuisine right to your kitchen. The balance of crispy, tender chicken with the sweet-tangy orange sauce creates a meal that’s both satisfying and impressive. While it might seem complex at first glance, breaking it down into simple steps makes it an achievable dish even for those new to cooking Asian-inspired meals.

What makes this recipe special is its adaptability—adjust the heat level, sweetness, or cooking method to suit your preferences and dietary needs. Whether you’re cooking for a special occasion or simply craving something beyond ordinary weeknight fare, this orange chicken delivers restaurant-quality results with the added benefit of fresh ingredients and personalized touches. Give it a try, and you might find yourself reaching for this recipe instead of the takeout menu next time the craving strikes.

FAQs

Can I use chicken breast instead of thighs?
Yes, chicken breast works well in this recipe. Just be careful not to overcook it as breast meat tends to dry out more quickly than thighs. Reduce the frying time to 3-4 minutes and check for doneness.

How can I make this orange chicken recipe less sweet?
Reduce the sugar to ¼ cup and increase the vinegar slightly for a more tangy profile. You can also add more orange zest for flavor without the added sweetness.

Is there a way to make this dish ahead of time?
Yes! Prepare the sauce up to 3 days ahead and store it in the refrigerator. You can also bread the chicken and keep it refrigerated for up to 4 hours before frying. Combine freshly fried chicken with reheated sauce just before serving.

What if I don’t have fresh oranges?
While fresh is best, you can substitute with ¾ cup of store-bought orange juice and 1 tablespoon of orange marmalade to provide the zesty flavor component.

Can I make this recipe with other meats or tofu?
Absolutely! This sauce pairs wonderfully with crispy tofu, shrimp, or even pork. Adjust cooking times accordingly for different proteins, but follow the same sauce instructions.

Easy Taco Soup Recipe for a Cozy Dinner Night

Introduction

Craving the robust flavors of tacos but desire something more comforting and warming? This taco soup recipe delivers the perfect solution, combining the bold, zesty flavors of traditional tacos in a satisfying, hearty soup format. As the temperatures drop, there’s nothing quite like wrapping your hands around a steaming bowl of soup that’s bursting with Mexican-inspired flavors. The beauty of this easy taco soup lies in its versatility and simplicity – it comes together in one pot, requires minimal prep work, and can be customized to suit your taste preferences or dietary needs.

Whether you’re feeding a hungry family on a busy weeknight or meal prepping for the week ahead, this recipe delivers maximum flavor with minimal effort. The combination of seasoned ground beef, beans, corn, and tomatoes creates a deliciously thick and satisfying consistency, while the traditional taco seasonings infuse every spoonful with that unmistakable southwestern flavor profile. Even better, this soup actually improves with time as the flavors meld, making it an excellent make-ahead meal option.

Ingredients List

For this crowd-pleasing taco soup recipe, you’ll need:

Main Ingredients:
– 1 pound lean ground beef (or turkey for a leaner option)
– 1 medium onion, diced
– 2 cloves garlic, minced
– 1 green bell pepper, diced
– 1 can (15 oz) black beans, drained and rinsed
– 1 can (15 oz) pinto or kidney beans, drained and rinsed
– 1 can (15 oz) corn kernels, drained (or 1½ cups frozen corn)
– 1 can (10 oz) diced tomatoes with green chilies
– 1 can (15 oz) tomato sauce
– 2 cups beef broth (or chicken broth)
– 1 cup water (adjust for desired thickness)

Taco Seasoning Blend:
– 1 tablespoon chili powder
– 1 teaspoon ground cumin
– 1 teaspoon paprika
– ½ teaspoon oregano
– ½ teaspoon garlic powder
– ½ teaspoon onion powder
– ¼ teaspoon cayenne pepper (adjust to taste)
– 1 teaspoon salt (adjust to taste)
– ½ teaspoon black pepper

Optional Toppings:
– Shredded cheddar or Mexican cheese blend
– Sour cream
– Diced avocado
– Fresh cilantro, chopped
– Lime wedges
– Crushed tortilla chips
– Sliced jalapeños
– Diced green onions

Timing

Total time: 45 minutes
– Prep time: 15 minutes
– Cook time: 30 minutes

This easy taco soup recipe is perfect for busy weeknights when you need something substantial but don’t have hours to spend in the kitchen. The active cooking portion takes just about 15 minutes, with the remaining time allowing the flavors to develop as the soup simmers. For even deeper flavor development, consider preparing this soup a day ahead – the taste improves as it sits!

Step-by-Step Instructions

1. Brown the Meat
– Heat a large Dutch oven or soup pot over medium-high heat.
– Add the ground beef and break it apart with a wooden spoon.
– Cook until no longer pink, about 5-7 minutes.
– If using higher-fat ground beef, drain excess fat, leaving about 1 tablespoon in the pot.

2. Add Aromatics
– Add the diced onions to the pot with the meat and cook until translucent, about 3 minutes.
– Add the minced garlic and diced bell pepper, cooking for another 2 minutes until fragrant.

3. Incorporate Seasonings
– Add all the taco seasoning ingredients directly to the pot (or use 2 tablespoons of pre-made taco seasoning if preferred).
– Stir well to coat the meat and vegetables, allowing the spices to toast slightly for about 30 seconds.

4. Add Remaining Ingredients
– Pour in the diced tomatoes with green chilies, tomato sauce, and beef broth.
– Add the drained and rinsed beans and corn.
– Stir everything together, then add water to reach your desired consistency.

5. Simmer
– Bring the soup to a boil, then reduce heat to low.
– Cover and simmer for at least 20 minutes, allowing the flavors to meld.
– Stir occasionally to prevent sticking.

6. Adjust Seasoning
– Taste and adjust salt, pepper, or spice levels as needed.
– For a thicker soup, simmer uncovered for an additional 5-10 minutes.

7. Serve
– Ladle the hot taco soup into bowls.
– Set out bowls of optional toppings and let everyone customize their soup to taste.

Nutritional Information

Per serving (approximately 1½ cups, without toppings):
– Calories: 325
– Protein: 23g
– Carbohydrates: 30g
– Fiber: 8g
– Sugar: 6g
– Fat: 14g
– Saturated Fat: 5g
– Sodium: 820mg
– Potassium: 720mg

Note: Nutritional values may vary depending on specific ingredients used and optional toppings added. This analysis is based on using 85% lean ground beef and regular sodium beans and broth.

Healthier Alternatives

This taco soup recipe is already fairly nutritious, but here are some modifications to make it even healthier:

Protein Options:
– Substitute ground turkey or chicken for beef to reduce saturated fat
– Use plant-based ground meat substitute for a vegetarian version
– Add an extra can of beans and omit the meat entirely for a plant-based protein boost

Reduce Sodium:
– Use low-sodium or no-salt-added canned beans, corn, and tomato products
– Make your own beef broth or choose low-sodium varieties
– Reduce added salt in the seasoning blend

Boost Vegetables:
– Add diced zucchini, carrots, or celery with the onions
– Include chopped spinach or kale during the last few minutes of cooking
– Double the bell peppers for extra color and nutrients

Lower Carbohydrates:
– Reduce or omit one can of beans
– Use fewer corn kernels
– Serve without tortilla chips and focus on avocado or cheese toppings instead

Serving Suggestions

Transform your taco soup into a complete meal with these complementary sides and serving ideas:

Bread Options:
– Warm cornbread with honey butter
– Toasted flour tortillas cut into wedges
– Crispy cheese quesadillas for dipping
– Garlic bread for an Italian-Mexican fusion

Side Salads:
– Simple green salad with cilantro-lime dressing
– Cucumber and jicama slaw with light vinaigrette
– Mexican chopped salad with avocado and pepitas

Serving Styles:
– Taco Soup Bar: Set out individual bowls of toppings and let everyone customize
– Family Style: Serve the soup in a large tureen with toppings arranged around it
– Bread Bowls: Hollow out small sourdough loaves for an impressive presentation
– Kids’ Style: Serve with a small side of tortilla chips for scooping

For a truly authentic experience, serve with a wedge of lime for squeezing over the soup just before eating – this adds brightness that balances the rich flavors perfectly.

Common Mistakes

Even an easy taco soup recipe can go awry. Here’s how to avoid common pitfalls:

Overcooking the Ground Beef:
– Problem: Cooking the beef too long before adding liquids can make it tough.
– Solution: Brown just until no longer pink, then proceed with the recipe.

Underseasoning:
– Problem: Beans and tomatoes need adequate seasoning to pop with flavor.
– Solution: Don’t be shy with the spices, and taste/adjust before serving.

Rushing the Simmer:
– Problem: Not allowing enough time for flavors to develop.
– Solution: Give your soup at least 20 minutes to simmer, longer if possible.

Skipping the Toppings:
– Problem: Missing the textural contrast that makes taco soup special.
– Solution: Include at least 2-3 toppings for the best eating experience.

Too Thick or Thin:
– Problem: Soup consistency not to your preference.
– Solution: Start with less liquid than you think you need – you can always add more, but it’s harder to thicken an overly thin soup.

Storing Tips

This taco soup recipe makes excellent leftovers and freezes beautifully:

Refrigeration:
– Cool soup completely before transferring to airtight containers.
– Store in the refrigerator for up to 4 days.
– Reheat portions on the stovetop over medium heat or in the microwave, stirring occasionally.

Freezing:
– Portion cooled soup into freezer-safe containers, leaving about ½ inch of space for expansion.
– Label containers with the date and contents.
– Freeze for up to 3 months.
– For best quality, thaw overnight in the refrigerator before reheating.

Make-Ahead Tips:
– This soup actually tastes better the next day as flavors continue to develop.
– Consider making a double batch and freezing half for busy weeknights.
– Store toppings separately from the soup base.

Revitalizing Leftovers:
– Add a splash of fresh lime juice when reheating to brighten flavors.
– Try new toppings to transform leftover soup into a different experience.
– Use leftover soup as a sauce for enchiladas or as a topping for baked potatoes.

Conclusion

This easy taco soup recipe embodies the perfect balance of convenience and flavor, bringing the beloved taste of tacos to a comforting bowl of soup. With its rich, savory broth, hearty ingredients, and customizable toppings, it’s no wonder this dish has become a staple in many households. Whether you’re looking for a simple weeknight dinner solution, meal prep for busy days ahead, or a crowd-pleasing option for casual gatherings, this taco soup delivers on all fronts.

The beauty of this recipe lies not only in its delicious taste but also in its adaptability. Feel free to experiment with different protein options, adjust the spice level to suit your taste, or incorporate seasonal vegetables to make it your own. As you master this foundation recipe, you’ll discover countless ways to personalize it while maintaining that quintessential taco flavor profile that makes it so irresistible.

So grab your soup pot and gather your ingredients – a satisfying, flavorful meal awaits that’s sure to become a regular in your cooking rotation. From first spoonful to last, this taco soup offers the comforting warmth of soup with all the vibrant, bold flavors you love in traditional tacos.

FAQs

Can I make this taco soup in a slow cooker?
Yes! Brown the meat, onions, and garlic first, then transfer everything to a slow cooker. Cook on low for 6-8 hours or on high for 3-4 hours.

Is this soup spicy?
The recipe as written has a mild to medium spice level. Adjust the cayenne pepper up or down to control the heat, or add diced jalapeños for extra kick.

Can I use a packet of taco seasoning instead of the individual spices?
Absolutely. Substitute one packet (approximately 2 tablespoons) of your favorite taco seasoning for the individual spices listed.

How can I make this taco soup recipe vegetarian?
Omit the ground beef and use vegetable broth instead of beef broth. Add an extra can of beans (black, pinto, or kidney) or use plant-based ground meat substitute.

Can I use dried beans instead of canned?
Yes, though you’ll need to cook them separately first. One 15-oz can of beans equals about 1½ cups cooked beans from dry.

What if I don’t have all the listed toppings?
The soup is delicious even without toppings, but try to include at least cheese or sour cream for the authentic taco experience.

How can I thicken my soup if it’s too thin?
Simmer uncovered for 10-15 minutes to reduce liquid, or mash some of the beans against the side of the pot to release their natural starches.

Can I use frozen corn instead of canned?
Yes, about 1½ cups of frozen corn kernels can replace a 15-oz can. No need to thaw before adding to the soup.

Delicious Pasta Recipes You Need to Try Today!

Introduction

There’s something undeniably comforting about a perfectly cooked plate of pasta. Whether it’s a quick weeknight dinner or an elaborate weekend feast, pasta dishes have secured their place in kitchens worldwide. This versatile staple transcends cultures and cuisines, offering endless possibilities for creativity and flavor combinations. Today, we’re diving into the art of preparing a classic pasta dish that balances simplicity with rich, satisfying flavors.

The beauty of pasta lies in its adaptability. From the hearty spaghetti bolognese that warms you on cold evenings to the light summer pasta salads that refresh during warmer months, there’s a pasta dish for every season and occasion. What makes pasta truly special is how it brings people together – families gathering around the dinner table, friends sharing a meal, or even solo cooks treating themselves to a bowl of comfort.

As we explore this recipe, we’ll discover not just the mechanics of cooking pasta to perfection, but also the little touches that elevate a simple dish into something memorable. Whether you’re a novice cook or a seasoned chef, there’s always something new to learn about this beloved carbohydrate that has graced dining tables for centuries.

Ingredients List

For this classic pasta dish, you’ll need:

For the pasta base:
– 1 pound (450g) of quality pasta (spaghetti works wonderfully here)
– 4 quarts (3.8 liters) of water
– 2 tablespoons of salt for the cooking water

For the sauce:
– 3 tablespoons extra virgin olive oil
– 4 cloves garlic, minced
– 1 medium onion, finely diced
– 1 can (28oz/800g) San Marzano tomatoes, crushed
– 1 teaspoon dried oregano
– 1 teaspoon dried basil (or 2 tablespoons fresh, chopped)
– ½ teaspoon red pepper flakes (adjust to taste)
– Salt and freshly ground black pepper to taste

For garnish:
– Fresh basil leaves
– Freshly grated Parmesan cheese
– Extra virgin olive oil for drizzling

The quality of your ingredients will significantly impact the final dish. For the pasta, choose a brand that uses durum wheat semolina for that perfect al dente texture. If spaghetti isn’t your preference, feel free to substitute with linguine, fettuccine, or even penne – each pasta shape offers a slightly different eating experience but works beautifully with this sauce.

Timing

Understanding timing is crucial for pasta perfection. Here’s a breakdown:

Total Time: 35 minutes
– Prep Time: 10 minutes
– Cook Time: 25 minutes

For the best results, coordinate your sauce and pasta cooking times. Start the sauce first, as it needs longer to develop flavors. Begin boiling your pasta water while the sauce simmers. This synchronization ensures your pasta is freshly cooked when the sauce reaches its peak flavor profile.

A common mistake is starting the pasta too early, resulting in it sitting and becoming sticky while waiting for the sauce. Alternatively, having your sauce ready while your pasta is still undercooked creates unnecessary pressure. With proper timing, everything comes together harmoniously for the perfect plate.

Step-by-Step Instructions

Preparing the Sauce:

1. Heat the olive oil in a large, deep skillet over medium heat until it shimmers.
2. Add the diced onion and cook for 3-4 minutes until translucent but not browned.
3. Add the minced garlic and cook for another 30-45 seconds until fragrant, being careful not to burn it.
4. Pour in the crushed tomatoes, stirring to combine with the aromatics.
5. Add the dried oregano, basil, red pepper flakes, salt, and black pepper.
6. Reduce heat to low and let the sauce simmer uncovered for 15-20 minutes, stirring occasionally.
7. The sauce should reduce slightly and develop a deeper flavor. If using fresh basil, stir it in during the last 2 minutes of cooking.

Cooking the Pasta:

1. While the sauce simmers, bring the 4 quarts of water to a rolling boil in a large pot.
2. Add 2 tablespoons of salt to the boiling water – this may seem like a lot, but properly salted water is key to flavorful pasta.
3. Add the spaghetti to the water, stirring immediately to prevent sticking.
4. Cook according to package directions until al dente (typically 8-10 minutes for dried spaghetti).
5. Before draining, reserve 1 cup of the starchy pasta water.
6. Drain the pasta but do not rinse – the starch on the surface helps the sauce adhere.

Bringing It All Together:

1. Add the drained pasta directly to the sauce in the skillet.
2. Toss thoroughly to coat each strand, adding a splash of reserved pasta water as needed to loosen the sauce.
3. Cook together for 1-2 minutes, allowing the pasta to absorb some of the sauce’s flavors.
4. Taste and adjust seasonings if necessary.

Nutritional Information

Understanding the nutritional content of your pasta dish helps make informed dietary choices:

Per serving (based on 4 servings):
– Calories: Approximately 420-450
– Carbohydrates: 65-70g
– Protein: 12-15g
– Fat: 10-12g
– Fiber: 4-5g
– Sodium: 600-800mg (varies based on salt usage)

These values are estimates and may vary based on specific ingredients and portion sizes. The traditional pasta dish provides substantial carbohydrates for energy, moderate protein content, and a reasonable amount of healthy fats from the olive oil.

Healthier Alternatives

For those looking to adjust this classic pasta dish for dietary preferences or restrictions:

Lower-Carb Options:
– Substitute regular pasta with zucchini noodles (“zoodles”)
– Try spaghetti squash for a vegetable-based alternative
– Use chickpea or lentil pasta for increased protein and fiber

Gluten-Free Choices:
– Rice pasta maintains a similar texture to wheat-based versions
– Corn pasta offers a slightly sweeter flavor profile
– Quinoa pasta provides additional protein

Reducing Sodium:
– Decrease salt in the pasta water
– Use low-sodium canned tomatoes
– Enhance flavor with fresh herbs instead of salt

Boosting Nutrition:
– Add diced vegetables to the sauce (bell peppers, carrots, spinach)
– Include lean protein like grilled chicken or shrimp
– Incorporate nutrient-rich mushrooms for additional texture and umami

Remember, these modifications may alter the traditional flavor profile but can make the dish suitable for various dietary needs while maintaining its comforting essence.

Serving Suggestions

Elevate your pasta experience with these thoughtful serving ideas:

Accompaniments:
– A simple green salad with a light vinaigrette balances the richness of the pasta
– Garlic bread or focaccia for sopping up extra sauce
– Roasted vegetables as a nutritious side

Beverage Pairings:
– A medium-bodied Italian red wine like Chianti or Montepulciano
– For non-alcoholic options, sparkling water with a squeeze of lemon
– Iced tea with fresh mint for a refreshing contrast

Presentation Ideas:
– Serve family-style in a large, warmed pasta bowl
– For individual plating, use pasta tongs to create a neat spiral of spaghetti
– Add a final drizzle of quality olive oil and a sprinkle of freshly grated cheese tableside

The traditional approach involves twirling the pasta with a fork, using the spoon as a support. However, in Italy, many locals skip the spoon entirely, using just the fork against the plate’s edge – a technique worth mastering for an authentic experience.

Common Mistakes

Avoid these pitfalls for pasta perfection:

Cooking Errors:
– Undercooking or overcooking the pasta instead of achieving true al dente texture
– Using a pot that’s too small, causing the pasta to clump together
– Not stirring the pasta initially, resulting in sticking
– Rinsing pasta after cooking, which removes the starch needed for sauce adhesion

Sauce Missteps:
– Rushing the sauce development instead of allowing flavors to properly meld
– Oversalting, which cannot be corrected easily once done
– Using low-quality canned tomatoes that lack depth of flavor
– Adding too many competing ingredients that muddle the traditional profile

Serving Issues:
– Allowing the pasta to cool before serving, which affects texture
– Not properly incorporating the pasta and sauce together
– Drowning the pasta in too much sauce, overwhelming its flavor
– Using pre-grated cheese, which lacks the freshness and flavor of freshly grated

By avoiding these common errors, your pasta dish will showcase the beautiful simplicity and authentic flavors that make Italian cuisine so beloved worldwide.

Storing Tips

Proper storage ensures your pasta remains enjoyable even as leftovers:

Short-term Storage:
– Allow any leftovers to cool completely before refrigerating
– Store pasta and sauce together in an airtight container
– Refrigerate for up to 3-4 days
– Add a few drops of olive oil to prevent excessive sticking

Reheating Methods:
– Microwave: Add a splash of water, cover loosely, and heat on medium power, stirring halfway through
– Stovetop: Warm in a skillet over medium-low heat, adding a tablespoon of water to rejuvenate the sauce
– Oven: For larger portions, cover with foil and bake at 350°F (175°C) until heated through

Freezing Guidance:
– While possible to freeze, pasta texture often suffers upon thawing
– If freezing, slightly undercook the pasta initially
– Freeze sauce and pasta separately when possible
– Use within 1-2 months for best quality
– Thaw in the refrigerator overnight before reheating

For the best experience, pasta is ideally enjoyed fresh. However, with proper storage and reheating techniques, leftovers can still provide a satisfying meal with minimal quality loss.

Conclusion

The humble pasta dish we’ve explored represents more than just sustenance—it’s a celebration of simplicity, quality ingredients, and time-honored techniques. Whether you’re tossing spaghetti with our classic sauce or experimenting with variations, the fundamental principles remain: respect for ingredients, attention to cooking details, and the joy of sharing good food.

What makes pasta endure as a global favorite is its remarkable versatility combined with comforting familiarity. It welcomes both tradition and innovation, serving as a blank canvas for culinary creativity while honoring its rich heritage. From the precise al dente texture to the harmonious marriage with sauce, each element contributes to the overall experience.

As you perfect your pasta-making skills, remember that the most memorable dishes often come from understanding the basics deeply rather than complicated techniques. The satisfaction of twirling perfectly cooked spaghetti around your fork, capturing just the right amount of sauce, is one of the simple pleasures that makes cooking at home so rewarding.

FAQs

How can I tell when pasta is perfectly al dente?
Al dente pasta should offer slight resistance when bitten, without any chalky center. Start testing about a minute before the package’s suggested cooking time. For spaghetti, it should hold its shape when lifted but be tender enough to bite through easily.

Why does restaurant pasta taste better than mine at home?
Restaurants often finish cooking the pasta in the sauce, allowing it to absorb flavors. They also liberally salt their pasta water and use starchy pasta water to create silky sauces. Additionally, they typically use higher-heat cooking methods and professional-grade ingredients.

Should I add oil to my pasta water?
No, this is unnecessary and counterproductive. Oil floats on water’s surface and ultimately coats the pasta when drained, preventing sauce from adhering properly. Instead, use a large pot with plenty of water and stir occasionally to prevent sticking.

What’s the ideal pasta-to-sauce ratio?
The traditional Italian approach favors a balanced ratio where pasta remains the star, enhanced rather than overwhelmed by sauce. Typically, 1 cup of sauce is sufficient for 1 pound (450g) of pasta, though personal preference may vary.

Can I prepare pasta dishes in advance for parties?
Yes, with some adjustments. Cook the pasta slightly underdone, toss with a little olive oil, and refrigerate separately from the sauce. When ready to serve, briefly immerse the pasta in boiling water to refresh it, then combine with the reheated sauce and finish cooking together for 1-2 minutes.

Delicious Butter Chicken Recipe: Easy Steps to Savor

Introduction

Few dishes capture the essence of Indian cuisine like a well-prepared butter chicken. This creamy, tomato-based curry has won hearts worldwide with its rich texture and complex flavor profile that balances tanginess, sweetness, and spice. While often confused with chicken tikka masala recipe variations (which gained popularity in the UK), authentic butter chicken originated in Delhi, India, during the 1950s at the Moti Mahal restaurant. The story goes that leftover tandoori chicken was simmered in a buttery tomato gravy to prevent it from drying out – thus creating culinary history. Today, we’re sharing a traditional butter chicken recipe that stays true to its roots while being accessible for home cooks. Whether you’re new to Indian cooking or looking to perfect your technique, this step-by-step guide will help you create restaurant-quality butter chicken in your own kitchen.

Ingredients List

For the chicken marinade:
– 1.5 pounds boneless, skinless chicken thighs, cut into 2-inch pieces
– 1 cup plain yogurt
– 1 tablespoon fresh lemon juice
– 2 teaspoons ground turmeric
– 2 teaspoons garam masala
– 2 teaspoons ground cumin
– 3 cloves garlic, minced
– 1 tablespoon fresh ginger, grated
– 1 teaspoon salt

For the sauce:
– 4 tablespoons unsalted butter, divided
– 1 large onion, finely diced
– 3 cloves garlic, minced
– 1 tablespoon fresh ginger, grated
– 1-2 green chilies, sliced (adjust to taste)
– 2 teaspoons ground cumin
– 2 teaspoons ground coriander
– 1 teaspoon garam masala
– 1/4 teaspoon cayenne pepper (adjust to taste)
– 14 oz can tomato puree
– 1 cup heavy cream
– 1 teaspoon kasoori methi (dried fenugreek leaves)
– 1 tablespoon sugar
– Salt to taste
– Fresh cilantro, chopped (for garnish)

Timing

Preparation time: 20 minutes
Marination time: 2 hours minimum (overnight preferred)
Cooking time: 35-40 minutes
Total time: 3 hours (including minimum marination)
Serves: 4-6 people

Step-by-Step Instructions

Marinate the chicken:
1. In a large bowl, combine yogurt, lemon juice, turmeric, garam masala, cumin, minced garlic, grated ginger, and salt.
2. Add chicken pieces and coat thoroughly.
3. Cover and refrigerate for at least 2 hours or preferably overnight.

Cook the marinated chicken:
1. Preheat your oven to 425°F (220°C).
2. Line a baking sheet with foil and place a wire rack on top.
3. Arrange the marinated chicken pieces on the rack, leaving space between each piece.
4. Bake for 15-18 minutes until slightly charred on the edges.
5. Alternatively, you can grill the chicken or cook it in a pan until it’s about 80% done.

Prepare the sauce:
1. Heat 2 tablespoons of butter in a large, heavy-bottomed pot over medium heat.
2. Add onions and cook until soft and translucent (about 5 minutes).
3. Add minced garlic, grated ginger, and green chilies. Sauté for 1-2 minutes until fragrant.
4. Add ground cumin, coriander, garam masala, and cayenne pepper. Stir continuously for 30 seconds to toast the spices.
5. Pour in the tomato puree and bring to a simmer. Cook for 10-15 minutes until the sauce thickens and the oil starts to separate.
6. Using an immersion blender or regular blender (carefully, in batches if needed), puree the sauce until smooth.
7. Return the sauce to the pot and bring back to a gentle simmer.
8. Stir in the heavy cream, remaining 2 tablespoons of butter, kasoori methi (crushing it between your palms first), and sugar.
9. Season with salt to taste.

Combine and finish:
1. Add the partially cooked chicken pieces to the sauce.
2. Simmer gently for 8-10 minutes until the chicken is fully cooked and tender.
3. Adjust consistency with a splash of water if the sauce is too thick.
4. Garnish with fresh cilantro before serving.

Nutritional Information

Per serving (based on 6 servings):
– Calories: 480
– Protein: 28g
– Carbohydrates: 12g
– Fat: 36g
– Saturated Fat: 19g
– Cholesterol: 195mg
– Sodium: 730mg
– Fiber: 2g
– Sugar: 6g

Note: Nutritional values are approximate and may vary based on specific ingredients used.

Healthier Alternatives

If you’re looking to enjoy butter chicken with fewer calories or dietary restrictions, consider these modifications:

Reduce cream: Substitute half the cream with plain Greek yogurt for tanginess with less fat.
Lighter protein option: Use chicken breast instead of thighs to reduce fat content.
Dairy-free version: Replace butter with ghee or coconut oil and heavy cream with coconut cream.
Lower sugar: Omit the added sugar and use naturally sweet, ripe tomatoes.
Increase vegetables: Add bell peppers, peas, or spinach to boost nutritional value.
Use less butter: The name notwithstanding, you can reduce the butter by half without significantly impacting flavor.

Serving Suggestions

Traditional butter chicken pairs beautifully with:

Basmati rice: Fragrant, long-grain rice is the classic accompaniment.
Naan bread: Perfect for scooping up the rich sauce.
Roti or chapati: Whole wheat flatbreads offer a healthier alternative to naan.
Cucumber raita: A cooling yogurt side dish balances the richness.
Kachumber salad: A simple chopped salad of cucumber, tomatoes, and onions with lemon juice.
Dal: A side of yellow lentils creates a complete protein-packed meal.
Vegetable biryani: For a more elaborate meal, serve alongside vegetable biryani.

For a complete dinner party menu, add a vegetarian side dish like saag paneer (spinach with cheese) or aloo gobi (potato and cauliflower).

Common Mistakes

Avoid these pitfalls when preparing your butter chicken recipe:

1. Skipping the marination: This crucial step tenderizes the chicken and infuses it with flavor.
2. Rushing the sauce: Allow proper simmering time for flavors to develop and meld together.
3. Not blending the sauce: A smooth sauce is characteristic of authentic butter chicken.
4. Using cold cream: Adding cold cream directly can cause curdling; bring it to room temperature first.
5. Omitting the fenugreek leaves: Kasoori methi gives butter chicken its distinctive flavor; don’t skip it.
6. Overcooking the chicken: This results in dry, tough meat instead of tender, juicy pieces.
7. Insufficient seasoning: Taste and adjust salt levels at the end of cooking.
8. Using low-fat dairy: Full-fat yogurt and heavy cream provide the authentic richness.

Storing Tips

Butter chicken actually improves in flavor when stored properly:

Refrigeration: Store in an airtight container for 3-4 days. The flavors will continue to develop and meld.
Freezing: Butter chicken freezes exceptionally well for up to 3 months. Freeze in portion-sized containers for easy reheating.
Thawing: Thaw overnight in the refrigerator for best results.
Reheating: Warm gently on the stovetop over medium-low heat, stirring occasionally. Add a splash of water or cream if the sauce has thickened too much.
Separation: If you notice the sauce separating when reheated, whisk vigorously to recombine.
Storage containers: Use glass containers rather than plastic to prevent staining from the turmeric and tomatoes.

Conclusion

Mastering this butter chicken recipe allows you to bring authentic Indian flavors into your home cooking repertoire. The balance of spices, the velvety texture of the sauce, and the tender chicken pieces create a memorable dish that’s far superior to takeout versions. While it might seem intimidating at first, breaking down the process into marination, chicken cooking, sauce preparation, and final combining makes it manageable even for novice cooks. Don’t be afraid to adjust the spice levels to suit your preference – authentic Indian cooking is all about personalizing flavors to your taste. With practice, you’ll develop an intuitive understanding of how the spices work together, allowing you to craft your signature version of this beloved dish. Share your creation with friends and family for a truly impressive homemade feast.

FAQs

Can I use chicken breast instead of thighs?
Yes, though chicken thighs remain juicier and more flavorful. If using breasts, be careful not to overcook them, as they can dry out more easily.

What can I substitute for kasoori methi (dried fenugreek leaves)?
While nothing perfectly replicates its unique flavor, a combination of mustard greens and maple syrup (just a small amount) can approximate the taste. Alternatively, you can omit it, though the dish will lack some of its authentic character.

Is butter chicken very spicy?
Traditional butter chicken is mild to medium in spice level. The recipe provided allows you to adjust the heat by controlling the amount of green chilies and cayenne pepper.

What’s the difference between butter chicken and chicken tikka masala recipes?
While similar, butter chicken tends to be creamier, sweeter, and milder, with a tomato-butter base. Chicken tikka masala typically has a more complex spice profile, tangier tomato base, and sometimes includes bell peppers and onions in the sauce.

Can I make this dish ahead of time for a party?
Absolutely! Butter chicken tastes even better the next day as flavors develop. Simply reheat gently before serving, adding a touch of cream if needed to restore the silky texture.

Is this recipe gluten-free?
Yes, this butter chicken recipe is naturally gluten-free, just ensure your spice blends are from gluten-free sources as some commercial mixes may contain fillers.